Teaching your child to ice skate is one of the most rewarding winter activities you can share together. Our team has spent months working with skating instructors, researching best practices, and gathering real parent experiences to create this comprehensive guide on how to teach a child to ice skate safely and effectively. By the end of this guide, you will know exactly what age to start, what equipment you need, and a proven step-by-step method that builds confidence and skills progressively.
Ice skating builds coordination, strengthens muscles, and creates memories that last a lifetime. Whether your goal is preparing your child for hockey, figure skating, or simply enjoying a fun family activity, the approach remains the same. Start with safety, progress through fundamentals, and always keep the experience positive and fun.
Table of Contents
At What Age Can You Teach a Child to Ice Skate?
Children can begin learning ice skating as young as 3 years old, though many parents successfully introduce the ice at age 2 with modifications. The optimal starting age depends on your child’s physical development, emotional readiness, and attention span rather than a fixed number.
Age 2 to 3: The Foundation Years
Toddlers between 2 and 3 years old can learn basic balance and standing skills on the ice. At this age, sessions should last only 15 to 20 minutes to prevent fatigue and frustration. Focus entirely on building comfort rather than technique.
Your child will need constant physical support at this age. Hold their hands or use a skating aid to help them feel secure. The goal is simply to associate ice skating with fun, not to master any specific skills.
Age 4 to 5: The Sweet Spot for Starting
Most skating instructors agree that ages 4 to 5 represent the ideal window for introducing formal ice skating skills. Children at this age have developed better balance, can follow simple instructions, and possess the attention span needed for 30-minute sessions.
Four and five year olds can typically learn to march, take basic steps, and attempt simple glides within the first few sessions. Their bodies are coordinated enough to practice proper falling techniques and begin understanding weight transfer concepts.
Age 6 and Up: Faster Progress with Focus
School-age children aged 6 and older can progress through basic skills more quickly due to their developed motor skills and ability to focus for longer periods. Sessions can extend to 45 minutes or an hour depending on interest and stamina.
Older children often feel self-conscious about falling or looking inexperienced. Emphasize that every skater started as a beginner and that falling is simply part of the learning process. This emotional support often matters more than technical instruction at this stage.
Essential Equipment for Teaching Kids to Ice Skate
Proper equipment makes the difference between a frustrating experience and a successful first session. Invest time in getting the right fit and safety gear before stepping onto the ice.
Choosing the Right Ice Skates
Selecting appropriate skates for your child requires balancing fit, support, and room for growth. Three main types exist for beginners: hockey skates, figure skates, and adjustable recreational skates.
Hockey skates offer excellent ankle support and a shorter blade that makes balance easier for young children. The rounded blade profile provides stability during those first uncertain steps. Figure skates feature a longer blade with a toe pick at the front, which can trip beginners but offers excellent stability once basic skills develop.
Adjustable skates accommodate growing feet and can span two to three shoe sizes. These work well for casual skaters and offer good value for rapidly growing children. Avoid double-runner training skates entirely. These skates with two parallel blades create a false sense of security and actually delay learning proper balance and edge control. Children who learn on double-runners struggle significantly when transitioning to single-blade skates.
Proper Skate Fitting Guide
Skates should fit snugly without causing pain or circulation issues. Your child should wear one pair of thin, tall socks made from moisture-wicking material. Thick socks or multiple layers create pressure points and reduce control.
When trying on skates, have your child stand up straight. Their toes should lightly brush the front of the boot when standing. When they bend their knees into a skating position, the toes should pull back slightly from the front. This ensures proper fit in the active skating stance.
Lace skates firmly from the bottom up, creating consistent tension across the entire boot. The top two eyelets should be snug but not overly tight to allow proper ankle flexion. Test the fit by having your child walk around. Any heel lift or excessive movement indicates poor fit and will cause blisters and reduced control on the ice.
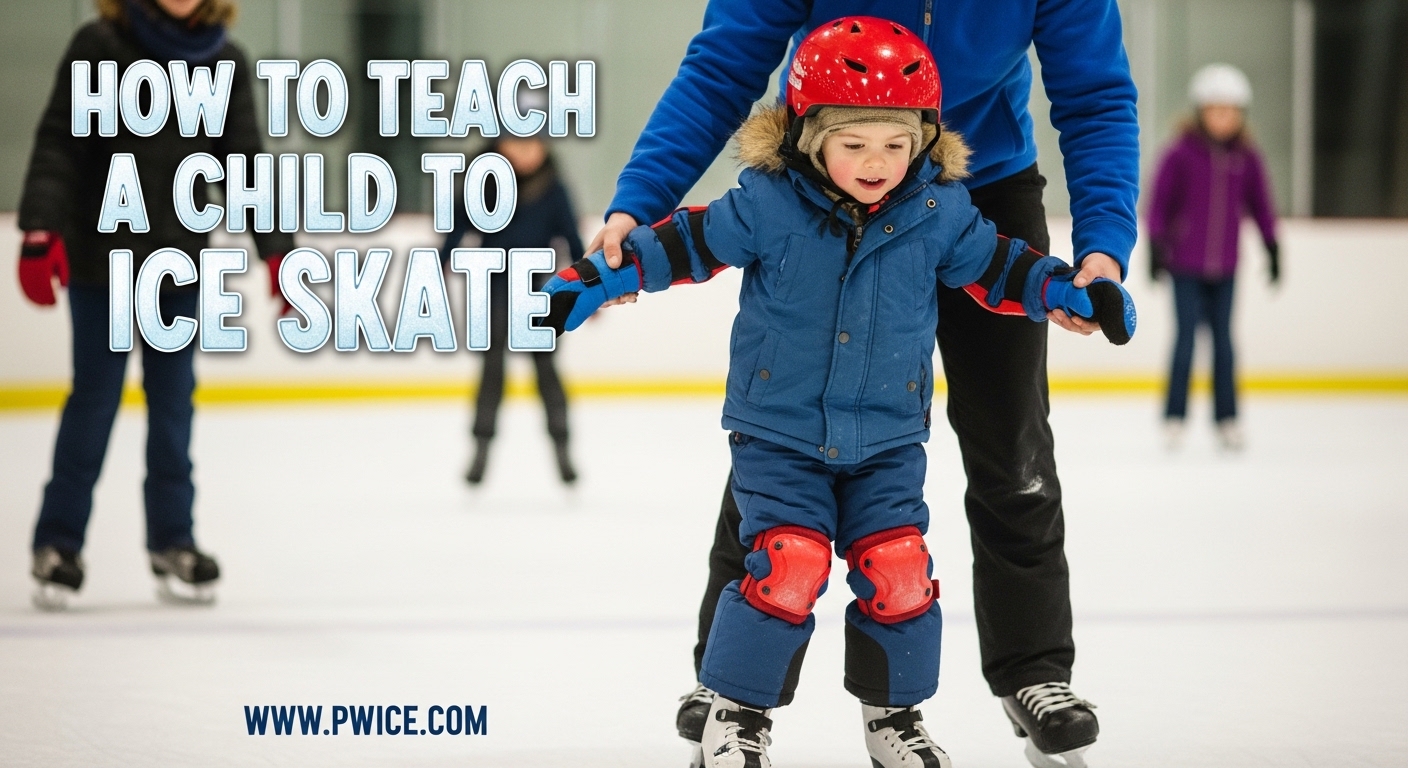
Helmet and Protective Gear Requirements
A properly fitted helmet is non-negotiable for children learning to ice skate. Hockey helmets provide the best protection and are specifically designed for ice impacts. Bike helmets are not recommended as they do not provide adequate coverage for the back of the head.
Ensure the helmet sits level on your child’s head with no tilt forward or backward. The chin strap should form a V shape around the ears and fasten snugly under the chin. You should be able to fit one finger between the strap and the chin, but no more.
Knee pads, elbow pads, and wrist guards provide additional protection and confidence for beginners. Wrist guards are particularly important as children naturally extend their hands when falling, which frequently results in wrist injuries. Many parents report that protective gear actually increases a child’s willingness to try new skills because they feel safer.
Clothing and Layering Strategy
Dress your child in layers that allow freedom of movement while keeping them warm. Start with a moisture-wicking base layer to prevent sweat from making them cold. Add a warm mid-layer like a fleece or sweatshirt. Top with a water-resistant outer layer, ideally snow pants, to keep them dry during inevitable falls.
Avoid bulky winter coats that restrict arm movement. Mittens keep hands warmer than gloves and are easier for small children to manage. Bring an extra pair of mittens or gloves as the first pair often gets wet from touching the ice.
Preparing Your Child Before They Hit the Ice
Preparation before arriving at the rink dramatically improves your child’s first experience on the ice. Practice key movements at home where your child feels safe and comfortable.
Off-Ice Balance Exercises
Have your child practice standing and walking in their skates on carpet or grass before visiting the rink. This allows them to feel the weight and balance of skates without the slipperiness of ice. Practice standing with feet shoulder-width apart and knees slightly bent.
Practice the falling technique on soft carpet. Have your child squat down, tuck their chin, and roll to the side, landing on their bottom and side rather than their hands. Follow this with the getting-up sequence: roll to hands and knees, place one foot flat on the ground, push up to standing. Repetition at home builds muscle memory that transfers to the ice.
Mental Preparation and Building Excitement
Discuss what your child should expect at the ice rink. Explain that the ice is slippery, that falling is normal, and that everyone learns at their own pace. Watch videos of children skating together to build positive associations.
Avoid creating pressure to perform or progress quickly. Frame the experience as play rather than practice. Many experienced parents recommend mentioning hot chocolate as a post-skating treat to create positive anticipation.
Choosing the Right Rink Environment
Begin at a quieter public session rather than a busy weekend free skate. Fewer people on the ice means less intimidation and more space to practice. Weekday mornings or early afternoons typically offer the least crowded sessions.
Indoor rinks provide the most controlled environment with consistent ice quality and temperature. They offer amenities like skate rentals, warming areas, and smooth ice surfaces ideal for beginners. Outdoor rinks can work for teaching but introduce weather variables and often rougher ice conditions that challenge balance.
Arrive early to allow time for skate fitting and getting dressed without rushing. A stressed parent creates a stressed child. Give yourselves at least 30 minutes before the session starts to handle logistics calmly.
How to Teach a Child to Ice Skate: Step-by-Step Method
Follow this progressive teaching method that builds skills sequentially. Master each step before moving to the next. Rushing the process creates frustration and ingrains bad habits that are difficult to correct later.
Step 1: Learning to Fall and Get Up
Falling safely is the first and most important skill your child must learn. Fear of falling prevents progress more than any physical limitation. Teach the proper falling technique before your child takes their first steps on the ice.
Demonstrate the tuck and roll method. When losing balance, bend the knees deeply, tuck the chin to the chest, and roll sideways onto the bottom and hip. Emphasize never catching falls with straight arms extended behind, as this causes wrist and elbow injuries.
Practice getting up until it becomes automatic. From a seated position on the ice, roll onto hands and knees, lift one knee to place the foot flat on the ice, then push up to standing. This method provides multiple points of contact with the ice for stability during the transition.
Make falling practice a game. Have your child intentionally fall and get up five times as a warm-up routine. This normalizes falling and builds confidence that they can recover from any stumble.
Step 2: Marching and Walking on Ice
Once falling feels manageable, introduce marching in place. This dinosaur walk exercise builds the leg strength and coordination needed for forward movement. Stand facing your child and hold their hands for support.
Have your child lift one foot directly up, set it down, then lift the other. The motion should resemble marching in place rather than walking forward. Lift the knee to hip height with each step. This high-knee marching develops the specific muscle groups needed for skating strides.
Progress to forward marching once the in-place marching feels stable. Take small steps forward, maintaining the high-knee motion. The “loud feet” technique helps here. Encourage your child to step down firmly enough that the blade makes a sound hitting the ice. This ensures they are actually lifting their feet rather than shuffling, a common beginner mistake.
Gradually reduce physical support as confidence builds. Move from holding both hands, to holding one hand, to hovering hands nearby without touching. Let your child set the pace for this progression based on their comfort level.
Step 3: Balancing on Two Feet
Before attempting glides, your child needs to master the basic skating stance. This position forms the foundation for every skating skill from beginner to advanced. Practice this stance until it becomes automatic.
The proper stance requires feet shoulder-width apart, knees bent deeply, and weight balanced over the balls of the feet. The back should be straight but tilted slightly forward from the ankles, not the waist. Arms should be extended forward at chest height for balance.
Teach your child to check their position using self-awareness cues. They should be able to see their toes past their knees when looking down. If they cannot see their toes, they are standing too upright. If their heels lift off the blade, they are leaning too far forward.
Practice the “quiet feet” exercise to find proper balance. Have your child stand still in the proper stance with no movement. Count to ten together without any foot adjustments or wobbling. This builds the proprioception and small muscle control necessary for gliding.
Step 4: Gliding on Two Feet
Gliding represents the first true skating experience and the moment most children realize they are actually ice skating. The magic skate trick makes this milestone achievable and fun.
Stand beside your child and hold their hands. Have them march three steps forward, building slight momentum. On the third step, have them bring their feet together and glide on both blades while maintaining the proper skating stance. The glide might last only one second initially, but that is success.
Gradually extend the glide distance as confidence builds. Count aloud during the glide to track progress. Starting with “one” and eventually reaching “five” or higher provides a measurable goal that children find motivating.
Once two-foot glides feel stable, introduce alternating one-foot glides. March forward, push off one foot, glide on the other foot for two counts, then step onto the gliding foot and glide on the opposite side. This creates the basic skating stride pattern used by all skaters.
Step 5: Learning to Stop
Stopping safely is essential before your child skates independently. The snowplow stop provides the most reliable and controllable stopping method for beginners.
The snowplow stop involves pushing the heels outward while keeping the toes pointed inward, creating a V shape with the blades. The inside edges of both blades dig into the ice, creating friction that slows and stops movement. Practice this motion standing still first, pushing the heels out and returning to parallel repeatedly.
The whiteboard marker technique makes learning to stop engaging for children. Give your child a dry-erase marker and have them crouch down to draw a line on the ice. Then have them stand up and use their blade to scrape the line away, pushing outward with their heels. This teaches the proper blade angle and motion for stopping while feeling like play.
Progress to moving snowplow stops once the stationary motion feels comfortable. Glide slowly forward on two feet, then execute the snowplow motion to create a controlled stop. Practice stopping at specific targets, like a cone or a parent standing ahead.
Step 6: One-Foot Glides and Turning
Once your child can glide, stop, and march confidently, introduce advanced beginner skills. These techniques prepare them for formal lessons and specific skating disciplines like hockey or figure skating.
Extended one-foot glides build single-leg strength and balance. Practice gliding on the right foot for increasing counts, then switch to the left foot. Most children have a dominant side that feels more comfortable. Spend extra time on the weaker side to develop balanced skills.
The dipping exercise, also called the lightbulb exercise, develops edge control and knee flexibility. Glide forward on two feet, then bend one knee deeply while keeping the other leg straight. Alternate sides while gliding. This creates a bobbing motion that children enjoy while building essential edge control.
Introduce basic turning by having your child march in a large circle. Gradually reduce the circle size while maintaining the marching motion. This develops the weight shifting needed for turns. Progress to gliding in curves, first wide arcs and eventually tighter turns.
Age-Specific Teaching Approaches
Children at different ages have varying physical abilities, attention spans, and emotional needs. Adjust your teaching approach based on your child’s developmental stage for the best results.
Teaching 2 to 3 Year Olds: Building Comfort
For toddlers ages 2 to 3, the goal is simply building positive associations with the ice. Keep sessions extremely short, between 15 and 20 minutes maximum. Focus on play rather than formal instruction.
Provide constant physical support by holding both hands or using a skating aid. The tapping game works well for this age group. Tap one of your child’s feet lightly, and have them lift that foot and set it down. Alternate feet in a rhythm. This teaches weight transfer and balance without requiring independent movement.
End every session while your child is still having fun. It is better to stop too early than too late. A child who leaves the ice crying is less likely to want to return. Multiple short positive sessions build skills faster than one long exhausting session.
Teaching 4 to 5 Year Olds: Structured Play
Children ages 4 to 5 can handle structured 30-minute sessions with clear activities and goals. They understand games and can follow multi-step instructions. This age responds well to the progression method described earlier in this guide.
Integrate games throughout the session to maintain engagement. Alternate between skill practice and play activities. This age group particularly enjoys racing games, follow the leader, and pretend play like being an airplane or a dinosaur on ice.
Begin building independence by gradually reducing hand-holding. Four and five year olds feel proud when they can skate even a few steps without help. Celebrate these victories enthusiastically to build confidence and motivation.
Introduce the concept of taking turns and sharing ice space with other skaters. This social skill is as important as physical skills for children entering school-age programs and group lessons.
Teaching 6+ Year Olds: Goal-Oriented Learning
School-age children aged 6 and older can set specific goals and work toward them over multiple sessions. They understand concepts like practice and improvement. Use this cognitive development to your advantage in teaching.
Sessions can extend to 45 minutes or an hour with proper breaks. Older children have the stamina for sustained physical activity but still need rest periods. Watch for signs of fatigue like sloppy technique or increased frustration.
Set specific skill goals for each session. For example, mastering the snowplow stop or completing a full lap without falling. Track progress visibly, perhaps with a chart at home showing skills mastered. Older children respond well to this concrete evidence of improvement.
Discuss the specific skating path your child might pursue. Hockey, figure skating, and speed skating each require slightly different fundamental approaches. While beginners should learn all basics, you can emphasize elements that match their interests.
Games and Activities to Make Ice Skating Fun
Games transform practice into play and keep children engaged during sessions. Use these activities to break up skill drills and maintain enthusiasm.
Red Light, Green Light
This classic playground game adapts perfectly to ice skating. When you call “green light,” your child skates or marches toward you. Call “red light” and they must stop immediately using their snowplow stop. This game practices controlled stopping and builds reaction time.
Progress to “yellow light” for slow skating, practicing controlled speed reduction. Add “blue light” for backward marching if your child has reached that skill level. The variety keeps the game fresh across multiple sessions.
Follow the Leader
Take turns being the leader who demonstrates different movements. The follower must copy exactly what the leader does. This game naturally introduces new skills by demonstrating them first in a fun context.
As the parent, you can model proper technique during your turns as leader. When your child leads, they practice creativity and movement confidence. Praise their ideas enthusiastically to build ownership of the learning process.
Simon Says on Ice
Give commands like “Simon says touch your knee,” “Simon says lift one foot,” or “Simon says glide to the blue line.” This game reinforces balance positions and listening skills simultaneously. Only follow commands that begin with “Simon says” to add the listening challenge element.
Obstacle Courses
Set up simple obstacles using cones, pool noodles, or other safe objects. Create a course that requires marching around cones, stopping at a line, and gliding between two markers. Time your child and challenge them to beat their previous time.
Obstacle courses develop agility and control while feeling like an adventure. Change the course layout each session to maintain interest. Let your child design the course sometimes, giving them control over the activity.
How Long Does It Take a Kid to Learn to Ice Skate?
Most children achieve basic independence on the ice within 4 to 8 weeks of regular weekly sessions. However, the timeline varies significantly based on age, natural coordination, session frequency, and individual temperament. Focus on steady progress rather than arbitrary timelines.
Week 1 to 2: Foundation Building
During the first two weeks, expect your child to learn falling safely, basic marching, and perhaps a brief two-foot glide with support. Progress feels slow at this stage as your child overcomes fear and builds basic balance. Sessions might involve more sitting and standing than actual skating.
Success at this stage means your child wants to return to the ice. Do not worry about visible skill acquisition. The neural pathways for balance are forming even when it looks like nothing is happening. Celebrate every attempt and keep the mood light.
Week 3 to 4: Skill Emergence
By weeks three and four, most children can march independently across the ice and complete brief unassisted glides. The snowplow stop begins to function, though it may not be pretty or reliable yet. You will see visible improvement session to session.
This is often when children first say they “love skating” or ask when they can go again. The initial fear has transformed into enjoyment. Skills accelerate now that the foundation is established.
Week 6 to 8: Independence Development
Between weeks six and eight, children typically achieve true independence on the ice. They can stop reliably, glide confidently, and recover from falls without assistance. At this point, they could join a beginner group class if desired.
Skills like backward marching, one-foot glides, and basic turns emerge during this period. Your child might experiment with speed and start attempting small jumps over cracks in the ice. Supervision remains essential, but hands-on support becomes less necessary.
Month 3 and Beyond: Refinement
After three months of regular skating, children typically move beyond beginner skills into early intermediate techniques. They develop personal skating style and may express interest in specific disciplines like hockey or figure skating.
This is the appropriate time to consider formal instruction if you have not already. A professional coach can refine technique and introduce advanced skills that become difficult to teach as a non-skating parent or as a parent whose child no longer accepts your instruction.
Signs Your Child Is Ready to Progress
Watch for these indicators that your child has mastered a skill and is ready for the next challenge: completing the skill five times in a row without falling, performing the skill while looking at you rather than at their feet, or expressing boredom with the current activity.
If your child seems frustrated or stuck, they may need more time at their current level. Pushing too fast creates anxiety and bad habits. Trust the process and let your child set the pace.
Safety Tips and Common Mistakes to Avoid
Safety extends beyond helmet use. Protect your child and yourself by avoiding common pitfalls that lead to injury or negative experiences.
Parent Physical Strain Prevention
Holding your child’s weight while hunched over for extended periods causes significant back strain. Many parents end their child’s skating journey not because the child wants to stop, but because the parent cannot physically continue supporting them.
Use proper lifting posture when supporting your child. Bend at the knees, not the waist. Keep your back as straight as possible. Switch positions frequently, alternating which side you stand on to balance muscle use.
Take advantage of skating aids and supports offered by the rink. Many rinks provide plastic walkers or cones that children can push for balance. These devices save your back while giving your child the independence to move without your constant physical support.
Double-Runner Skate Warning
Never purchase double-runner training skates, which feature two parallel blades instead of one. While they seem more stable for beginners, they actually prevent children from learning proper balance and edge control. Children who learn on double-runners develop a dependency on the wide base and struggle immensely when transitioning to proper single-blade skates.
Many skating instructors report that children who start on double-runners take twice as long to achieve basic independence compared to children who begin on single blades. The temporary stability is not worth the long-term delay in skill development.
Recognizing Fatigue and When to Stop
Children rarely recognize or communicate their own fatigue. Watch for physical signs like increased falling, slower movements, or sloppy technique. Emotional signs include increased frustration, tears, or refusal to try new things. These indicate it is time to end the session.
Cold muscles are more prone to injury. If your child has been sitting on the ice repeatedly or taking long breaks, have them march in place to warm up before attempting new skills. A shivering child should go warm up rather than continue skating.
Handling Fear and Anxiety
Fear is the most common obstacle children face when learning to ice skate. Validate your child’s feelings while encouraging them to try anyway. Never dismiss their fear or force them to do something that terrifies them.
Share stories of famous skaters who fell repeatedly when learning. Watch videos of professional competitions that include warm-up footage showing even elite athletes losing their balance. Normalizing falling reduces the stigma your child might feel about their own stumbles.
If fear persists across multiple sessions, consider professional lessons. Sometimes children respond better to an instructor who is not their parent. The structured environment of a class can also reduce anxiety for children who feel overwhelmed by open skating sessions.
When to Consider Professional Lessons
While teaching your child yourself builds bonding and saves money, professional instruction offers benefits that become difficult to replicate at home. Knowing when to transition to formal lessons maximizes your child’s potential.
Benefits of Learn to Skate Programs
Most ice rinks offer Learn to Skate programs modeled after the Snowplow Sam curriculum or similar structured progressions. These group classes provide professional instruction at a fraction of the cost of private lessons. Children benefit from peer learning and social interaction.
Professional instructors spot technique errors that parents miss. They know how to correct bad habits before they become ingrained. Instructors also understand how to push children just enough to advance without causing burnout or fear.
Group vs Private Lessons
Group lessons work well for most children learning basic skills. The social environment makes learning fun, and the lower cost allows for consistent weekly attendance. Groups typically contain skaters at similar levels, reducing intimidation.
Private lessons suit children who are very shy, need intensive correction of specific technique issues, or are advancing quickly beyond group class levels. Private instruction costs significantly more but provides one-on-one attention that accelerates progress for motivated learners.
Consider a trial private lesson before committing to a package. This allows you to evaluate whether your child responds better to professional instruction than to parent teaching. Many parents continue teaching basics themselves while using occasional private lessons for specific skill refinement.
Frequently Asked Questions
At what age can you teach a child to ice skate?
Children can start learning ice skating as young as 3 years old, though some parents successfully introduce the ice at age 2 with modifications and shorter sessions. Ages 4 to 5 represent the ideal window for formal instruction, as children at this age have developed the balance, coordination, and attention span needed for structured learning. Children aged 6 and older can progress more quickly through basic skills due to developed motor skills and longer focus capabilities.
Can ice skating cause plantar fasciitis?
Ice skating can contribute to plantar fasciitis if skates do not fit properly or if a child skates with excessive intensity without proper conditioning. The rigid boot of ice skates places unique pressure on the foot arch, and improper support can strain the plantar fascia. Ensure proper skate fitting, take regular breaks, and stop skating if your child complains of persistent heel or arch pain. Consult a medical professional if pain persists beyond normal muscle soreness.
Is ice skating good for bone density?
Ice skating provides weight-bearing exercise that supports healthy bone development in children. The impact and resistance involved in skating stimulates bone growth and strengthens the musculoskeletal system. Regular physical activity on ice contributes to overall bone health when combined with proper nutrition including adequate calcium and vitamin D. Skating is particularly beneficial because it engages multiple muscle groups while the body works to maintain balance on the ice.
How long does it take a kid to learn to ice skate?
Most children achieve basic independence on the ice within 4 to 8 weeks of regular weekly sessions. During weeks 1 to 2, they learn falling and basic marching. By weeks 3 to 4, independent glides and stops begin to emerge. Between weeks 6 and 8, reliable stopping and confident gliding typically develop. Timeline varies based on age, natural coordination, session frequency, and individual temperament. Consistent weekly practice produces faster results than occasional sessions.
Do kids need helmets for ice skating?
Yes, helmets are essential safety equipment for children learning to ice skate. Hockey helmets provide the best protection as they are designed specifically for ice impacts and provide coverage for the back of the head. Bike helmets are not recommended because they lack adequate rear head protection. The helmet should fit level on the head with a properly fastened chin strap that allows only one finger between strap and chin.
What should my child wear ice skating?
Dress your child in layers that allow freedom of movement while keeping them warm. Start with a moisture-wicking base layer, add a warm mid-layer like fleece, and top with water-resistant snow pants. Tall thin socks work best, thick socks create pressure points. Mittens keep hands warmer than gloves. Bring an extra pair of gloves as the first pair often gets wet from touching the ice. Avoid bulky coats that restrict arm movement.
Can a 2 year old ice skate?
Yes, a 2 year old can experience the ice with proper modifications. Keep sessions extremely short, 15 to 20 minutes maximum. Provide constant physical support by holding both hands or using a skating aid. Focus entirely on building comfort and positive associations rather than teaching specific skills. Many 2 year olds enjoy the experience, but others may not be ready. There is no pressure to start this young, waiting until age 3 or 4 often produces faster skill development.
Should I teach my child myself or get lessons?
Most parents can successfully teach basic ice skating fundamentals themselves using the step-by-step method in this guide. Professional lessons become beneficial once children master the basics and need technique refinement, or if your child shows interest in competitive skating. Group Learn to Skate classes offer excellent value for beginner instruction. Consider professional lessons if your child struggles with fear, is not progressing after several weeks of home teaching, or expresses interest in advanced skills.
Conclusion: How to Teach a Child to Ice Skate
Teaching your child to ice skate is a journey that requires patience, preparation, and persistence. Start with the right equipment fitted properly, teach falling before gliding, and progress through the six-step method outlined in this guide. Remember that every child learns at their own pace, and the goal is building a lifelong love of skating, not achieving specific skills by arbitrary deadlines.
The skills your child develops on the ice extend far beyond skating itself. Balance, coordination, resilience after falling, and the confidence to try new things all transfer to other areas of life. By following the age-specific approaches and keeping sessions fun with games and positive reinforcement, you create memories and capabilities that last a lifetime.
Now that you know how to teach a child to ice skate, it is time to lace up those skates and step onto the ice together. Start with short sessions, celebrate every small victory, and enjoy watching your child discover the joy of gliding across frozen water. The cold air, the sound of blades on ice, and the smile on your child’s face make every moment of preparation worthwhile.