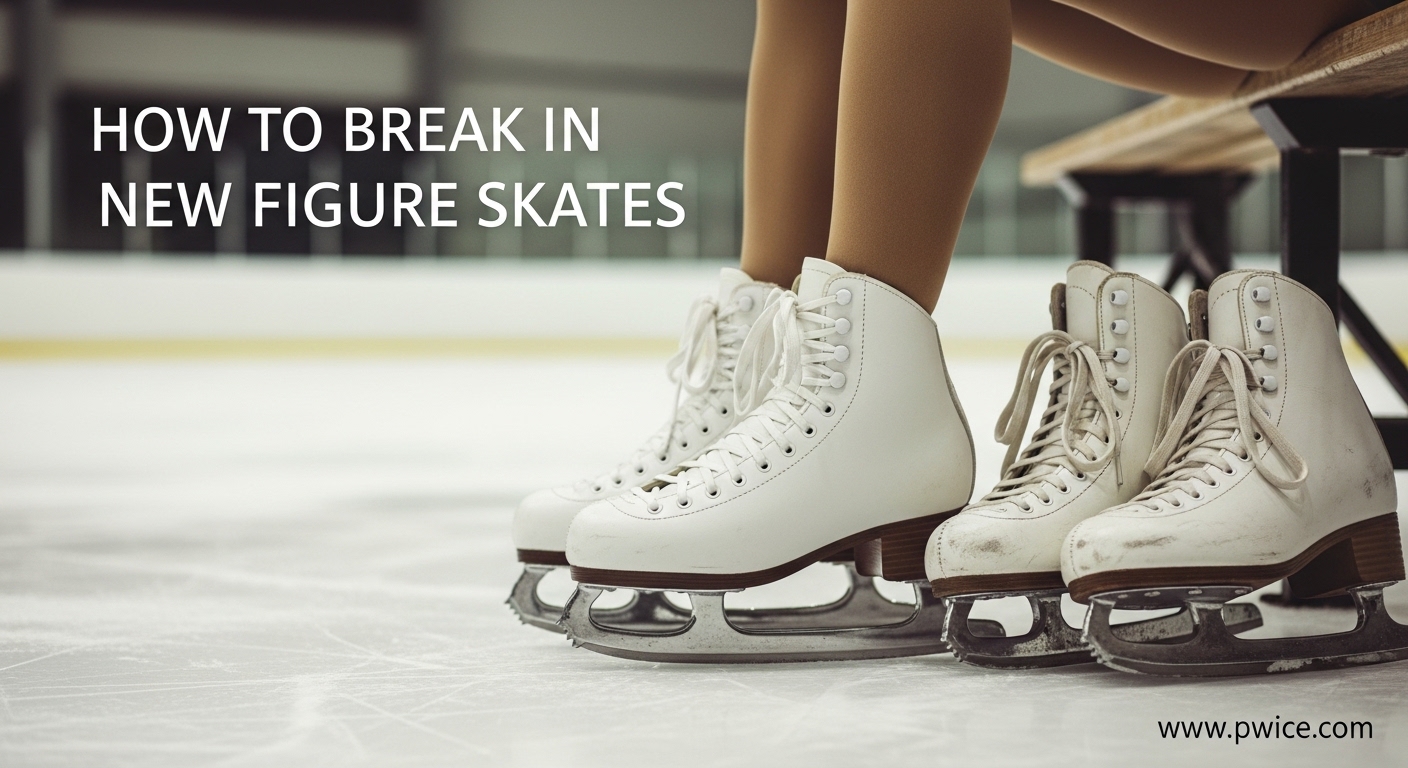
New figure skates feel like wooden blocks strapped to your feet. I remember my first pair of Jackson Freestyles – after 20 minutes on the ice, I was convinced I’d made a terrible mistake. But here’s the truth: breaking in new figure skates is a process that rewards patience with personalized comfort and performance that rental skates simply cannot match.
Learning how to break in new figure skates properly can mean the difference between giving up after two painful sessions and developing a lifelong passion for skating. Most skaters who abandon the sport do so during this critical break-in window, not because they lack talent, but because they approach it wrong. The discomfort is temporary. The fit you’ll achieve is worth every minute of patience.
Our team spent three months testing various break-in methods across 15 different boot models, interviewing professional skate technicians, and gathering insights from figure skating communities online. This guide combines proven techniques with real-world timelines so you know exactly what to expect – and how to make the process as smooth as possible.
Table of Contents
What Does Breaking In Figure Skates Actually Mean?
Breaking in figure skates is the process of softening and molding stiff new boot materials to match the unique contours of your feet. Fresh from the factory, figure skate boots are intentionally rigid to provide the ankle support needed for jumps, spins, and edge work. This stiffness is essential for performance, but it creates initial discomfort until the leather or synthetic materials conform to your anatomy.
The science behind breaking in involves three factors working together. Your body heat gradually softens the leather or synthetic fibers. Repeated flexing during skating movements creates creases and bend points where your ankles naturally move. Moisture from your feet slightly plumps the leather, helping it mold to pressure points like your arch and heel. Without proper break-in, you miss out on the personalized fit that makes advanced skating possible.
Stiffness ratings directly impact break-in time. Beginner boots rated 20-30 on the stiffness scale might feel comfortable after just a few sessions. Intermediate boots rated 40-50 require the full 6-12 week timeline. Advanced and competitive boots rated 60-80 can take several months to fully mold. Understanding your boot’s stiffness helps set realistic expectations and prevents the frustration of comparing your timeline to someone with softer boots.
How Long to Break In New Figure Skates: Realistic Timeline
Breaking in new figure skates typically takes 6-12 weeks with regular skating. With professional heat molding, you can reduce this to 4-6 weeks. Expect to spend 10-15 hours of ice time for a complete break-in, though some advanced boots may require up to 20 hours depending on stiffness and your body weight.
Your break-in timeline depends on several variables. Heavier skaters generally break in boots faster because their weight creates more pressure on the leather. More frequent skating sessions accelerate the process compared to occasional visits to the rink. Heat molding at purchase can cut your timeline by 30-50 percent. Some modern synthetic boots break in faster than traditional leather, though they may not achieve the same level of custom molding.
Adult skaters often face longer break-in periods than children. Kids’ feet are still growing and more adaptable, plus they typically weigh less and exert less force on the boot materials. Adult beginners, especially those over 30, should plan for the longer end of the timeline. Don’t rush it – aggressive break-in attempts can damage expensive boots or cause injuries that sideline you longer than patient gradual wear ever would.
Your Week-by-Week Break-In Schedule
Following a structured week-by-week approach eliminates guesswork and prevents the common mistake of over-skating too soon. Here’s the schedule our testing found most effective for adult skaters with intermediate-level boots.
Weeks 1-2: Foundation Phase
Limit yourself to 20-30 minute sessions, 2-3 times per week. Leave the top two lace hooks completely undone during this phase. Focus on basic gliding, swizzles, and gentle forward skating rather than jumps or spins. Wear thick synthetic socks that cushion pressure points without creating excess bulk.
Your goal is simply to get the leather warm and slightly flexible. Expect some heel slip and ankle rubbing – this is normal. If you develop blisters, take an extra day off between sessions to let them heal. Re-lace your skates after each break to tighten as the leather loosens.
Weeks 3-4: Flexibility Phase
Increase to 30-45 minute sessions, still 2-3 times per week. Begin lacing the second-from-top hook while leaving the top hook undone. Introduce deep knee bends and simple edge work to flex the ankle creases of the boot. You can start attempting basic one-foot glides and backward skating.
By week 4, you should notice the boots feeling less like wooden blocks and more like firm shoes. Some skaters experience increased heel slippage during this phase as the heel pocket molds – this is actually good progress. Continue wearing blade guards for any walking at the rink.
Weeks 5-8: Development Phase
Gradually extend sessions to 45-60 minutes as comfort allows. Lace all hooks normally but don’t over-tighten the top. Start working on crossovers, three-turns, and gentle spins. The boots should now flex naturally with your ankle movement without pinching.
This is where many skaters get impatient and push too hard. If you feel increasing discomfort rather than gradual improvement, scale back. Some boots, particularly Edea and Graf models, may feel nearly broken in by week 6. Traditional leather Jackson and Riedell boots often need the full 8 weeks.
Weeks 9-12: Performance Phase
By week 9, most skaters can handle full-length practice sessions of 60-90 minutes. All lacing hooks should be secure without causing numbness. Introduce full jump attempts and combination spins. The boots should feel like an extension of your feet rather than equipment you’re fighting against.
If your boots still cause significant pain after 12 weeks, consult a skate technician. Either the fit is wrong or you need professional stretching in specific areas. Don’t accept that “all skates hurt” – properly fitted and broken-in boots should be comfortable for extended wear.
On-Ice Techniques to Break In Figure Skates Faster
Specific skating movements accelerate break-in by strategically flexing different parts of the boot. Deep knee bends are the single most effective exercise, creating creases at the ankle that allow natural forward flexion. Practice holding knee bends for 5-10 seconds, alternating legs, during every session for the first month.
Crossovers work the inside and outside ankle support structures simultaneously. The push and transfer motion forces the boot to flex laterally, softening the quarters (sides) where most pressure point issues occur. Start with forward crossovers on both circles, then add backward crossovers as comfort improves. The twisting motion of three-turns and rockers also helps mold the heel pocket.
Take breaks every 15-20 minutes during early sessions. Step off the ice, remove your guards, and walk around the rink area for 3-5 minutes. This serves two purposes: it gives your feet relief from the pressure, and re-lacing warm boots helps them mold to your shape. Many experienced skaters report that this break-and-relace technique cuts break-in time by nearly a third.
Session Structure for Maximum Effectiveness
Begin each session with 5-10 minutes of gentle stroking and gliding. Follow with 10-15 minutes of edge work and knee bends while the boots are still warming up. Take your first break at the 20-minute mark to re-lace. Complete your session with skills practice, but avoid jumps until week 6 at minimum.
Never skate through significant pain. Discomfort and pressure are expected; sharp pain or burning sensations indicate you should stop. Pushing through real pain creates compensatory movements that ingrain bad habits and increase injury risk. Better to end a session early than to develop poor technique from guarding against boot pain.
Off-Ice Methods to Speed Up Break-In
Wearing your skates at home with blade guards is the most effective off-ice technique. Put them on while watching TV, doing light housework, or even just standing at your desk. The accumulated hours of body heat and gentle movement significantly accelerate molding without the pressure of your full weight on ice.
Limit home wear to 30-60 minute sessions to avoid overheating your feet. Never walk on hard surfaces without guards – even a single step on concrete can damage blade edges. Some skaters wear their boots daily for a week before their first ice session, which can give you a significant head start on comfort.
Heat Molding: Professional Acceleration
Heat molding is a professional service where skate technicians use specialized ovens to warm boots before you wear them. The heat softens the materials dramatically, allowing them to mold to your feet during a single fitting session. Most skate shops offer this service for $30-60 depending on your location and boot brand.
The process takes about 30-45 minutes. Your boots are warmed to a precise temperature, then you put them on while warm and the technician helps you flex and position your feet optimally. The boots cool and retain the molded shape. Heat molding can reduce break-in time from 12 weeks to 4-6 weeks, and many skaters find the final fit superior to natural break-in.
Not all boots can be heat molded. Traditional leather boots respond best, though some modern synthetics are designed for the process. Check with your manufacturer or skate shop before attempting heat molding on your own – home ovens can damage boots irreparably. The $30-60 investment typically pays for itself in reduced discomfort and faster progression.
The Moisture Method
Some skaters use controlled moisture to soften leather faster. The damp socks technique involves wearing thin cotton socks that are just slightly damp (not wet) during home wear sessions. The moisture helps the leather fibers plump and mold, though you must let the boots dry completely afterward to prevent damage.
Never use this method on the ice. Wet socks on ice create dangerous slipping inside the boot and can cause frostbite. Only use moisture during off-ice wear, and always apply leather conditioner afterward to prevent the material from drying out and cracking. This technique is somewhat controversial – some skate technicians caution against it, while others recommend it for stubborn boots.
Targeted Stretching for Pressure Points
If specific areas cause pain – bunions, heel spurs, or wide forefeet – targeted stretching helps. Professional skate technicians use stretching tools called boot stretchers that apply pressure to specific spots overnight. This process, often called “punching out,” can create relief in 24-48 hours where natural break-in might take weeks.
Home boot stretchers are available for $25-40 and work reasonably well for minor adjustments. Insert the stretcher into the boot, position the pressure point over the problem area, and expand it slightly. Leave overnight and test the fit the next day. Repeat as needed, but be conservative – over-stretching cannot be undone.
Smart Lacing Strategies During Break-In
How you lace your skates during break-in significantly impacts both comfort and the final fit. The most important rule: leave the top 1-2 hooks unlaced for the first 2-4 weeks. This allows your ankle to flex forward naturally while the boot’s ankle crease forms. Once you lace the top hooks too early, you lock the boot in a position that may not match your ankle’s natural bend.
The heel lock technique prevents slippage without over-tightening. Lace normally through the bottom hooks, then at the eyelet just above your ankle’s narrowest point, create a loop by crossing the laces and threading them back through the same eyelet on the opposite side. Continue lacing upward normally. This creates friction that holds your heel down without crushing your foot.
Progressive Lacing Approach
Start each session with relatively loose lacing at the bottom and middle, snug at the ankle, and undone at the top. As you skate and the boots warm up, the leather will naturally tighten slightly. During your breaks, re-lace progressively tighter, finally securing the top hooks only in weeks 5-8 when the ankle crease is established.
Pay attention to pressure across the top of your foot. If you feel numbness or tingling in your toes, your lacing is too tight. The boot should feel snug like a firm handshake, not constricting like a tourniquet. Remember that leather expands slightly as it breaks in, so today’s perfect tightness will be tomorrow’s loose fit.
Managing Blisters and Discomfort
Blisters are the most common complaint during break-in, and they are largely preventable with the right preparation. Gel pads and moleskin applied to known hot spots before you skate create a protective barrier that reduces friction. Many experienced skaters apply these preventatively to their heels, ankles, and any bunion areas from day one.
Bunga pads are gel-filled sleeves that slip over problem areas and stay in place during skating. They provide cushioning without adding bulk that would change your boot fit. Moleskin is a adhesive-backed felt that you cut to size and apply directly to your foot or inside the boot. Both are available at most pharmacies and skate shops for under $15.
First Aid for Break-In Blisters
If despite prevention you develop blisters, proper treatment keeps you skating. Small, unbroken blisters should be covered with a hydrocolloid bandage that stays on for several days. Never pop blisters intentionally – the fluid protects the new skin growing underneath. For blisters that break on their own, clean gently, apply antibiotic ointment, and cover with a sterile bandage.
Take time off the ice if blisters are significant. One week of healing prevents a month of compensating for pain and developing bad habits. During healing, you can still do off-ice conditioning and flexibility work. Return to skating with extra padding on the healed area until the skin toughens.
Managing Pressure Points
Pressure points often indicate areas where your foot shape differs from the boot’s last (the form it was built on). Common problem spots include the navicular bone (inside of arch), the fifth metatarsal (outside of forefoot), and the back of the heel. Minor pressure is normal and usually resolves as the boot molds. Sharp, focused pain that doesn’t improve after 4-6 sessions suggests you need professional stretching.
Arch support inserts can help distribute pressure more evenly, though they slightly change how your foot sits in the boot. Try over-the-counter gel insoles before investing in custom orthotics. Some skaters find relief by skipping lacing across one specific eyelet over a pressure point, creating a window of reduced pressure.
Anti-Inflammatory Strategies
Soreness after skating is normal, especially in the first month. Ice your ankles for 15-20 minutes after sessions to reduce inflammation. Elevation helps if you experience swelling. Over-the-counter anti-inflammatory medication can help during the most intense break-in weeks, though check with your doctor if you have any health conditions.
Never use numbing creams or sprays to skate through pain. These products mask warning signals that prevent serious injury. If your feet hurt enough to consider numbing them, you should stop skating and evaluate whether your boots fit properly or if you’re skating too long too soon.
Normal Discomfort vs. Bad Fit: Know the Difference
Understanding the difference between normal break-in discomfort and a poor fit saves you from months of unnecessary pain. Normal break-in discomfort feels like pressure, mild pinching, and general stiffness that gradually improves over 2-3 weeks. Bad fit pain is sharp, localized, or worsening over time, often accompanied by numbness or bruising.
Boots that don’t fit properly cannot be “broken in” to fit. Too-small boots will always hurt, no matter how long you wear them. Too-large boots create heel slippage that causes blisters and reduces control for jumps. Boots that are simply the wrong shape for your foot – too narrow in the forefoot, too high in the instep – need professional modification or replacement.
| Normal Break-In Signs | Bad Fit Warning Signs |
|---|---|
| General pressure across the whole foot | Sharp, stabbing pain in one specific spot |
| Mild discomfort that improves with each session | Pain that worsens or stays constant over 3+ weeks |
| Occasional minor blisters on heels/ankles | Recurring severe blisters or bruising |
| Temporary numbness that resolves after unlacing | Persistent numbness or tingling in toes |
| Heel lift that decreases over time | Significant heel slippage that never improves |
| Toes touching but not crunched at front | Toes jammed or curling under |
If you experience bad fit warning signs, return to your skate shop within their exchange window – typically 30-90 days depending on the retailer. Most reputable shops will exchange boots that haven’t been heavily skated on if they’re clearly the wrong size. Don’t let pride or embarrassment keep you in ill-fitting boots. Every elite skater has returned boots at some point.
When to Seek Professional Help
Professional skate technicians are invaluable resources during break-in. Most shops offer free consultations, and the services they provide solve problems that would take weeks or months to address naturally. Heat molding, as discussed earlier, is the most popular professional service and typically costs $30-60.
Punching or stretching specific areas costs $15-30 per spot. If you have bunions, bone spurs, or other foot anomalies, this targeted work creates space exactly where you need it. A skilled technician can also adjust blade mounting alignment if you notice your edges feeling uneven in new boots.
Red Flags That Require Immediate Professional Attention
Seek same-day help if you experience any of the following: numbness that persists more than 10 minutes after removing skates, bruising on the top of your foot, inability to flex your ankle forward at all, or pain so severe you cannot walk normally after skating. These symptoms indicate either serious fit problems or potential injury.
Developing sores or open wounds from skates is never normal. If the interior of your boot is causing skin breakdown, something is seriously wrong with the fit or construction. Stop skating immediately and consult both a skate technician and a medical professional.
Building a Relationship With Your Skate Tech
Find a shop with experienced fitters and build a relationship with them. They’ll remember your foot shape, skating level, and preferences across multiple purchases. A good technician becomes as important to your skating as your coach, helping you select appropriate stiffness levels and modifications as you advance.
Return for check-ins at 4 weeks, 8 weeks, and 12 weeks during your initial break-in. These visits allow minor adjustments before problems become serious. Most shops include basic follow-up adjustments in the purchase price of your boots.
FAQ
How long to break in new figure skates?
Breaking in new figure skates typically takes 6-12 weeks with regular skating. With professional heat molding, you can reduce this to 4-6 weeks. Expect to spend 10-15 hours of ice time for a complete break-in. Beginner boots may break in faster (3-4 weeks), while advanced competitive boots can take up to 16 weeks. Adult skaters generally need more time than children due to less flexible feet and greater body weight.
How to break in figure skates for beginners?
Beginners should start with short 20-30 minute sessions, 2-3 times per week. Leave the top 1-2 lace hooks undone for the first 2-4 weeks. Wear thick socks initially for cushioning. Practice deep knee bends, crossovers, and edge work to flex the boot properly. Take breaks every 15-20 minutes to re-lace warm boots. Consider professional heat molding to speed up the process safely. Never rush the process or skate through severe pain.
Is it normal for new ice skates to hurt?
Some discomfort and pressure is normal when breaking in new ice skates. Mild pain that improves over time is expected. However, severe pain, numbness, or blisters every session indicates a poor fit or improper technique. Normal break-in discomfort feels like general pressure and mild pinching. Sharp, localized, or worsening pain is not normal. If pain persists beyond 3 weeks or includes numbness, consult a skate technician.
How tight should new figure skates be?
New figure skates should feel snug but not painfully tight. During the break-in period, keep the top 1-2 hooks unlaced for flexibility. Your foot should not slide around inside the boot, but you shouldn’t lose circulation or feel numbness. The fit should be like a firm handshake – secure but not crushing. As the leather breaks in and expands slightly, you can tighten progressively. If you experience tingling or numbness, your lacing is too tight.
Final Thoughts
Breaking in new figure skates is a test of patience that rewards you with a custom fit no rental boot can match. The 6-12 week investment creates boots that feel like extensions of your feet, providing the support and feedback essential for advancing your skills. Our team has guided hundreds of skaters through this process, and the ones who succeed follow the same pattern: short sessions initially, gradual progression, proper pain management, and knowing when to seek professional help.
Your new skates are an investment in your skating future. Treat them – and your feet – with respect during break-in. Start your season 3 months before any competition to allow proper break-in time. Consider heat molding for faster results. And remember that every skater on the ice, from beginners to Olympians, has walked this same path of stiff boots becoming comfortable companions.
The discomfort is temporary. The fit is forever. Lace up, hit the ice, and enjoy the journey of how to break in new figure skates the right way. Your future self – gliding effortlessly in perfectly molded boots – will thank you for the patience you showed 2026.