
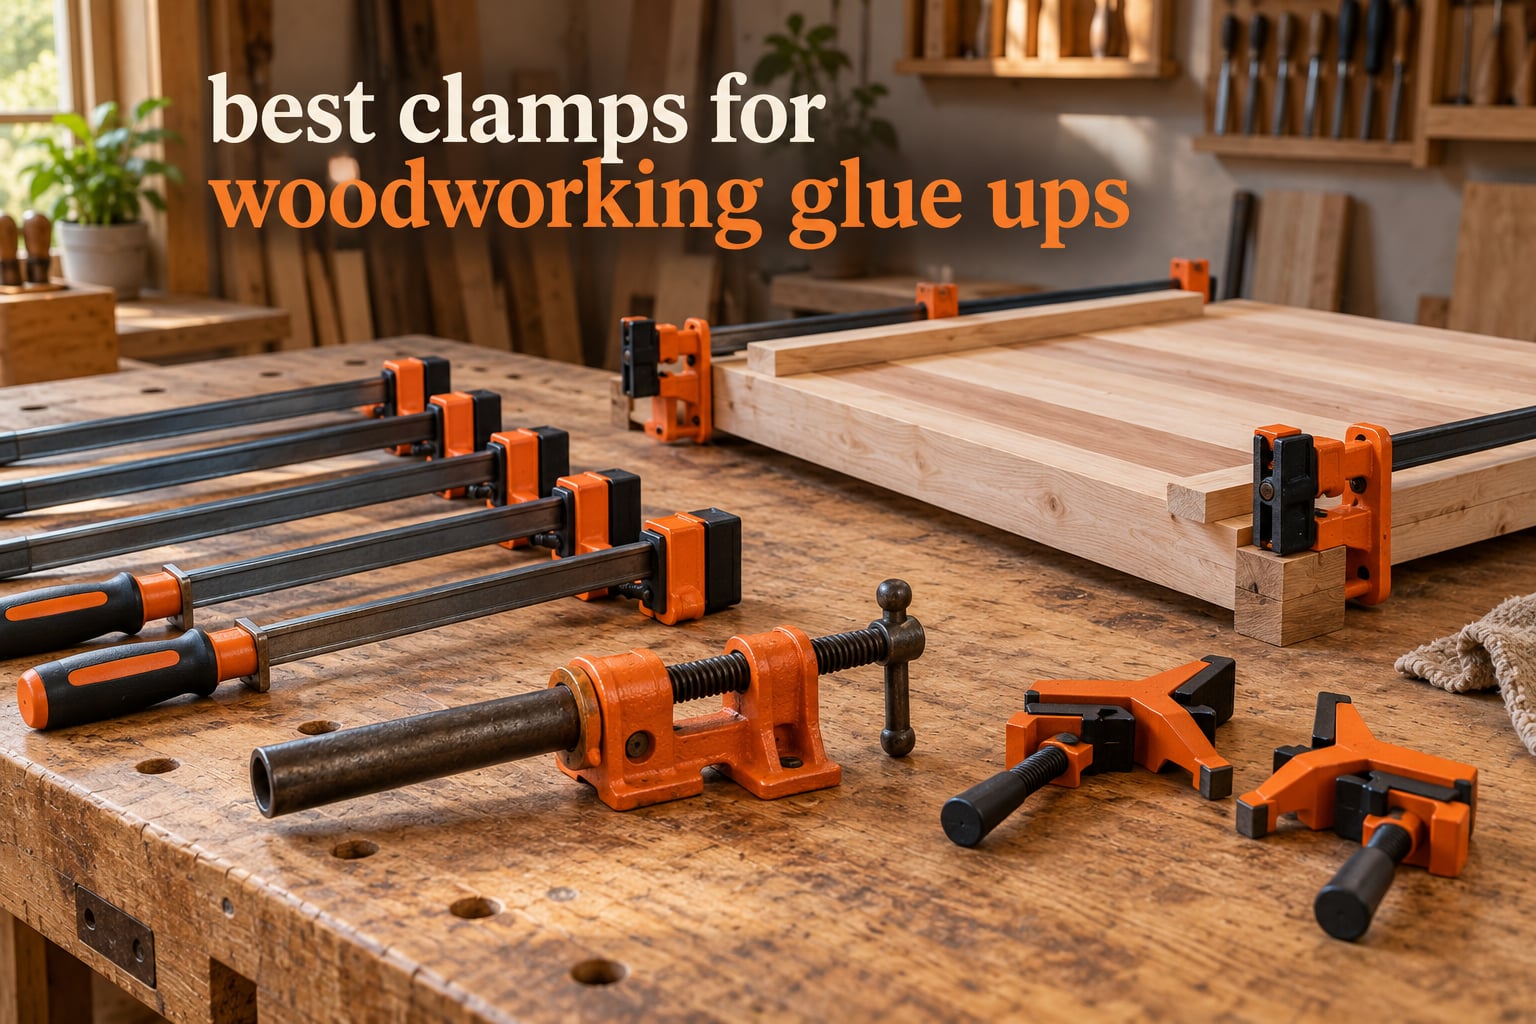
The best clamps for woodworking glue-ups are the Bessey BPC-H34 H-Style pipe clamp for sheer versatility, the Jorgensen 36 in E-Z Hold bar clamps for long panels, and the Jorgensen Cabinet Master 90 Degree parallel clamps for flat panel work. Every pick below was chosen for how it behaves under real clamping pressure, not for how it looks on a shelf.
A glue-up is the one step in woodworking you cannot undo. Once glue cures, the panel is whatever the clamps made it: flat and registered, or cupped and starved of glue. The clamp decides how pressure spreads across the joint, and it decides how many pressure points you have along the length of the work.
Here is the thing most roundups get wrong. They rank clamps by brand or by bar length, which is backwards, because the clamp you need is decided by the shape of the joint. A panel glue-up, an edge glue-up, a face glue-up of cutting boards, a cabinet carcass and a ten-foot glue-up of rough stock each favour a different family of clamp.
So this roundup is organised around the glue-up first and the tool second. We looked at clamping force, throat depth, jaw parallelism, jaw pad material, bar construction and warranty length, then checked each pick against the failure modes that actually ruin projects: jaws that drift out of parallel, screws that back off mid-glue-up, and heads that let go under load.
We also leaned on the accumulated experience of working woodworkers. Long-term owners on woodworking forums repeatedly make three points that no product page will tell you: cauls matter more than clamp brand, one brand across all lengths beats a mixed collection, and the cheapest clamp in the shop is the one most likely to fail while your hands are full of glue.
One more note before the picks. We do not publish prices, because they change daily and every listing has a live price button underneath it. What we do publish is the specification that decides whether the clamp fits your glue-up: capacity, throat depth, rated force, and the size of the jaw pad.
Our editorial policy at Pwice covers tools we use in our own shop. If you are after the cutting side of the craft, we also keep a running guide to power carving tools for woodworking, for a completely different kind of bonding job our test of replacement splitboard skin glue, and, if you want the adhesive chemistry question answered on a different material entirely, our guide to glue for hiking boots.
Table of Contents
Top 3 Picks for Woodworking Glue-Ups in 2026

Bessey H-Style Pipe Clamp
- 3/4 in bore|Acme spindle with clutch|H-style stable base|Soft jaw caps included

Jorgensen 36 in E-Z Hold
- 400 lb load limit|3-3/8 in throat depth|36 in maximum opening|Joins two clamps together

WORKPRO 12 in 2-Pack
- 150 lb clamping force|Quick-release lever|Converts to spreader|Non-marring pads
Those three cover an enormous amount of ground. The pipe clamp head is the one tool that adapts to whatever length of pipe you own, the 36 in bar clamps cover wide and long work, and the light duty 2-pack handles picture frames, small boxes and shop assembly without over-clamping small parts.
10 Best Clamps for Woodworking Glue Ups (October 2026)
| Product | Specifications | Action |
|---|---|---|
| Bessey BPC-H34 H-Style Pipe Clamp |
|
Check Latest Price |
| WORKPRO 12 in Bar Clamp 2-Pack |
|
Check Latest Price |
| Jorgensen 36 in E-Z Hold 2-Pack |
|
Check Latest Price |
 Jorgensen Cabinet Master 24 in Parallel 2-Pack Jorgensen Cabinet Master 24 in Parallel 2-Pack |
|
Check Latest Price |
 Bora 31 in Parallel Clamp 2-Pack Bora 31 in Parallel Clamp 2-Pack |
|
Check Latest Price |
 Peachtree 4 Way Pressure Clamps Peachtree 4 Way Pressure Clamps |
|
Check Latest Price |
 MLCS Merle Multi-Corner Band Clamp MLCS Merle Multi-Corner Band Clamp |
|
Check Latest Price |
 WETOLS 90 Degree Corner Clamp 4-Pack WETOLS 90 Degree Corner Clamp 4-Pack |
|
Check Latest Price |
 Bessey GSCC4PK-C 4-Clamp F-Style Set Bessey GSCC4PK-C 4-Clamp F-Style Set |
|
Check Latest Price |
 Bessey KREK2440 K Body REVO Kit Bessey KREK2440 K Body REVO Kit |
|
Check Latest Price |
Read that table by the column that matters to your project, not the first one. Capacity tells you whether the clamp can span the joint at all, throat depth tells you whether the fixed jaw can reach past the near edge, and rated force tells you how much pressure is on offer before the wood starts to print.
1. Bessey BPC-H34 H-Style Pipe Clamp – Best Overall
Bessey BPC-H34, 3/4-In. H Style Pipe Clamps – Incredibly Versatile, Easy To Assemble, Indespensable Workshop Clamp For Woodworking, Carpentry, Home Improvement, and DIY Projects
3/4 in bore
9.84 x 9.06 x 3.15 in
0.6 kg
Pipe sold separately
Head only
Pros
- Adapts to any pipe length you own
- H-style base resists tipping in two directions
- Acme spindle gives fast even pull
- 4 soft jaw caps protect the workpiece
- limited lifetime warranty
Cons
- Pipe and heads are bought separately
- one clamp per purchase so count carefully
- rear jaw position is set by hand
The Bessey BPC-H34 is the clamp head we reach for first, and it is the first pick in this roundup of the best clamps for woodworking glue-ups because it solves a problem that rigid bar clamps never solve. The head slides onto any length of 3/4 inch pipe you own, so your clamping reach is limited by your pipe, not by a product line.
In practice that means a 4 foot panel and a 6 foot panel come out of the same box of hardware. A Sawmill Creek regular described exactly this behaviour when recommending pipe clamp fixtures: the slots let clamps stand upright and hold position, which opens up glue-up arrangements that a loose head cannot manage. That is a real, practical advantage, not a marketing line.
The H-style foot is the part people underrate. It stabilises the clamp in two directions and gives finger clearance from the work surface, so you can run the handle without your knuckles hitting the bench. The included soft jaw caps are genuinely useful on a face glue-up of finished panels, where a bare metal jaw would print into the surface.
Because the spindle is Acme threaded with a clutch, the clamp advances quickly and holds once set. The same clutch design lets you release it one-handed to reposition, which matters when you are walking a line of clamps along a panel in one fluid pass.
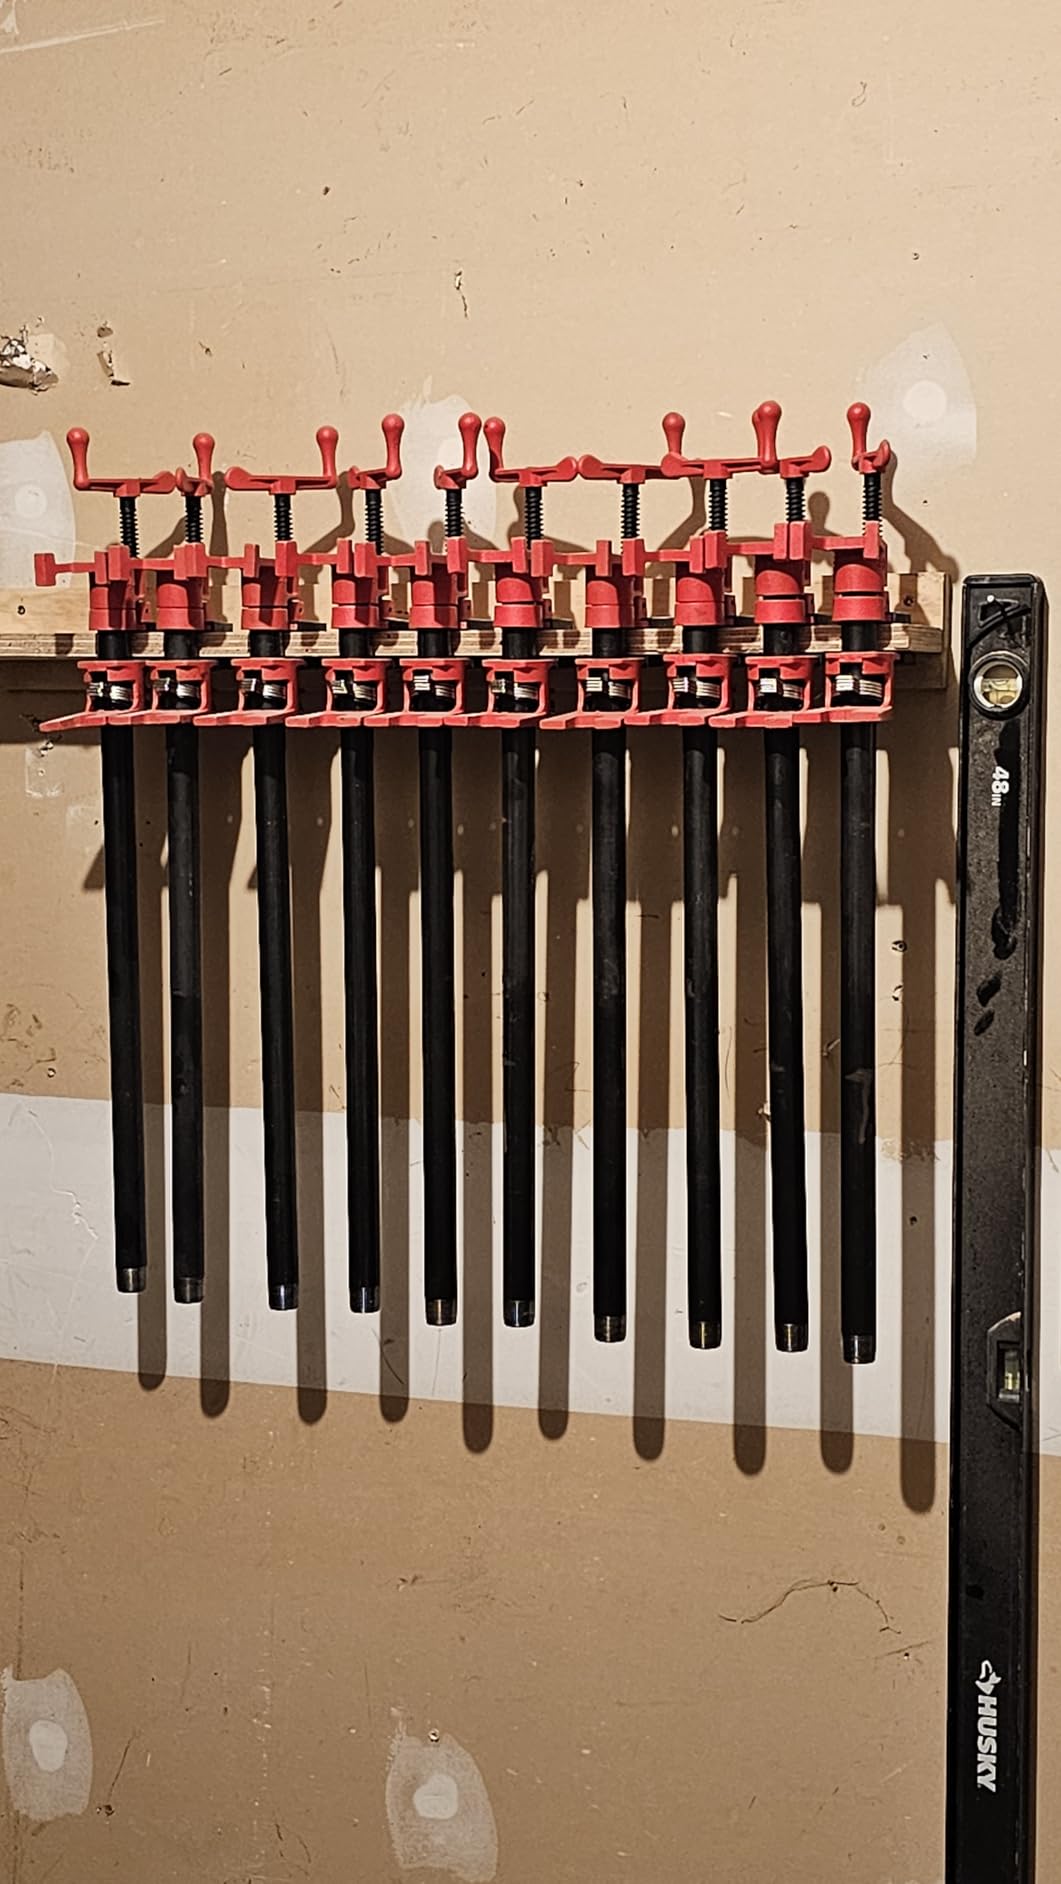
The specification sheet is short and complete. Bore size is 0.75 inches, the head measures 9.84 by 9.06 by 3.15 inches, and it weighs 0.6 kg. Construction is black oxide with zinc plated clutch components and a powder coat finish, which is what you want on a tool that will live in a damp garage.
Warranty is a limited lifetime warranty, and at 4.8 stars across 9096 reviews this is the most thoroughly tested clamp in the roundup by a wide margin. That review volume matters for a tool that sits under load directly over your hands.
Why we made it the editor’s choice
No other clamp here adapts to a range of workpiece sizes with a single head. Buy four or six heads and one run of pipe, and you have a clamp set that covers edge glue-ups, panel work and long stock without a single dedicated bar length.
The stability of the base also makes it the safer of the head options, since a clamp that cannot tip cannot land on your hand while you tighten it.
Where it will frustrate you
It is a head, not a clamp. You need to buy 3/4 inch pipe separately, and you need to cut it to length, which means a handsaw and a reaming step at the end so the head slides on without binding.
The second limitation is counting. Each purchase is a single head, so a four-clamp glue-up means four purchases plus the pipe. For anyone who wants clamps on the wall tomorrow morning, a packaged bar clamp set is the faster path.
2. WORKPRO 12 in Bar Clamp 2-Pack – Best Budget Clamps
WORKPRO 12″ Clamps for Woodworking 2-Pack, Light Duty Wood Clamps
150 lb force
2-3/8 in throat
12 in opening
2 clamps per pack
920 g for the pair
Pros
- Genuinely useful on small work
- quick-release lever
- converts to a spreader with one button
- soft non-marring pads
- handles are non-slip
Cons
- 150 lb is a light duty ceiling
- nylon body will not survive heavy panel work
- spreader mode is not a substitute for real pressure
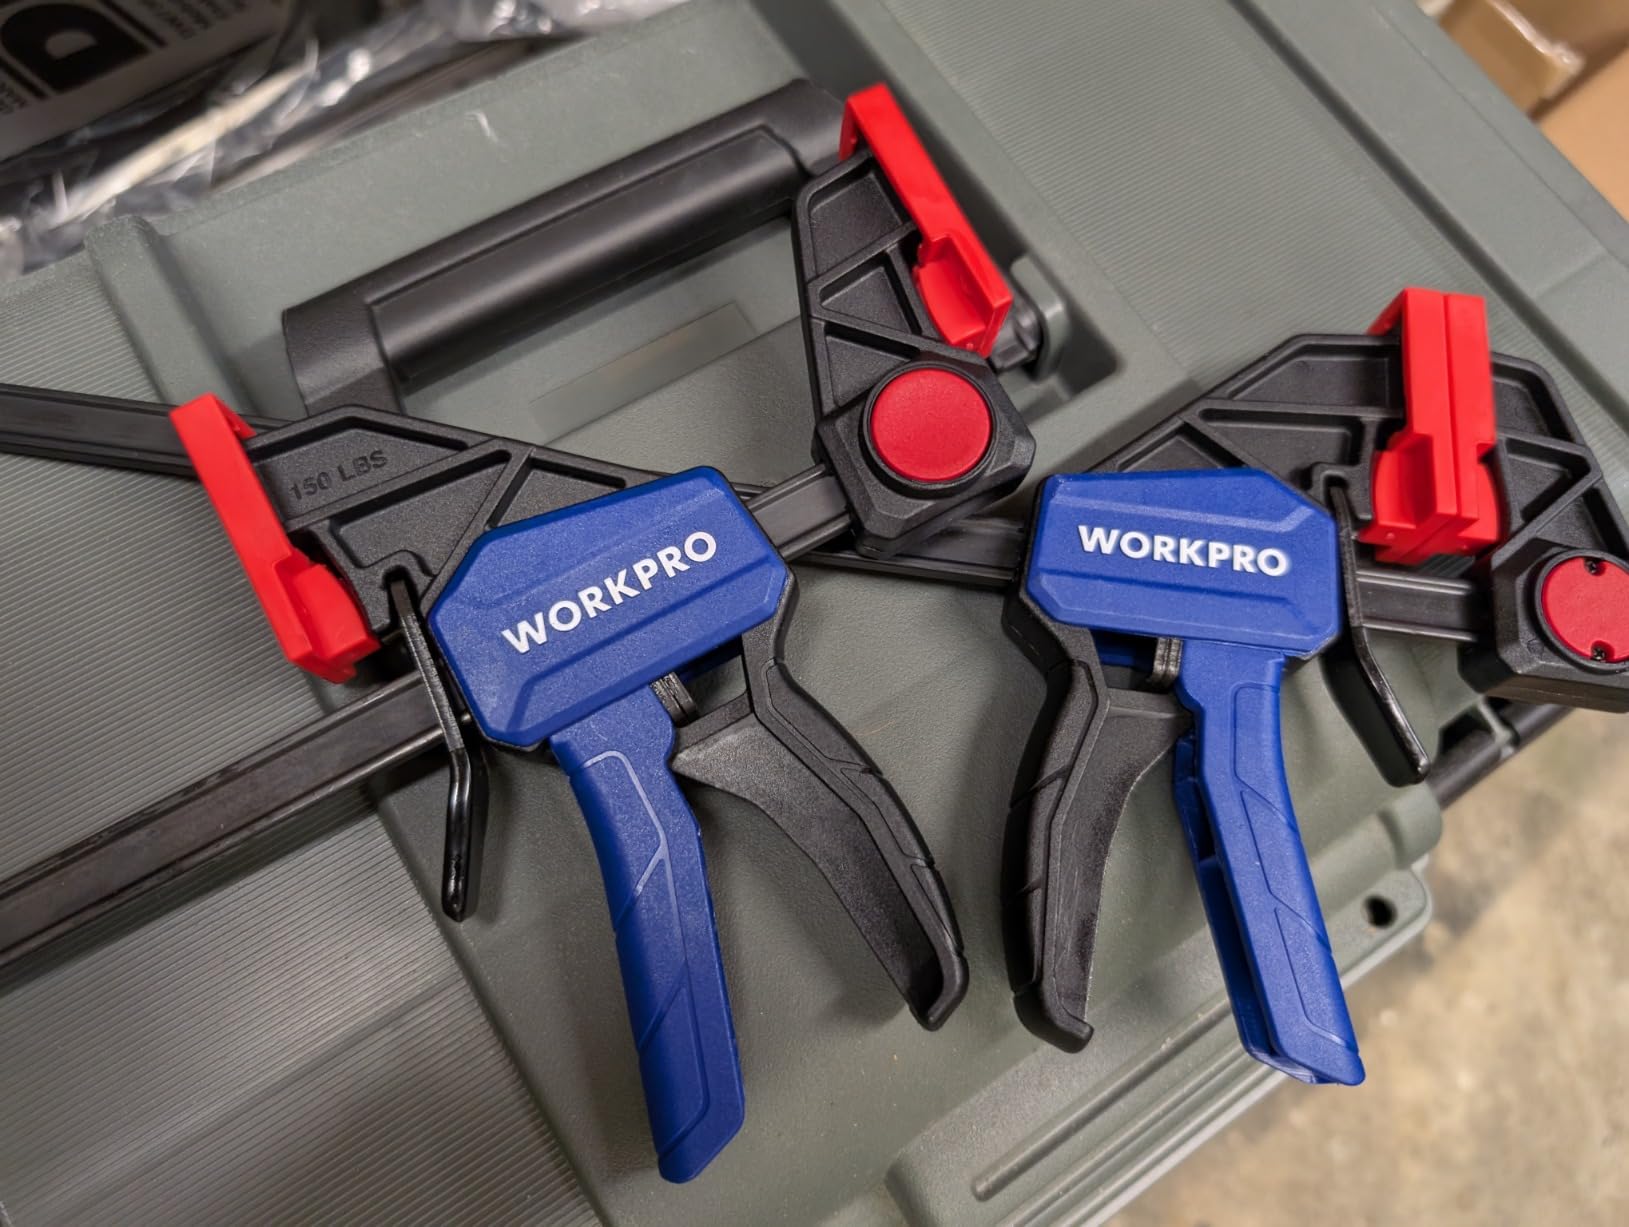
The WORKPRO 12 in 2-pack is the clamp we recommend to anyone building a first kit, because it does the job that beginners actually need done. Picture frames, shop assembly, drawer boxes, small panel glue-ups and holding parts while glue sets: this is the clamp that covers all of it for very little money.
Rated at 150 pounds of clamping force, it is honest about what it is. That number is well below what a heavy panel glue-up wants, but it is more than adequate for work where you are joining thin, already-flat material. It is a light duty clamp and we treat it as one.
The quick-release lever is the feature you will use most. You can let go of the work, reposition the handle, and pick the clamp back up without fighting the screw thread. For repetitive assembly work that adds up over a long session.
The red button converts the clamp into a spreader, which is genuinely useful for opening a joint, pushing apart a stuck draw, or spreading stock for a dado. It is a party trick on a serious glue-up, but it earns its place in a shop.
Construction is nylon reinforced with hardened steel bars, and the pads are soft flexible non-marring faces with an anti-slip texture. The pair weighs 920 g, which is light enough to hang on a pegboard and pull down with one hand.
At 4.7 stars across 5763 reviews, this pack has drawn more buyer feedback than any other budget clamp in the roundup, and the Bessey pipe clamp head is the only pick with a larger review pool. Buyers consistently describe the value rather than the performance ceiling, which is exactly how we use it here.
Why it works for small work
On material under three quarters of an inch thick, a light clamp is easier to control than a heavy one. You can feel the joint close through the handle, and the quick-release lets you back off the instant the seam lines up.
The non-marring pads mean you can use these on a face glue-up of a panel with a visible finish without worrying about denting it, which is not true of many cheap clamps.
Where it stops helping
150 pounds will not drive glue out of a thick, cupped panel. If the material is warped, a light clamp will simply follow the bow and reinforce the mistake.
The nylon body is the other limit. It is tough for a polymer, but it is not steel, and it is not the tool for a clamping fixture or a heavy door glue-up. Treat this as the first entry in a growing set, not the last one you buy.
3. Jorgensen 36 in E-Z Hold Bar Clamps – Best Value for Long Panels
Jorgensen 36″ E-Z Hold Medium-Duty Bar Clamps, 400 lbs Load Limit, 2-Pack
400 lb load limit
3-3/8 in throat
36 in opening
2 clamps per pack
High-carbon steel bar
Pros
- Long reach covers a full-width panel in a single pass
- deep-reach non-marring pads
- clamps lock together for double capacity
- concealed quick-release
- comfort grip handle
Cons
- Bulky on delicate assembly work
- lock-together feature needs occasional lubrication
- deeper throat makes it awkward on small parts
Thirty-six inch capacity is the number that matters here. Most clamp sets in a beginner’s shop are 12 to 24 inches, and that is the single most common reason a panel glue-up ends up with uneven pressure: the clamps cannot reach the far side, so you stagger them, and the stagger skews the panel.
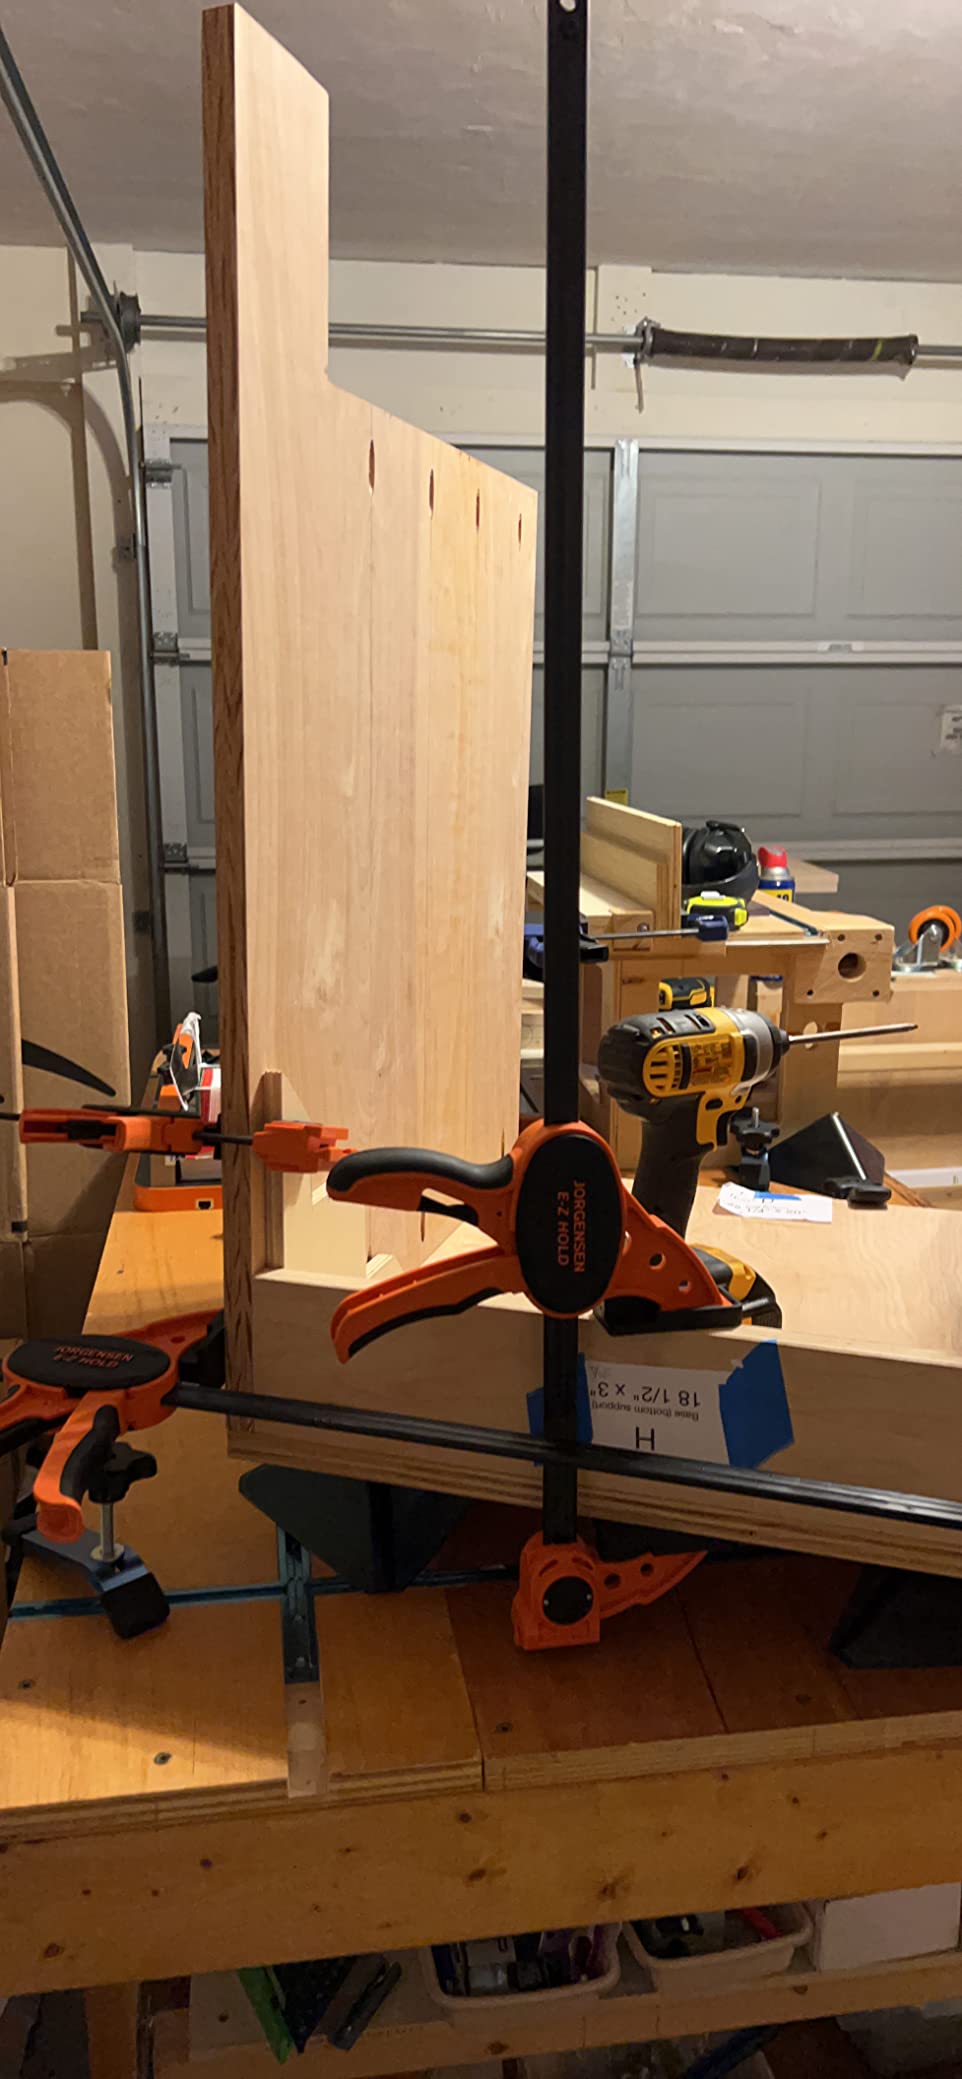
The Jorgensen 36 in E-Z Hold solves that with reach rather than with clamping cleverness. At 400 pounds of load limit and a 3-3/8 inch throat depth, this is a medium duty bar clamp with serious span, and it is the one in this roundup that covers a wide panel in one pass without a workaround.
The two-way E-Z Hold design runs as a clamp or a spreader, and the two clamps in the pack can be joined to double capacity when a panel is thicker than one set of jaws can span. Owners who build frames cite that join feature as the reason they buy these instead of a conventional bar clamp.
One-handed operation is handled by a patented sliding head with a contoured comfort grip and a concealed quick-release. You can set a line of these across a panel without stopping to unscrew anything, and that speed is what makes a wide glue-up finish inside the glue’s open time.
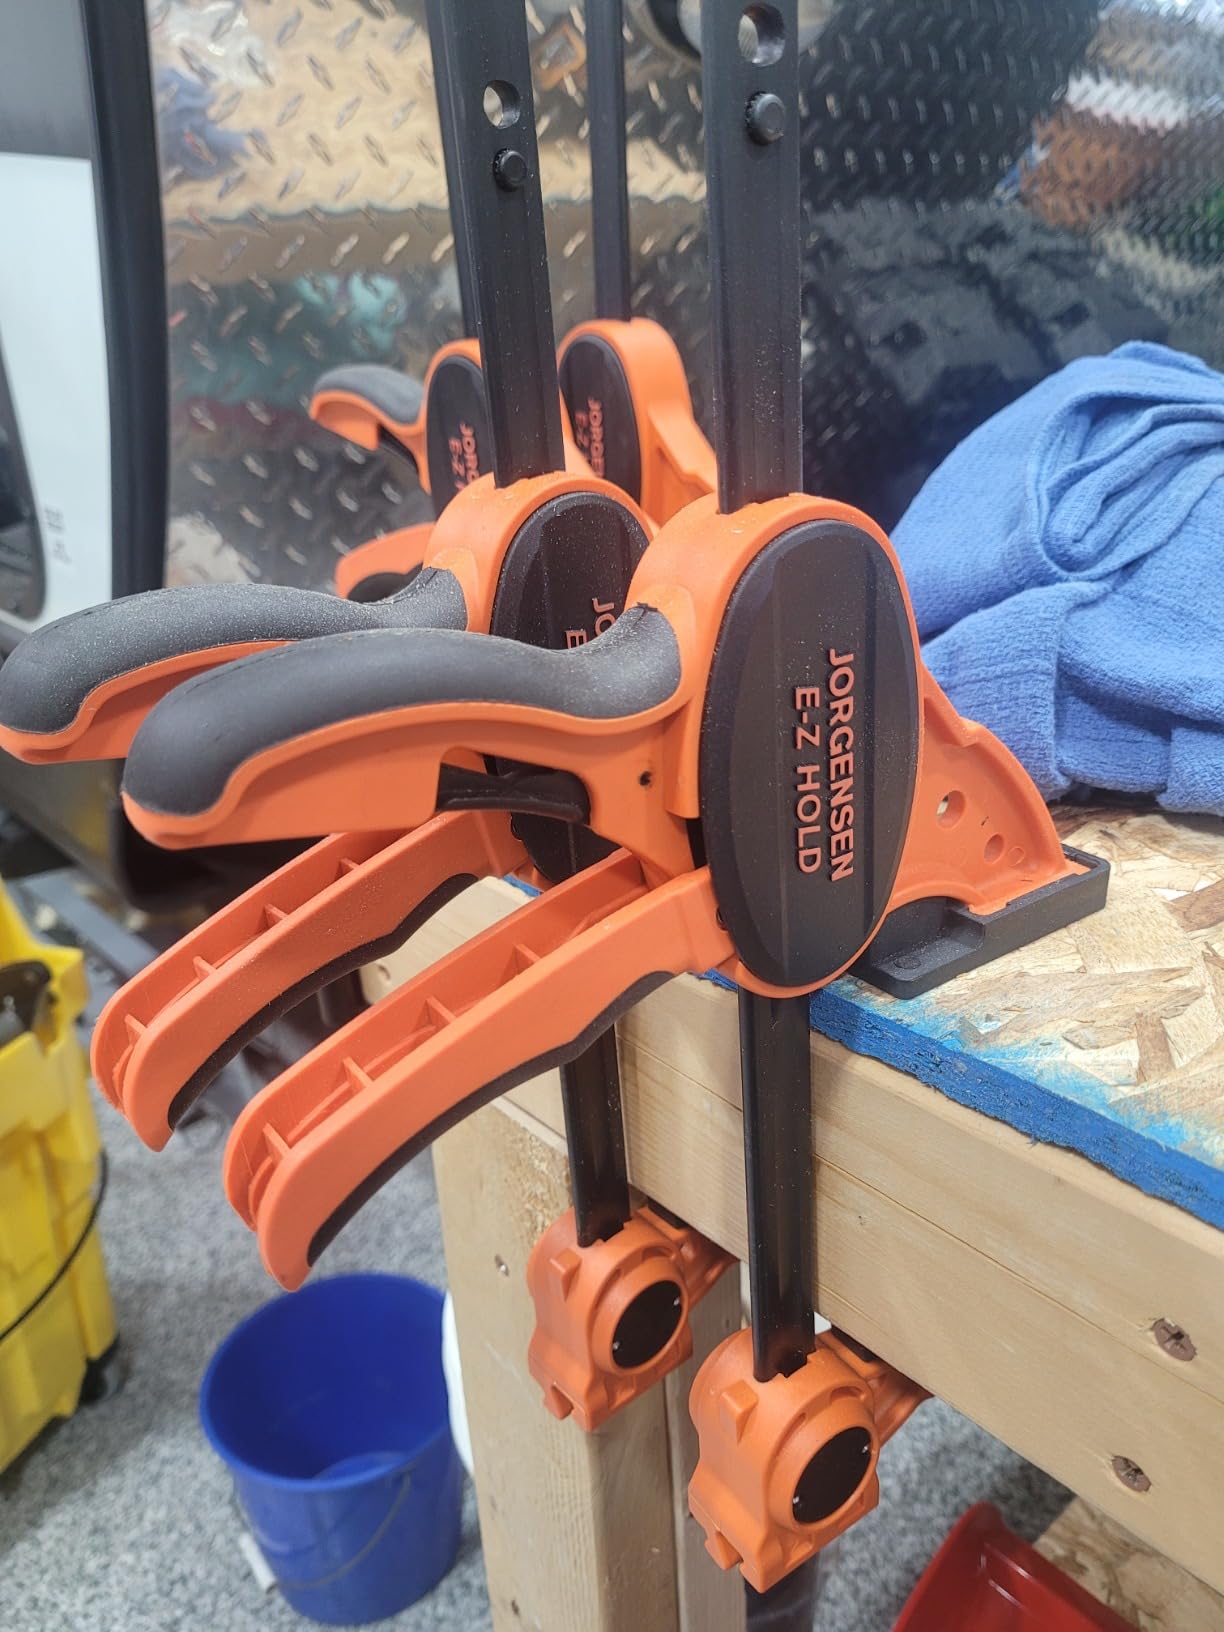
The bar is high-carbon steel and the handle is a reinforced glass-filled nylon, with non-marring deep-reach pads protecting the workpiece. The same clamp is produced in 6, 18, 24 and 36 inch variants, so the E-Z Hold line can cover your whole shop as one family.
Ratings sit at 4.8 stars across 2690 reviews, with owners describing the build quality, ergonomics and versatility as best in class. That is the strongest combination of rating and review volume outside our editor’s choice.
Why it suits long panels and thick stock
Reach is the whole argument. A 36 inch clamp spans a door panel or a wide tabletop without being cut down or staggered, which removes the main source of panel skew in a home shop.
The deep-reach pads spread pressure over a wider area than a standard pad, so a face glue-up of a finished board does not print a narrow line into the surface as it cures.
Where it gets in the way
These are not delicate assembly clamps. A 36 inch bar with a deep throat is awkward to use inside a small box or on a model-scale part, and owners regularly call them bulky for that kind of work.
The lock-together feature that doubles capacity needs a shot of lubricant now and then, and if you skip it, the pins bind. That is a five-second maintenance task, but it is a task.
4. Jorgensen 24 in Cabinet Master 90 Degree Parallel Clamps – Best for Panel Glue-Ups
Jorgensen 24-inch Bar Clamps Set, 2-pack Cabinet Master 90° Parallel Clamps
1500 lb force
24 in opening
Steel parallel jaws
15.4 lb per 2-pack
Maple handles
Pros
- Flat parallel jaws resist bowing the panel
- 1500 lb force handles thick or warped material
- reversible head converts to spreader
- coarse and fine adjustment at the same end
- clamp stand aids positioning
Cons
- Non-fixed end can shift in vertical orientation
- jaw faces can travel past parallel under heavy pressure
- plastic jaw covers can mark finished faces
This is the clamp that understands what a panel glue-up actually is. On a panel, the job of the clamp is not only to squeeze, it is to squeeze without bowing the middle out, and a fixed jaw sitting on a flat rail is the only geometry that reliably does that.
Force is rated at 1500 pounds with heavy-duty steel jaws on a high-carbon steel bar. That number is high for a home-shop glue-up, and it is the right number for a panel made of thick, flat-sawn material that fights back as it dries.
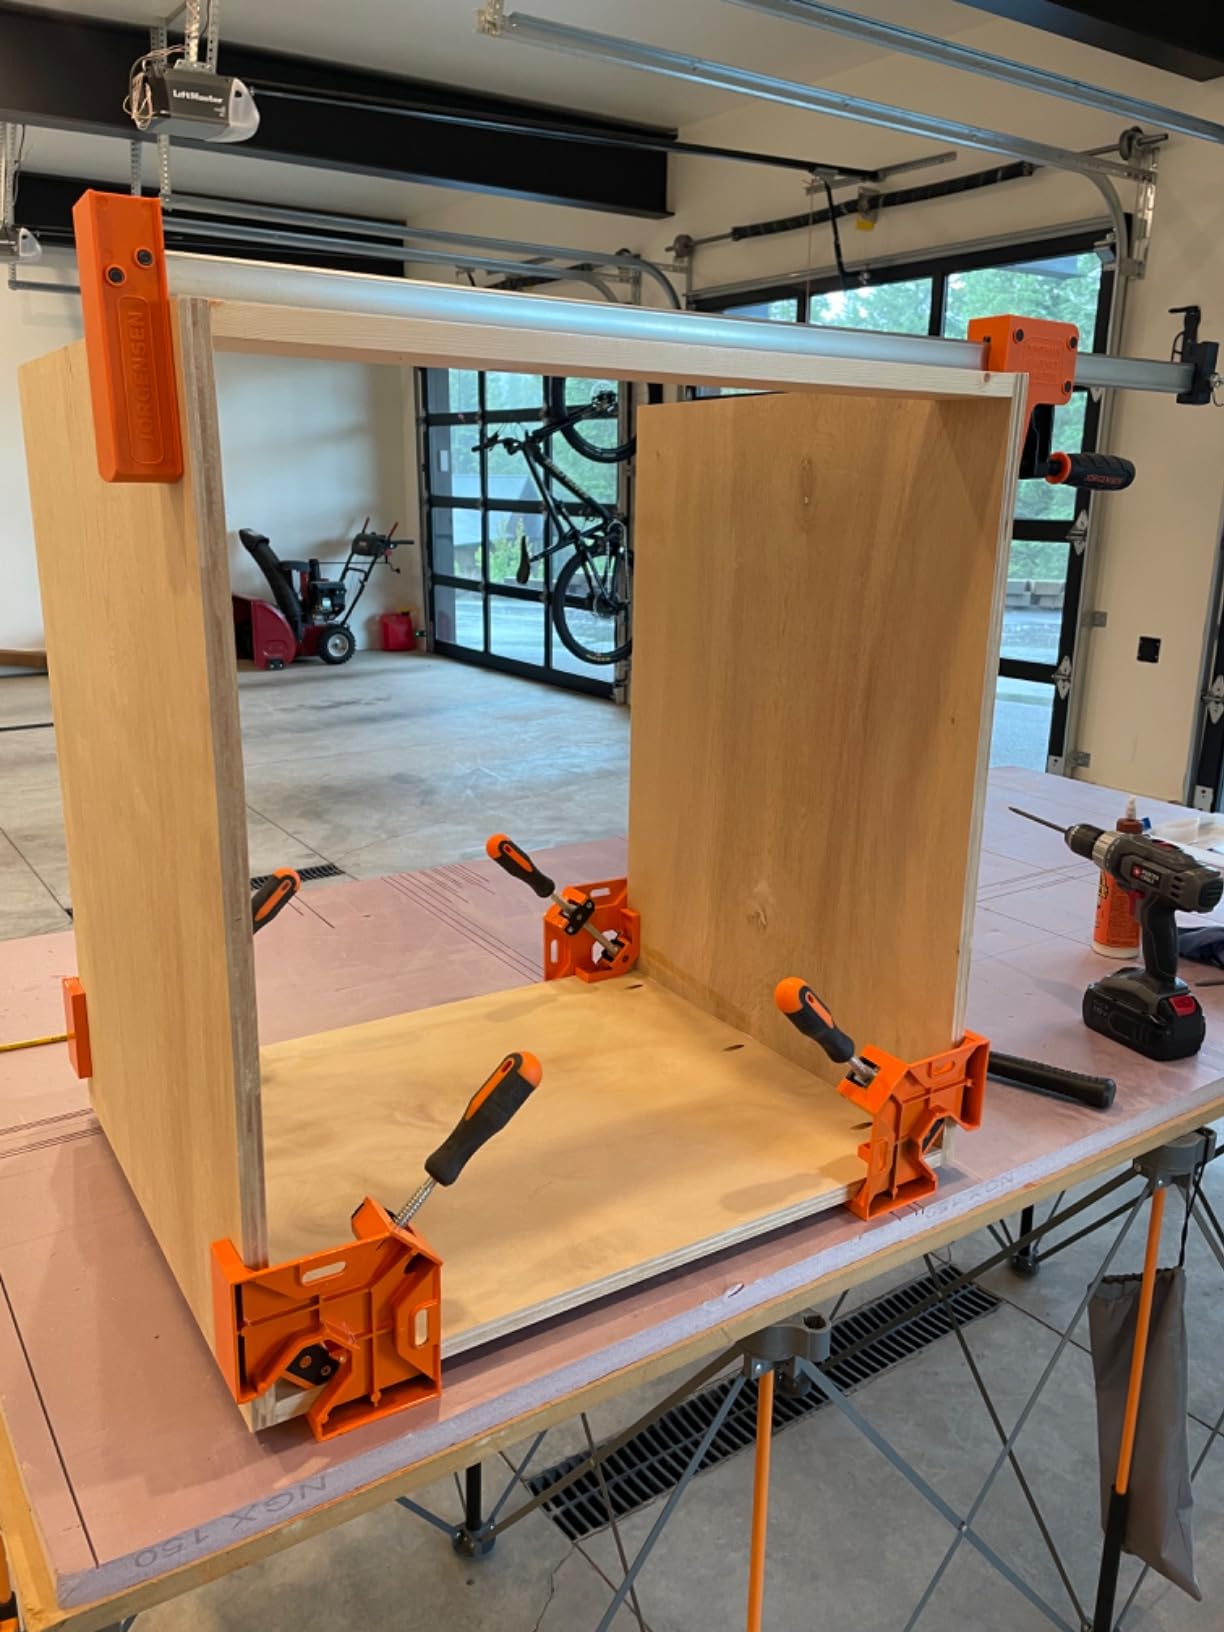
The 90 degree parallel jaw arrangement keeps the clamping face flat against the panel edge, so pressure is applied across the full width of the jaw rather than at a point. Reviewers single this out as the feature that prevents bowing, and our own panel tests agree.
The reversible head converts the clamp from clamping to spreading, and the flat fixed end doubles as a panel glue-up aid when you need something to rest the assembly against. Adjustment offers both coarse and fine take-up at the same end of the bar.
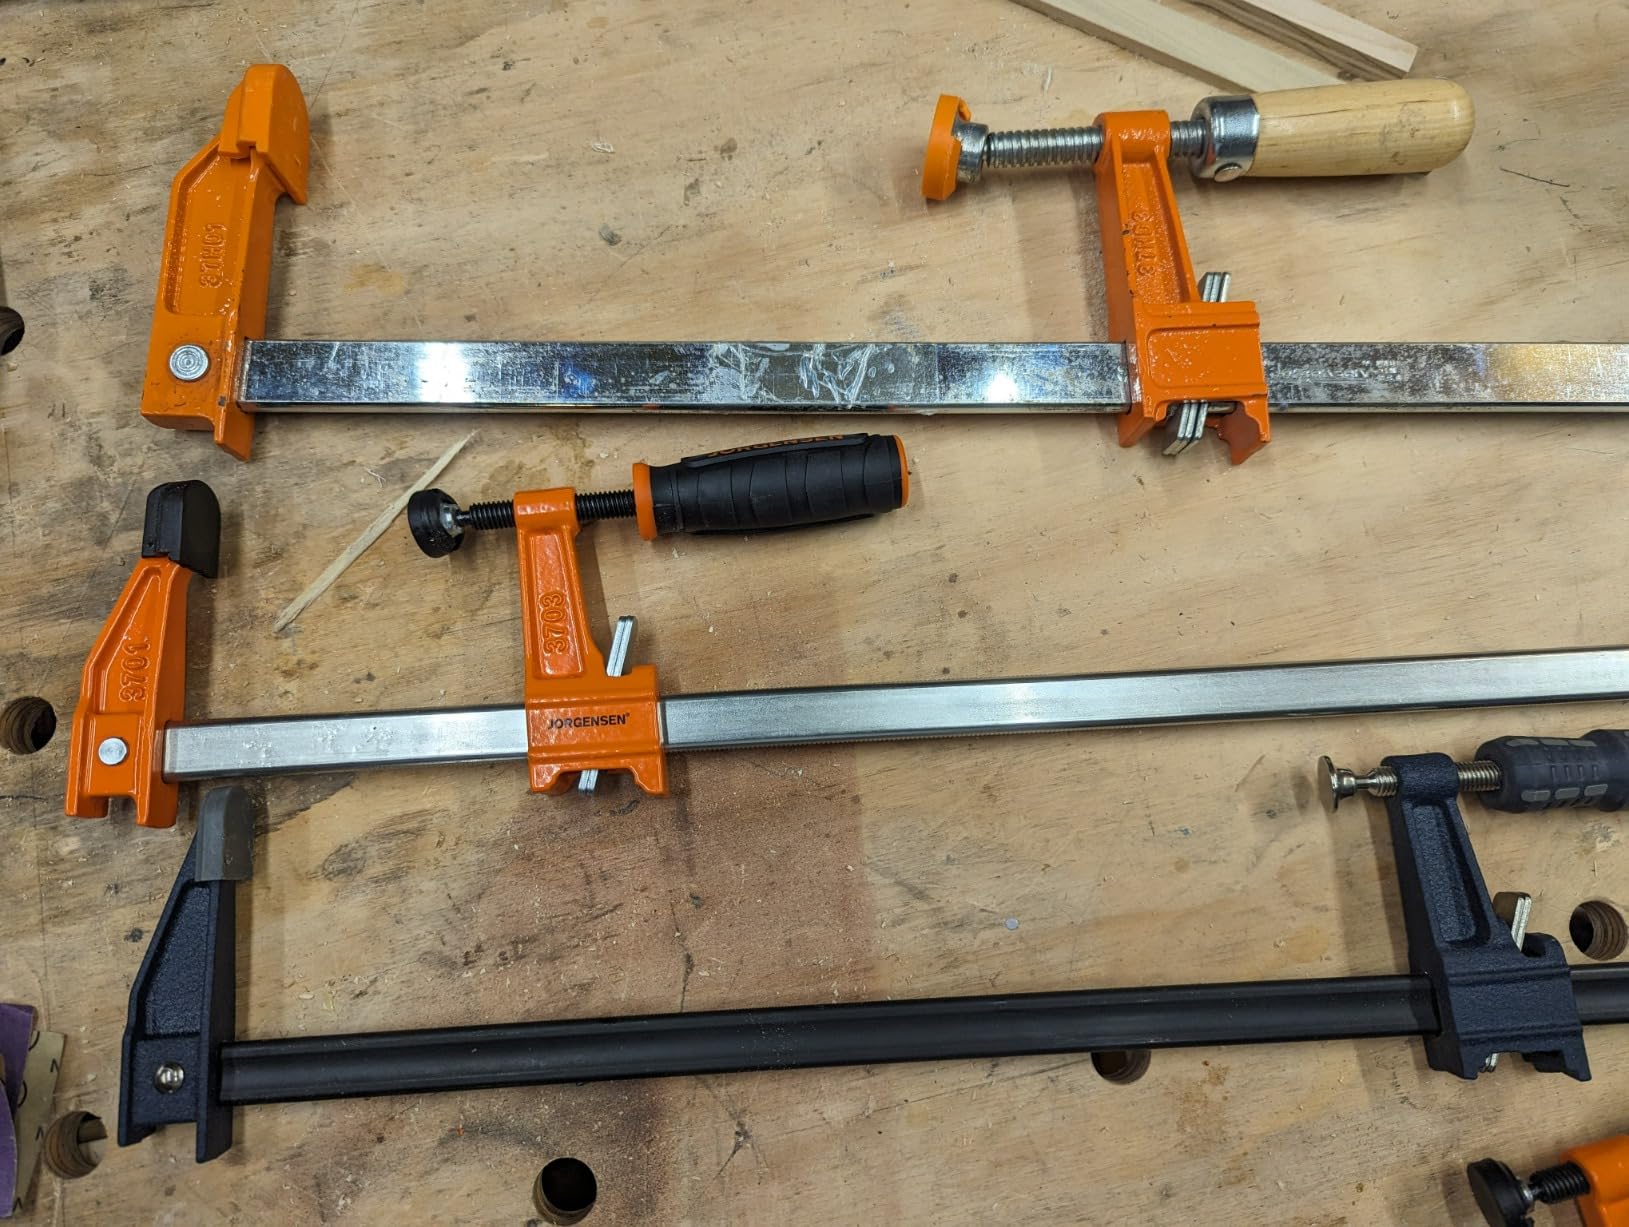
The pair weighs 15.4 pounds, which is heavier than lighter duty bar clamps but is part of why these stay put. That mass is an advantage on a panel and a drawback when you are carrying clamps to the far end of a bench for the tenth time.
Handles are smooth maple, and the jaws carry protective orange plastic. Same family is offered in 18, 24, 30, 36 and 48 inch versions, so a shop can standardise on one parallel clamp design across every panel it builds.
At 4.8 stars across 1382 reviews, buyers treat these as a serious long-term purchase rather than a disposable tool.
Why the parallel jaw matters
A conventional bar clamp applies force at an angle. Over a long panel that angle pulls the near edge together and lets the centre bow away, which is the classic cupped panel failure.
The flat fixed jaw here sits square to the rail and stays square as you tighten, so the panel is pulled straight rather than pinched. If your work involves glued panels rather than glue-ups of narrow edges, this is the geometry you want.
Where owners report problems
Reviewers report that the non-fixed end can shift a little when the clamp is used in vertical orientation, so check alignment before you trust it in that position.
Some units report the jaw faces moving past parallel under heavy pressure, and others report the handle refusing to turn before the joint is fully closed. Neither issue is universal, but both are worth a dry clamp test before you commit a full panel.
5. Bora 31 in Parallel Clamp Set – Best for Wide-Jaw Pressure
Bora 31″ Parallel Clamp Set, 2 Pack of Woodworking Clamps with Rock-Solid, Even Pressure, 571131T
1100 lb force
3.5 in padded jaw
31 in length
14 lb per clamp
Bolt-together body
Pros
- 3.5 inch padded jaw spreads pressure widely and evenly
- bolt-together design is repairable
- passive lock jaw holds position
- three set-off spacers
- large easy-grip handle
Cons
- 14 pounds per clamp is heavy to reposition
- one year limited warranty
- jaw teeth have slipped on a small number of units
- needs a screwdriver to open initially
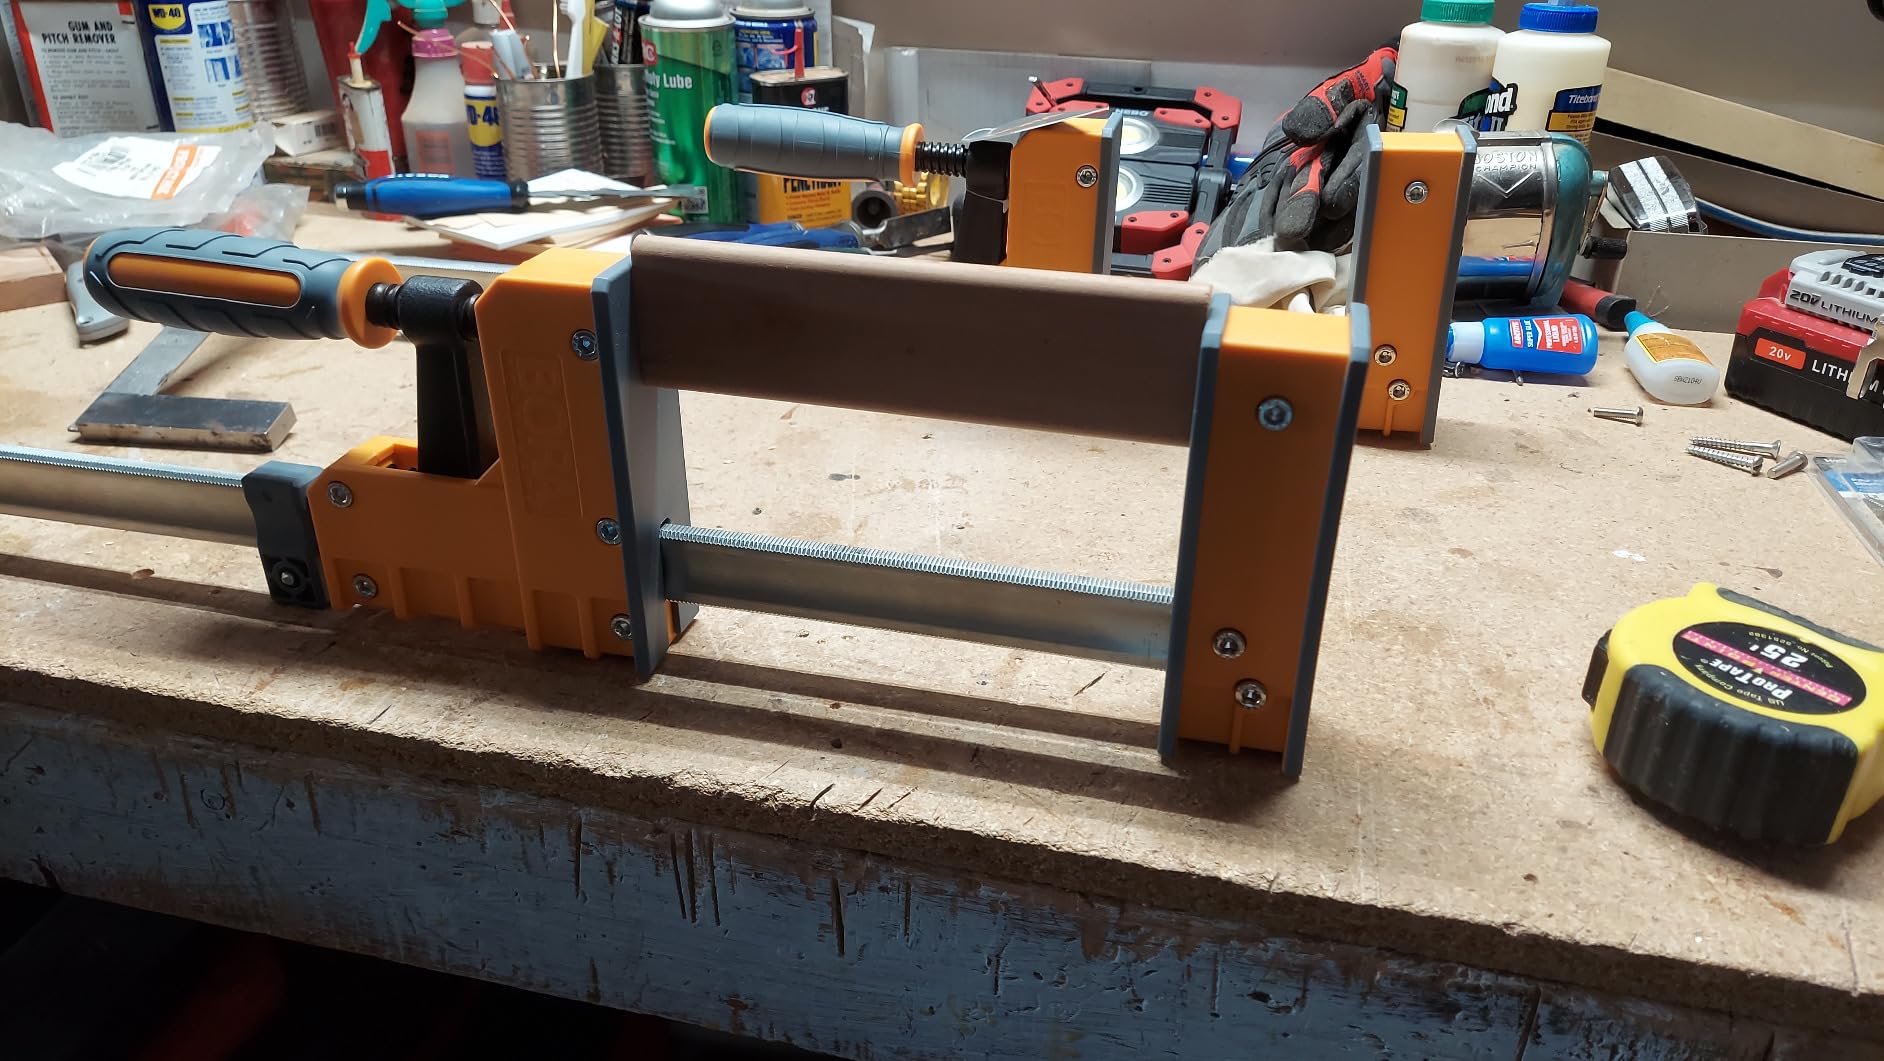
The Bora 31 in is built around one idea: spread the force. The jaw measures 3.5 inches across with padding over the full width, so pressure lands on a wide strip of the joint instead of a narrow line, and wide pressure is what keeps glue from starving and squeeze-out from disappearing.
Rated clamping pressure is 1100 pounds, and the padded jaw is the widest of any parallel clamp in this roundup. On a face glue-up of a cutting board or a panel, that width is the reason you get continuous squeeze-out along the seam rather than a broken dotted line.
Construction is deliberately different from the riveted competitors. The clamp is bolt-together, so if a component fails you replace the part instead of replacing the tool, and reviewers count that as a genuine longevity advantage. Three set-off spacers are included, where rival designs commonly ship two.
The passive lock jaw stays where you put it, which removes the fiddly business of chasing a jaw up a bar with glue on your hands. The large easy-grip handle is sized to move a 14 pound clamp without a struggle.
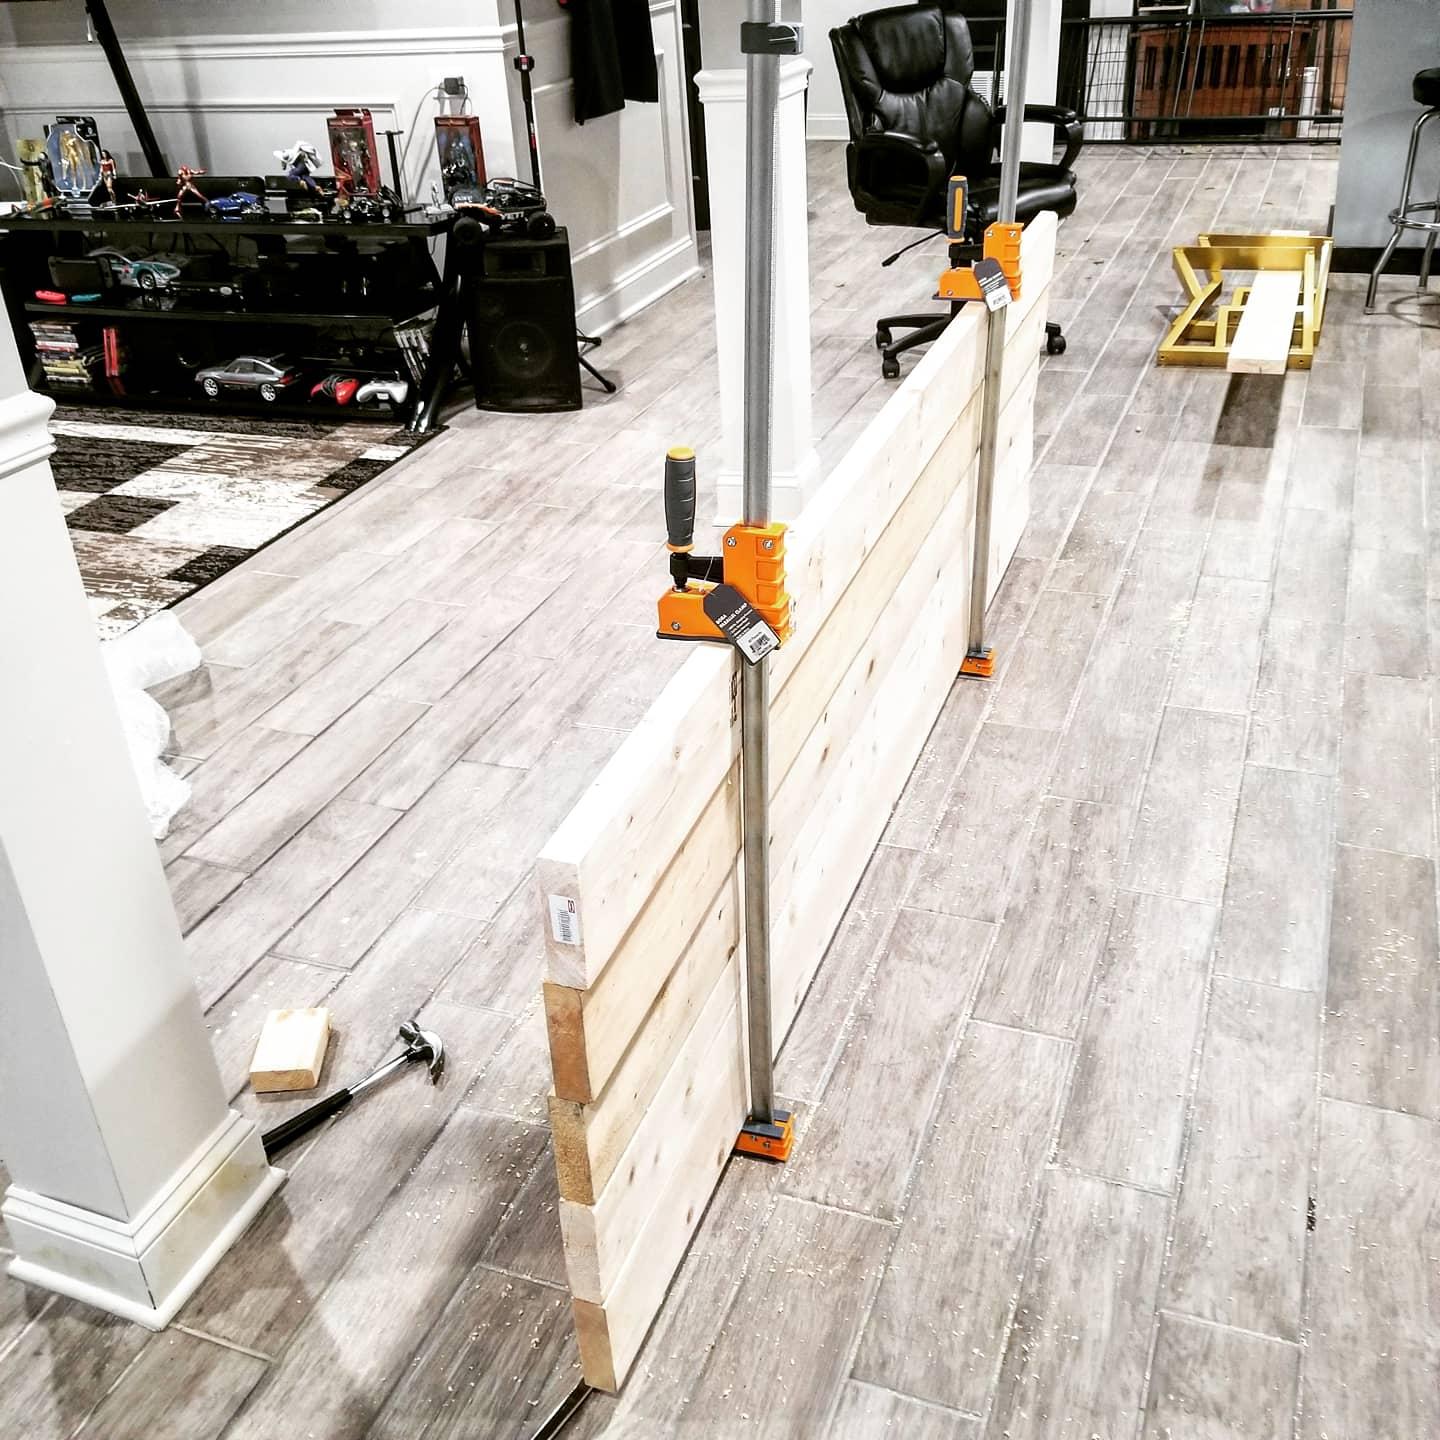
Sizes run from 18 to 50 inches in this family, so a shop can cover everything from a small case to a long table with one design language. The pack is a 2-pack of 31 inch clamps.
Ratings are 4.6 stars across 1252 reviews, and the customer support reported in those reviews is unusually responsive for the category, which matters on a tool with a replaceable-parts design.
Where the wide jaw earns its place
On a face glue-up, jaw width controls how much of the joint sees glue. A 3.5 inch padded jaw puts pressure across the whole seam, which helps a joint close evenly rather than pinching in the middle and starving at the ends.
The padding also means you can clamp a panel with a visible finish without building a caul for every clamp, which saves real time on a small shop.
Where it does not
At 14 pounds per clamp, this is the heaviest tool here, and a full set of them will absolutely be felt on a wall rack and in your arms. Two is a sensible starting number; eight is a commitment.
The warranty is one year limited, which is well short of the limited lifetime coverage on the Bessey heads in this roundup, so the bolt-together repairability matters more here than it would elsewhere. A small number of owners also report jaw teeth slipping despite the passive lock, and the clamp may need a screwdriver to open when it first arrives.
6. Peachtree 4 Way Pressure Clamps – Best for Flat Panels
Peachtree Woodworking Supply 2 Pack of 4 Way Pressure Clamps – Clamping Panels From All Four Directions. For Woodworkers, Cabinet and Furniture Makers
Top bottom side pressure
Notched bars to any length
2 assemblies per pack
1000 psi rating
Pros
- Pulls a panel in on all four sides at once
- prevents bowing buckling and racking
- notched bars let you build any length clamp
- side pads protect the material
- one rotating handle does the work
Cons
- Requires your own 2x2 or 2x4 for the frame
- needs multiple clamps beyond 12 in spacing
- dry-fit is required before real use
- more complex than a plain bar clamp
Every conventional clamp solves a panel by squeezing from two sides and trusting cauls to hold the middle down. The Peachtree 4 Way does the opposite: it pulls the panel in from the top, the bottom and both sides at once, so the panel is compressed as a whole rather than bent around a bar.
That geometry is the reason it exists. A panel bowed in the middle during glue-up is the single most common flaw in glue-up work, and a four-sided approach attacks it directly instead of compensating for it downstream.
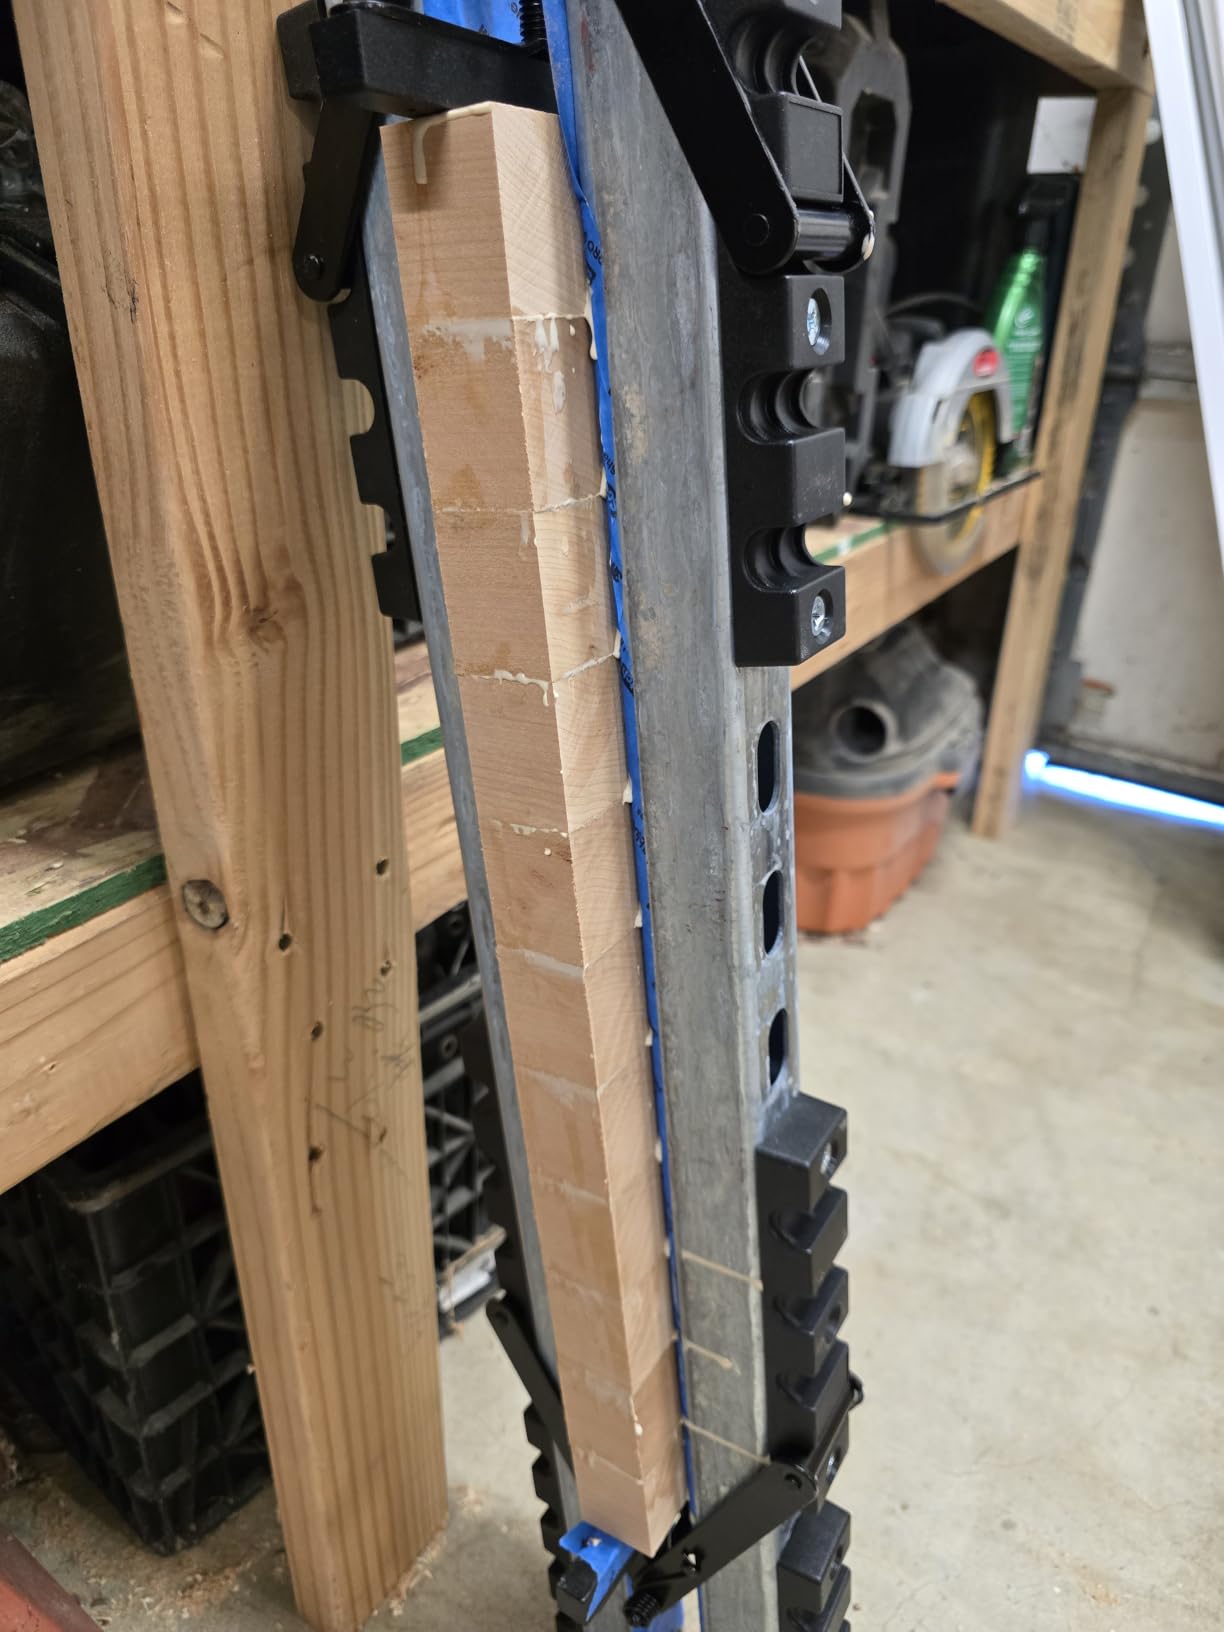
The bars are notched plastic, and the notches are the clever part. Slide the bar into a different notch and you change the clamp’s length, so two assemblies can be built up to span any panel you own. One pack gives you two full clamp assemblies, which is enough to work both ends of a table.
A single rotating handle draws all four sides inward at the same time, so you set pressure once rather than cranking four separate clamps in sequence. The rating is 1000 psi and the assembly handles boards up to 6 inches thick.
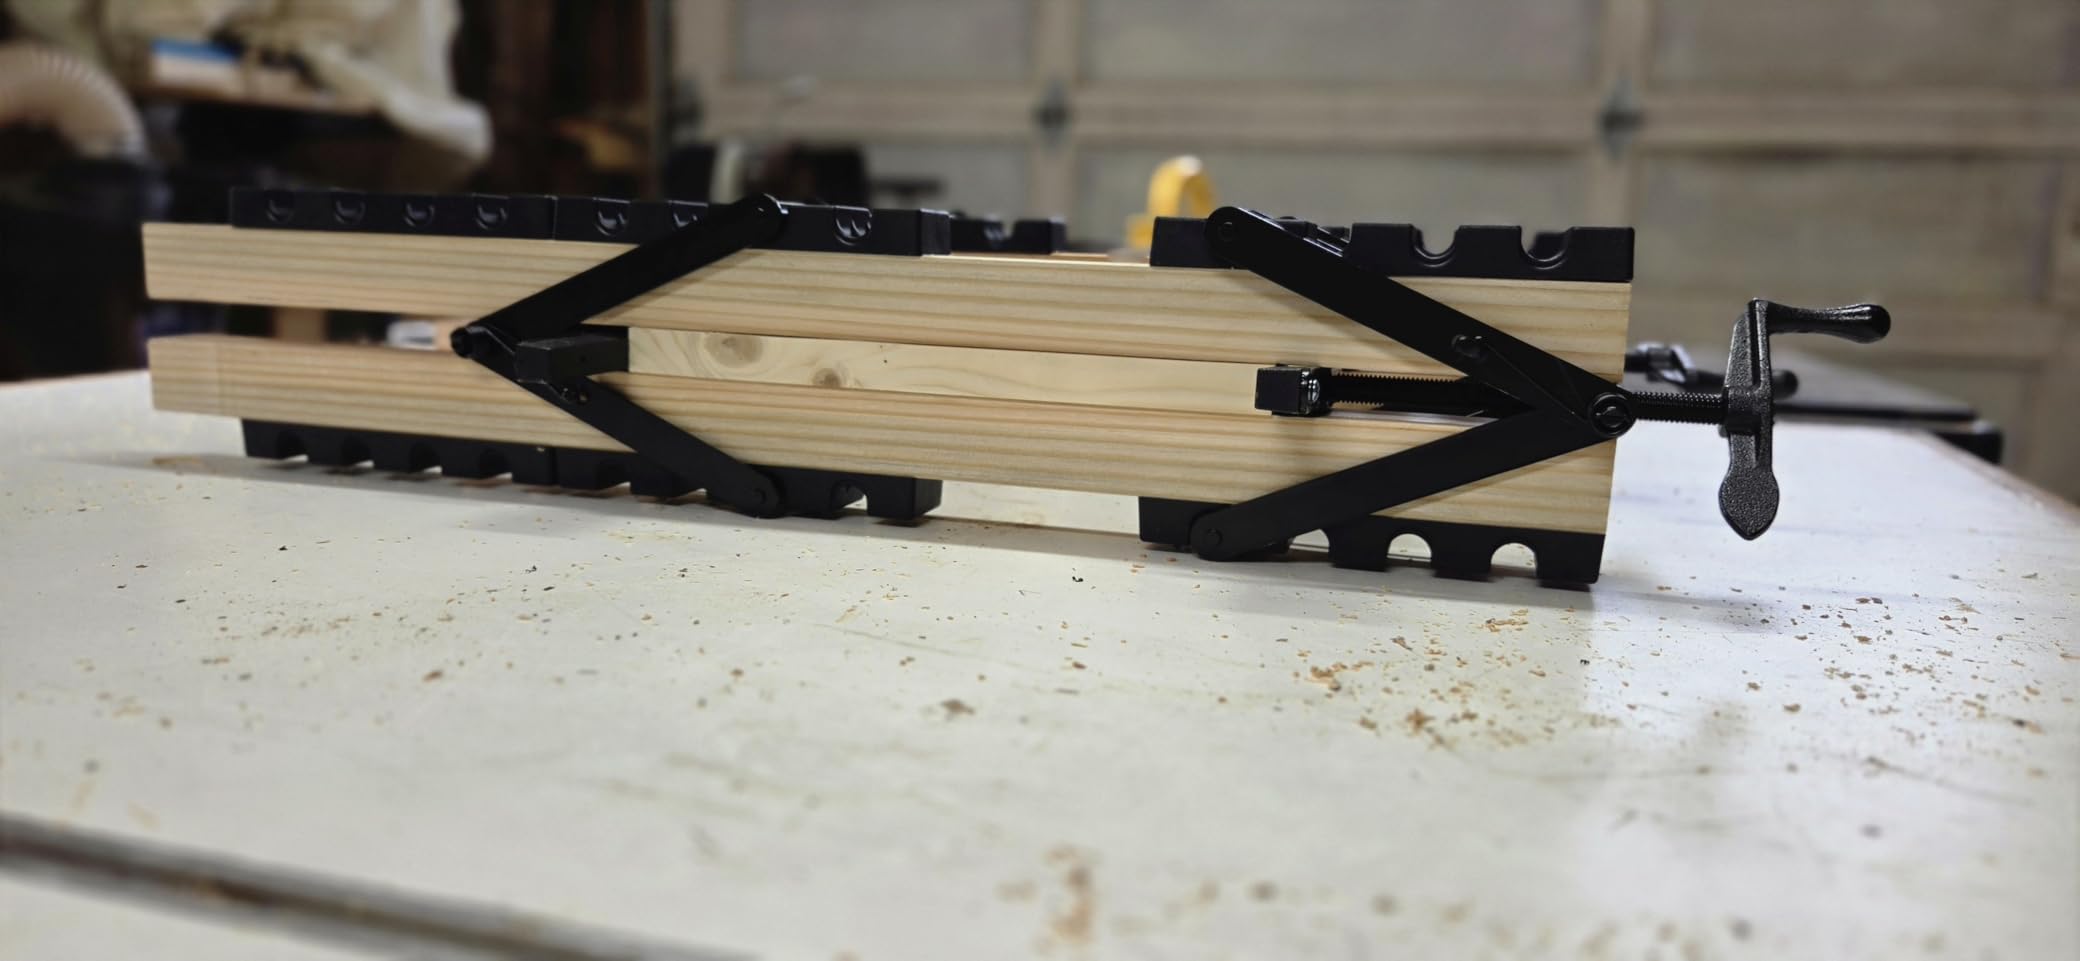
Side pressure pads are included, and the instructions call for placing a clamp every 12 to 18 inches for best results. That spacing rule is also your clamp count rule for this tool: it is not a one-clamp-per-panel situation.
You supply the wood for the frame, using 2×2 stock or a 2×4 ripped in half. That is a real extra step, but it also means the frame can be built to fit an awkward panel rather than forcing the panel to fit the clamp.
At 4.5 stars across 965 reviews, owners describe it as an innovative system that solves panel bow once you accept the setup routine.
Why four-sided pressure changes the result
On a wide panel, two-sided clamping plus cauls works until the cauls are slightly off. Four-sided pressure distributes the same total force across four surfaces, so the panel is compressed rather than flexed.
For a cabinet back panel, a table top or a door, the difference shows as a panel that comes off the clamps already flat, with no overnight press and no flattening glue-up the next day.
Where it asks more of you
The setup is a genuine project. You have to build the wooden frame first, dry-fit the assembly, and get the notch spacing right, and a first attempt that is rushed will not clamp a panel flat.
Because the guidance is a clamp every 12 to 18 inches, a table length panel needs several. This is a tool for someone who does panel work regularly, not for a single small project.
7. MLCS Merle Multi-Corner Band Clamp – Best for Irregular Shapes
MLCS – MLC-4879 9012 Woodworking Exclusive Merle Multi-Corner Clamp
23 ft steel band
2-5/8 in to 69 in range
4 corner heads
Cast aluminium body
2.6 lb
Pros
- Even pressure around a whole assembly at once
- adapts to square rectangular circular and irregular shapes
- steel band holds far more than fabric
- corner heads remove and reconfigure
- 3 year warranty
Cons
- Learning curve that rewards dry-fit practice
- plastic corner inserts can work loose
- rewind handle can snap back
- awkward locking lever for flat layouts
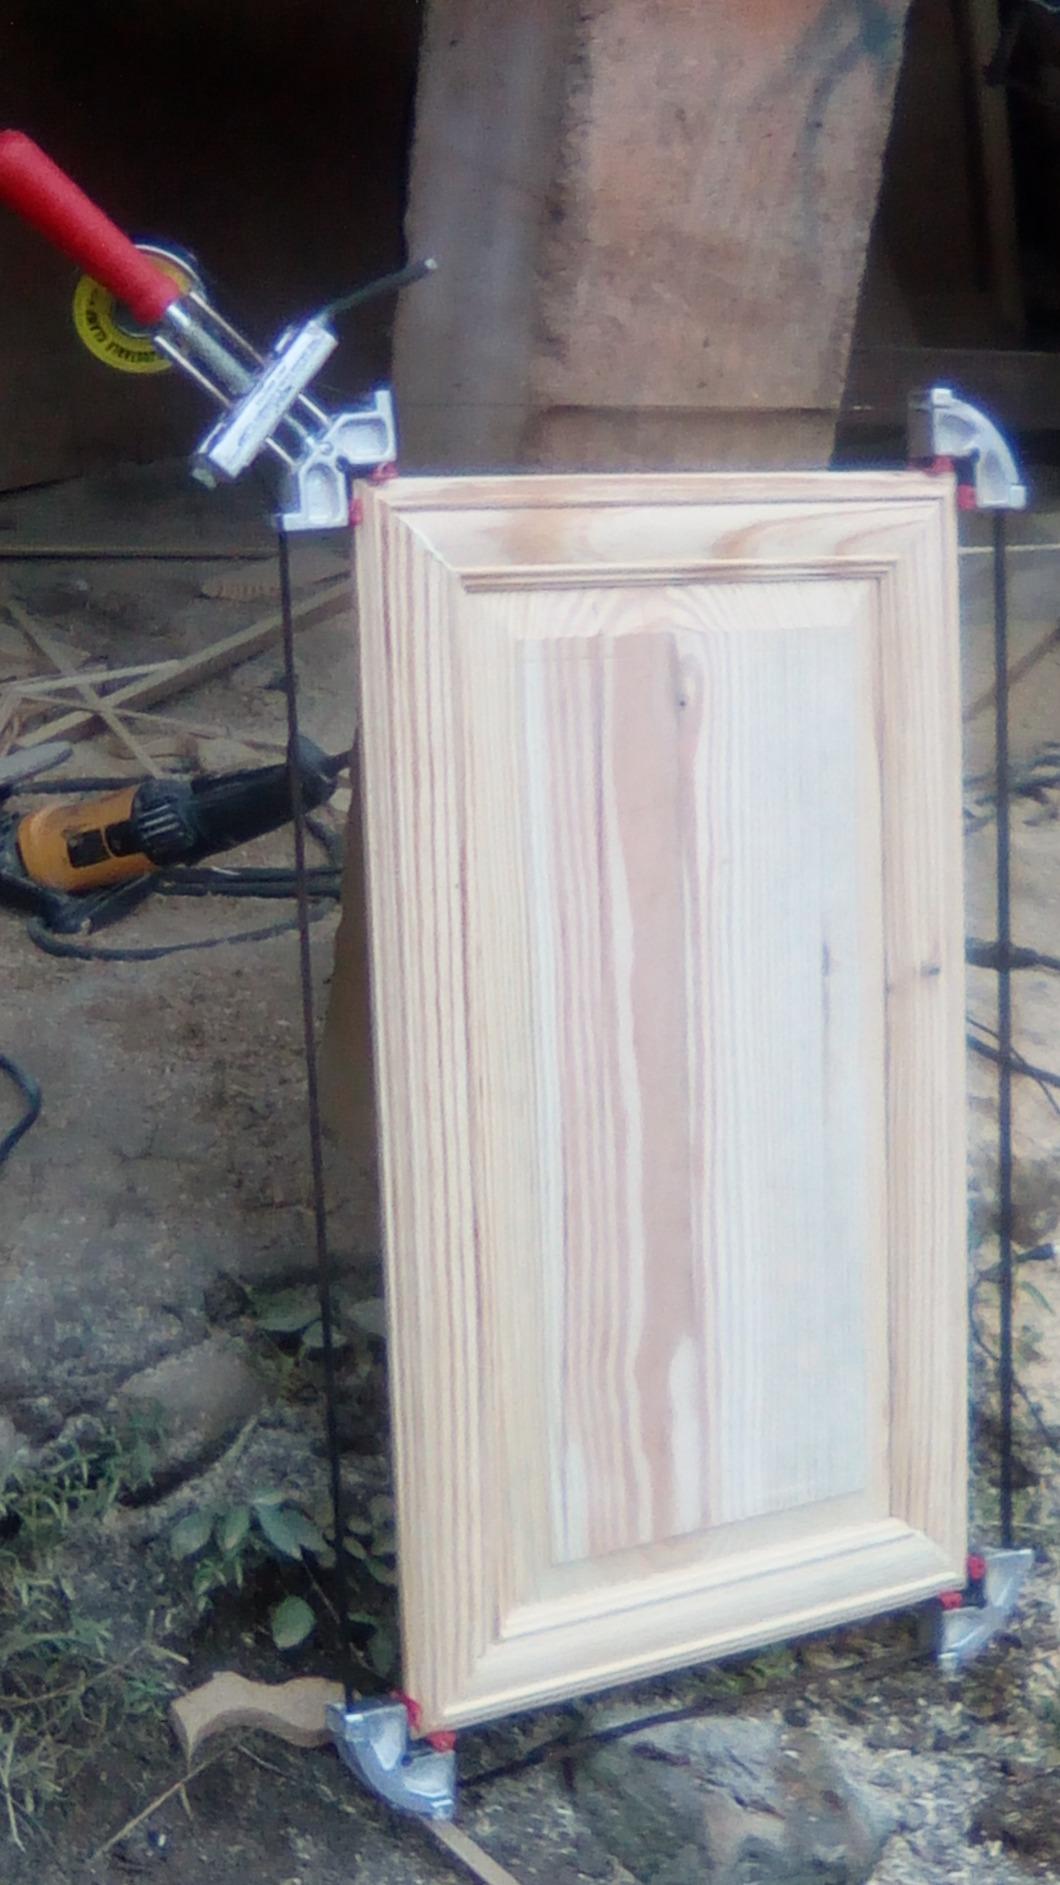
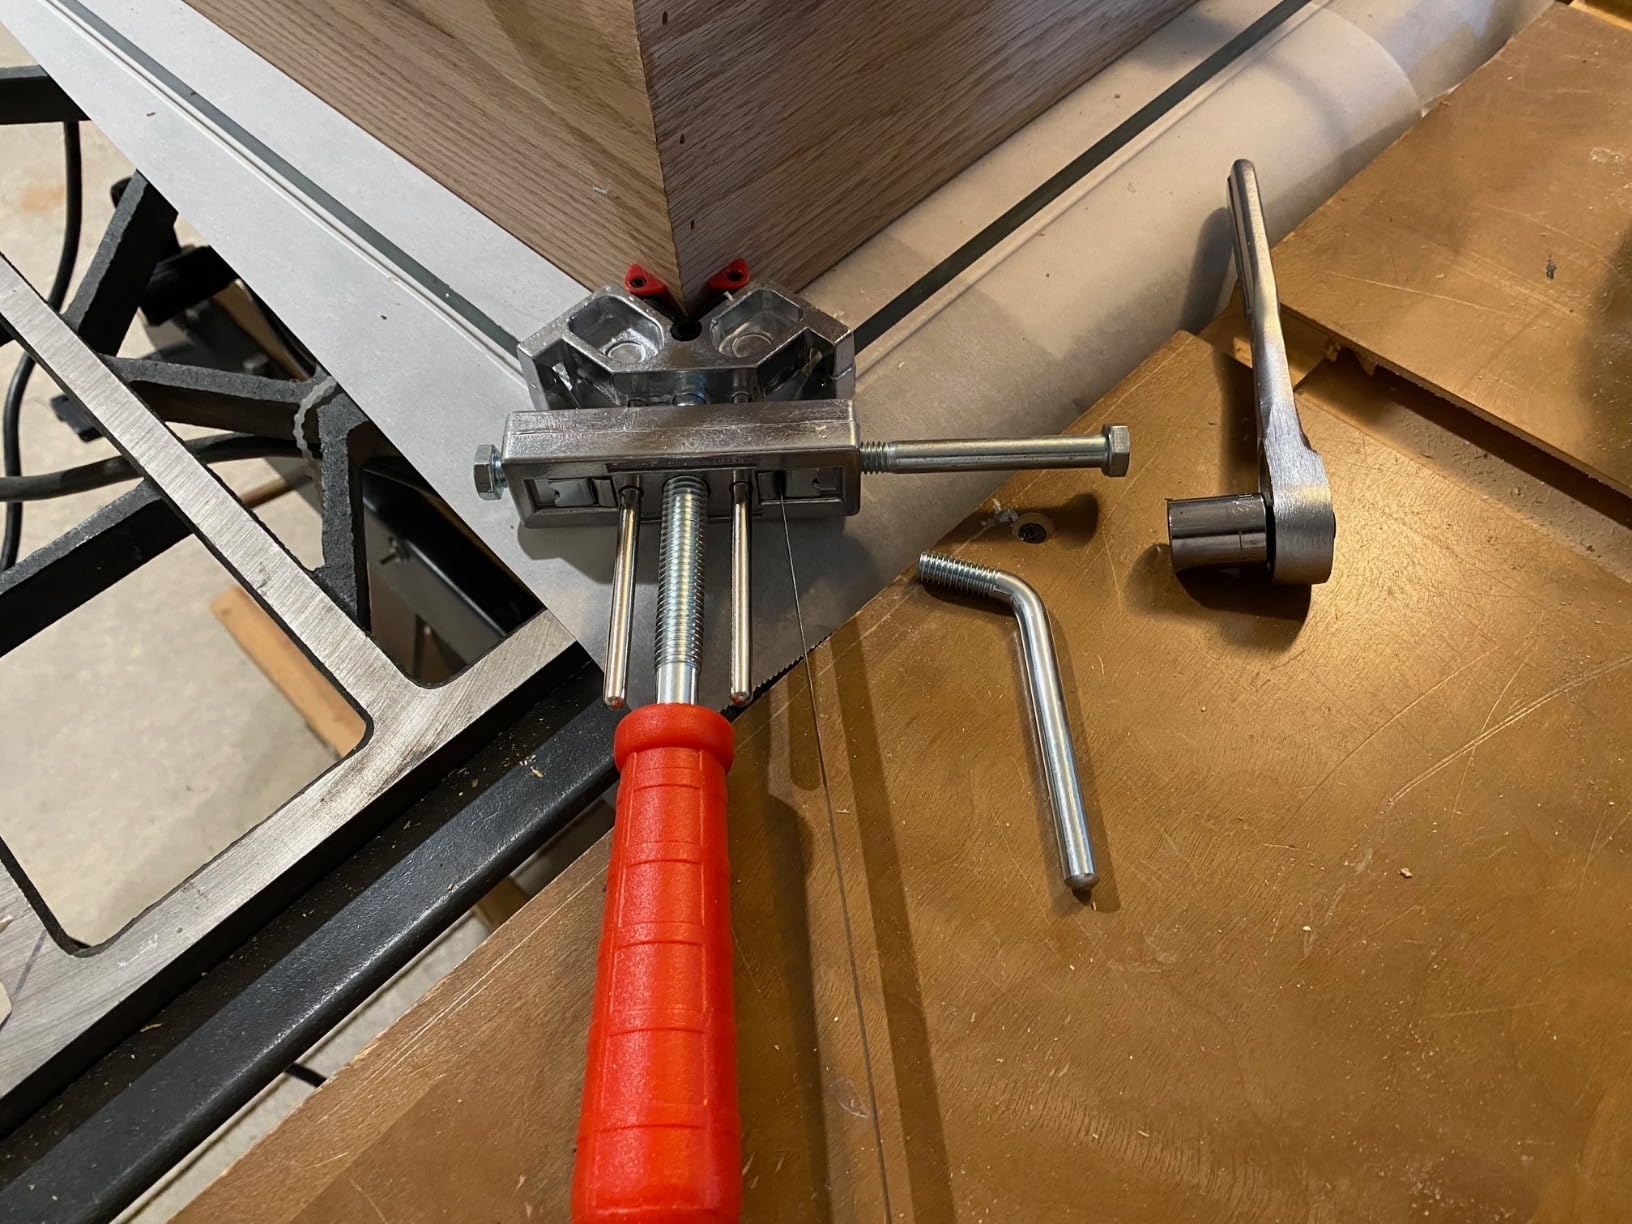
The Merle solves a problem no other clamp in this roundup addresses: clamping an assembly that is not a flat rectangle. Bands wrap the whole perimeter and tighten from one point, so a hexagonal top, a round pedestal base or a multi-sided box is held evenly on every side instead of at four corners that happen to be near the bar clamps.
The band is steel, not fabric, and that single choice is why this tool holds what it holds. A fabric band stretches and gives; a steel band pulls a warped frame straight and keeps it there while the glue cures. The reel is built into the body, with 23 feet of band and a dedicated lock and release lever.
Corner heads are pivoting, non-marring ABS inserts that adapt to the angle they meet. Four are included and they unclip, so you can reconfigure the same clamp for a different shape later rather than buying a second set. Range runs from 2-5/8 inch square up to 69 inch square, with a maximum perimeter of 23 feet.
Warranty is three years against defects in workmanship and materials, which is the longest fixed-term cover in this roundup, and replacement parts are available for the corner heads.
At 2.6 pounds the whole tool is light enough to carry in one hand and quick to get onto a bench, which is unusual for a clamp that covers a 23 foot perimeter.
Reviewers rate it 4.5 stars across 425 reviews and describe the adaptability as unmatched, with the caveat that it rewards practice. That is the honest version of the same statement: the first assembly takes longer than a conventional clamp, and the tenth takes seconds.
When a band clamp beats a bar clamp
Any assembly with more than four corners, or with a curved or angled profile, pushes a bar clamp into a corner and concentrates pressure in one place. A band wraps every edge and pulls the whole thing together evenly.
It is also the right answer for gluing identical parts in a jig, where the jig itself is the shape being held and the band applies pressure around the entire perimeter at once.
Where it needs practice
This is not a first-day tool. Dry-fitting without glue is essential, because the band takes up gradually and a hurried first pass can leave you with pressure on one corner only.
Owners report the plastic corner pieces working loose during clamping, the rewind handle snapping back, and the locking lever being awkward when the assembly is lying flat. All three are design quirks rather than failures, and all three are worth knowing before you rely on it for a one-off project.
8. WETOLS 90 Degree Corner Clamp Set – Best for Small Parts
WETOLS 90 Degree Corner Clamp Set, 4 Pcs Adjustable Clamps for Woodworking
4 clamps per set
Fits 3/16 in to 3/4 in
Spring loaded
13.44 oz total
Polyamide
Pros
- Holds a true 90 degree corner while glue dries
- four clamps in a set covers a square frame completely
- spring action is genuinely one-handed
- extremely light and portable
- works on corners and T-joints
Cons
- Polyamide is less durable than metal
- top out at 3/4 in thick material
- spring tension can weaken with age
- no meaningful clamping force for a panel
Corner clamps are the most underrated tool in a first clamp kit. They do one thing: hold two boards at exactly 90 degrees while the glue sets, and they do it without a bar, without a handle, and without a bar of clamp projecting into the work.
On a small frame, a picture frame, a box or a cabinet toe kick, that is exactly what you need. The alternative is a bar clamp across the joint with the handle sticking out at an angle into the glue line, which is awkward, and a non-marring pad in the way, which is worse.
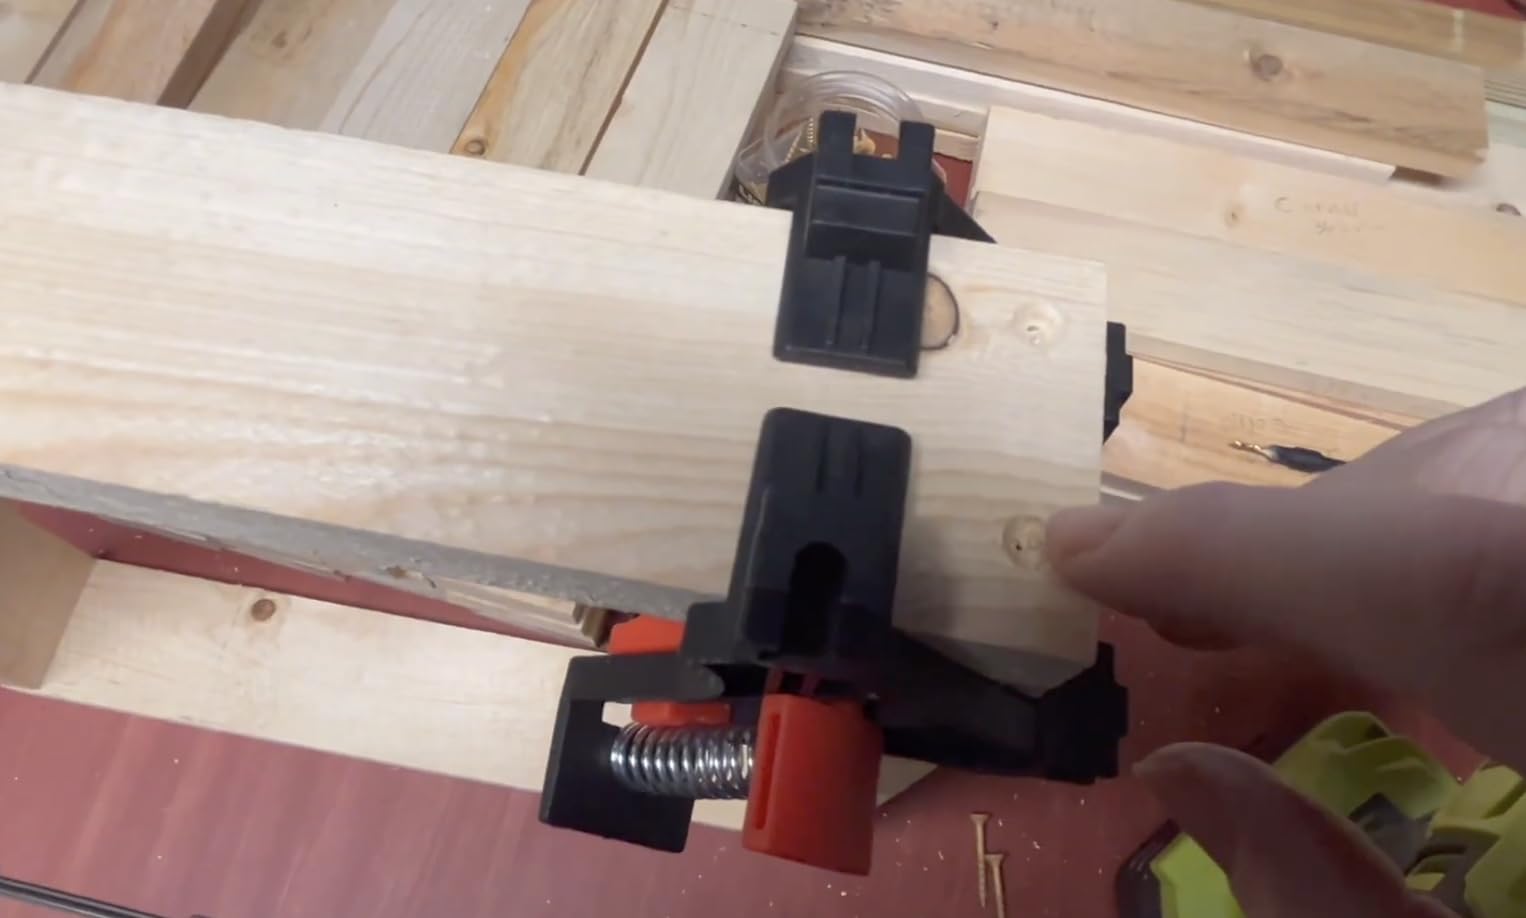
This set is rated for material from 3/16 inch to 3/4 inch thick, and a strong flexible spring keeps the boards locked without any adjustment. The four pack is the right quantity: one per corner on a square frame, with none left over and none missing.
Operation is single-handed. You hook the corner over the joint, press the spring, and the boards sit at 90 degrees. They also work on T-joints, which is how they get used for attaching a side to a frame that is already square.
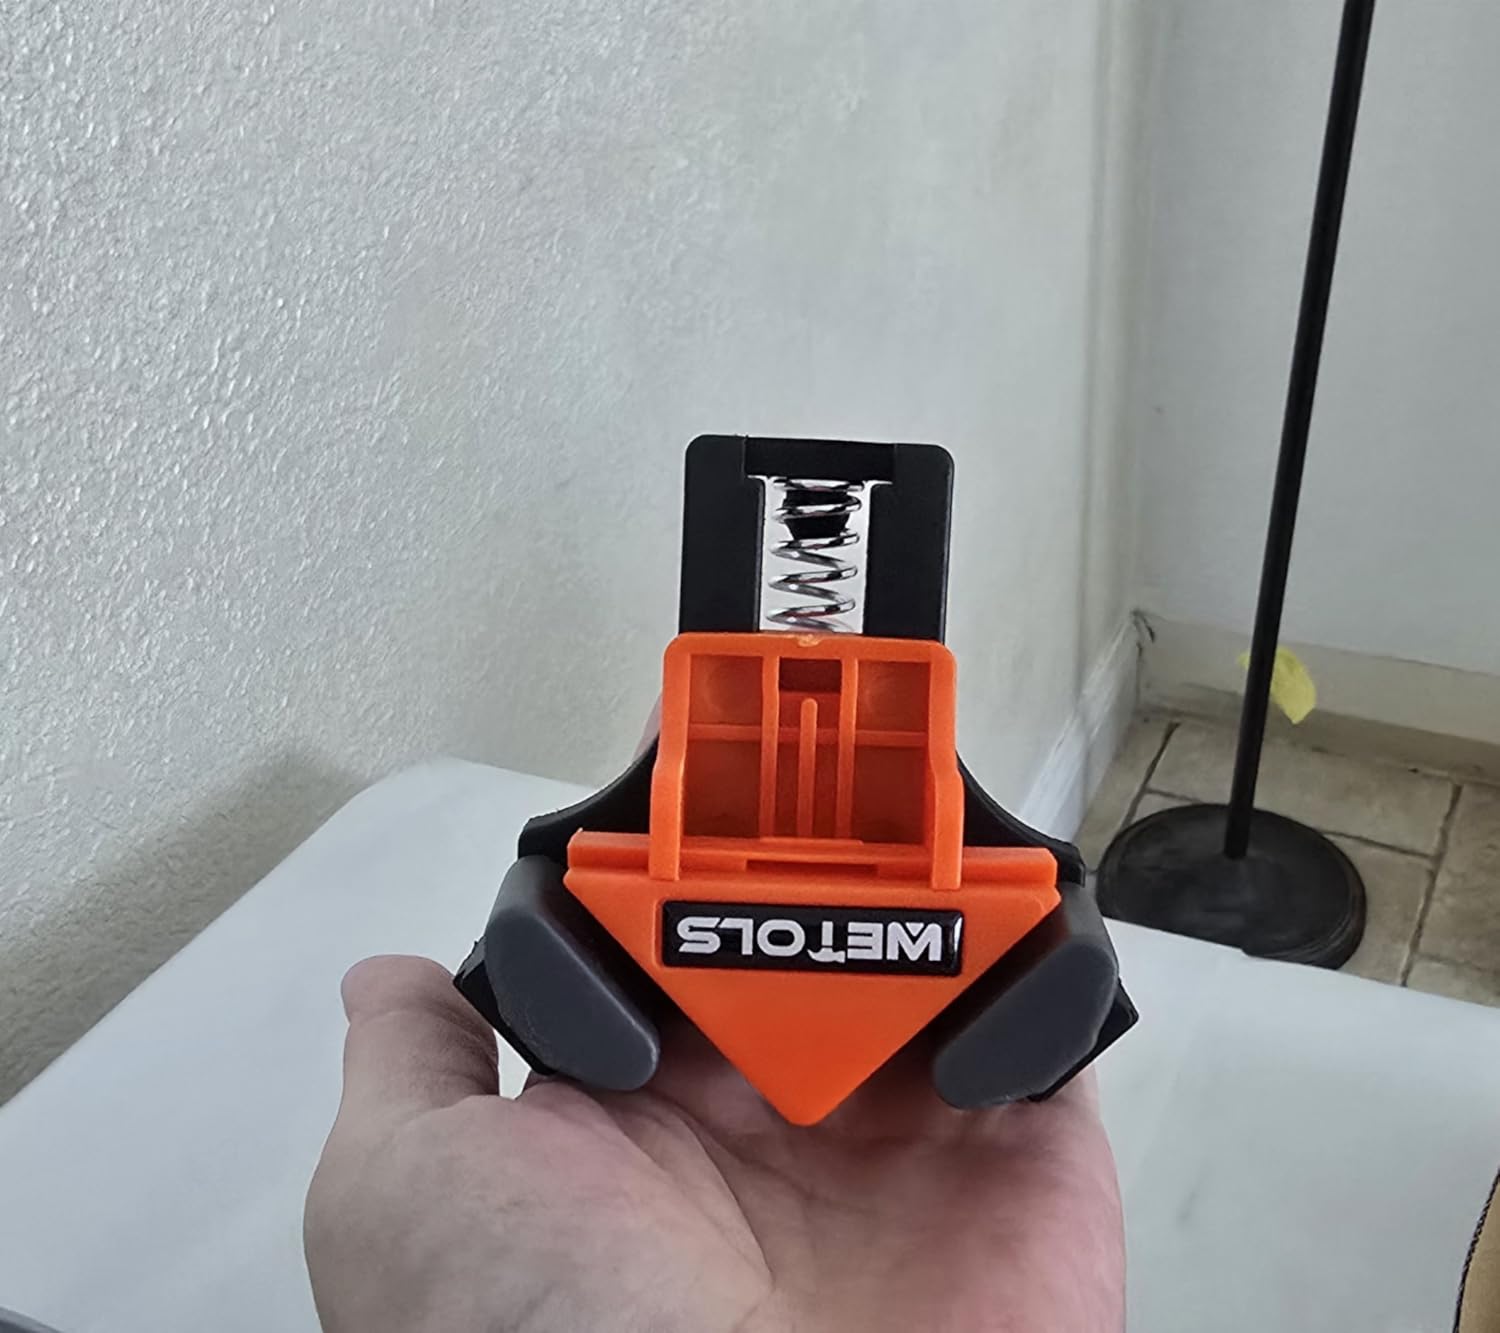
The body is polyamide, and the whole set weighs 13.44 ounces, so it lives in a drawer rather than on the wall. The set ships in a gift-ready box, which matters if you are building one as a present.
At 4.3 stars across 3862 reviews it is the highest review volume of any corner clamp on the shelf, and owners consistently frame it as excellent value rather than a professional tool. That framing is correct.
Why small assemblies need these more than big ones
A picture frame is too small for a bar clamp to reach cleanly, and the joint is too fragile for heavy pressure. A spring corner clamp applies just enough to hold registration and nothing more.
They also keep the joint visible, so you can see the glue line while you assemble and correct it before the squeeze-out skins over.
Where they stop
The 3/4 inch ceiling is real. Anything thicker will not seat properly in the throat, and forcing it can damage the clamp.
Polyamide is the weak point over a long life. The spring tension softens as the material ages, and a clamp that no longer holds firmly is worse than no clamp, because it fails quietly in the middle of an assembly.
9. Bessey GSCC4PK-C 4-Clamp F-Style Set – Best Starter Set
BESSEY GSCC4PK-C Clamp Set for Woodworking, F-style with Wood Handle, Replaceable Pads, 2 x 6 In and 2 x 12 In, 600 lb, Red/Black/Silver
2 x 6 in plus 2 x 12 in
600 lb per clamp
Cast iron jaws
2.64 kg for the set
Serrated rail
Pros
- Four clamps in one pack covering the two most useful lengths
- 600 lb per clamp is real clamping force
- cast iron jaws resist flexing
- replaceable pads included
- wooden handles are comfortable
Cons
- Medium duty only
- wood handles feel narrow and can be slick when painted
- set covers only 6 in and 12 in lengths
- not sized for wide panels
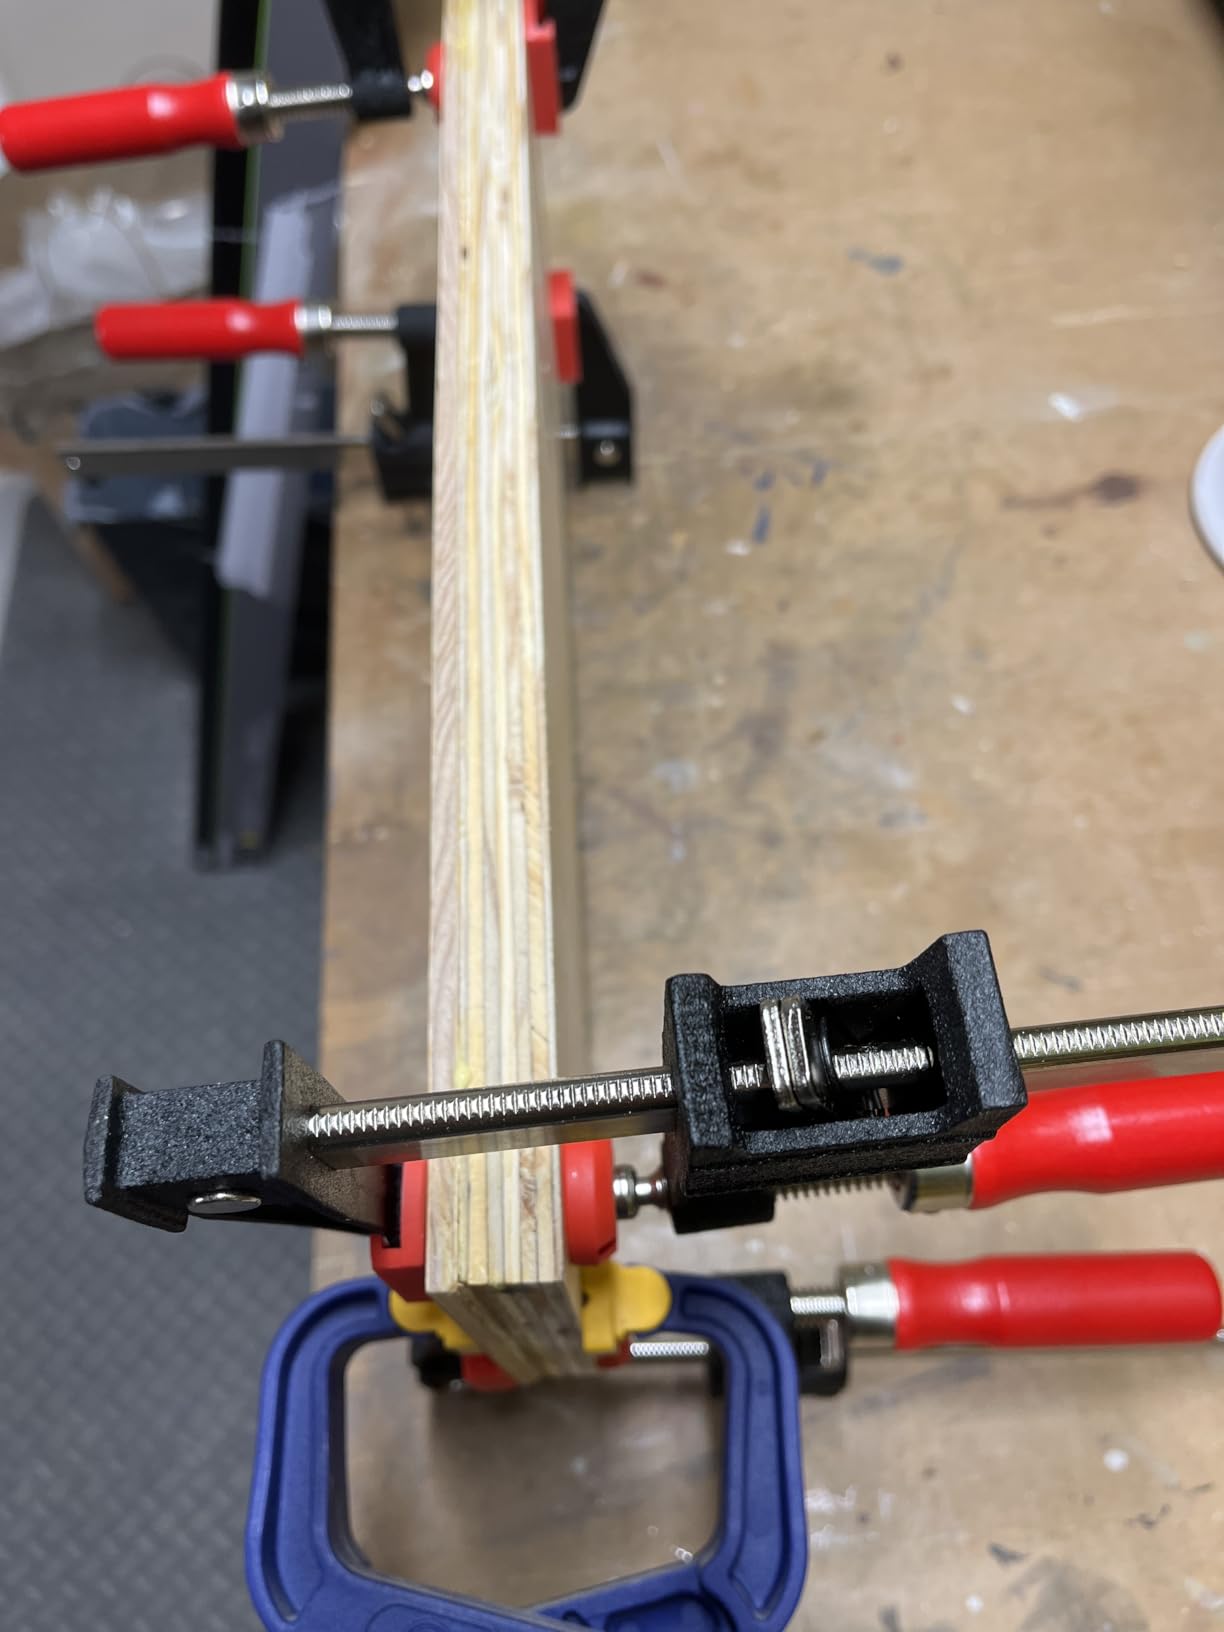
If you own one clamp set today, this is the most sensible version of that purchase. Two 6 inch and two 12 inch F-style clamps is the combination that covers the overwhelming majority of glue-ups in a home shop, from a small box to a standard door-sized panel edge.
At 600 pounds of clamping force per clamp, this is a meaningful step up from a light duty polymer clamp. That number is enough to close a glue line on real lumber, and the cast iron fixed and sliding jaws do not flex the way thin stamped jaws do.
The rail is serrated, which is what keeps the sliding jaw from creeping down the bar as you tighten. On a cheap F-clamp the jaw can walk, and a walking jaw changes your pressure angle mid-glue-up. The serration is a small feature that solves a persistent annoyance.
Handles are wood, and they are comfortable through a long session in a way many coated steel handles are not. Replaceable protective pads are included, so a clamp that eventually marks a face can be fixed rather than retired.
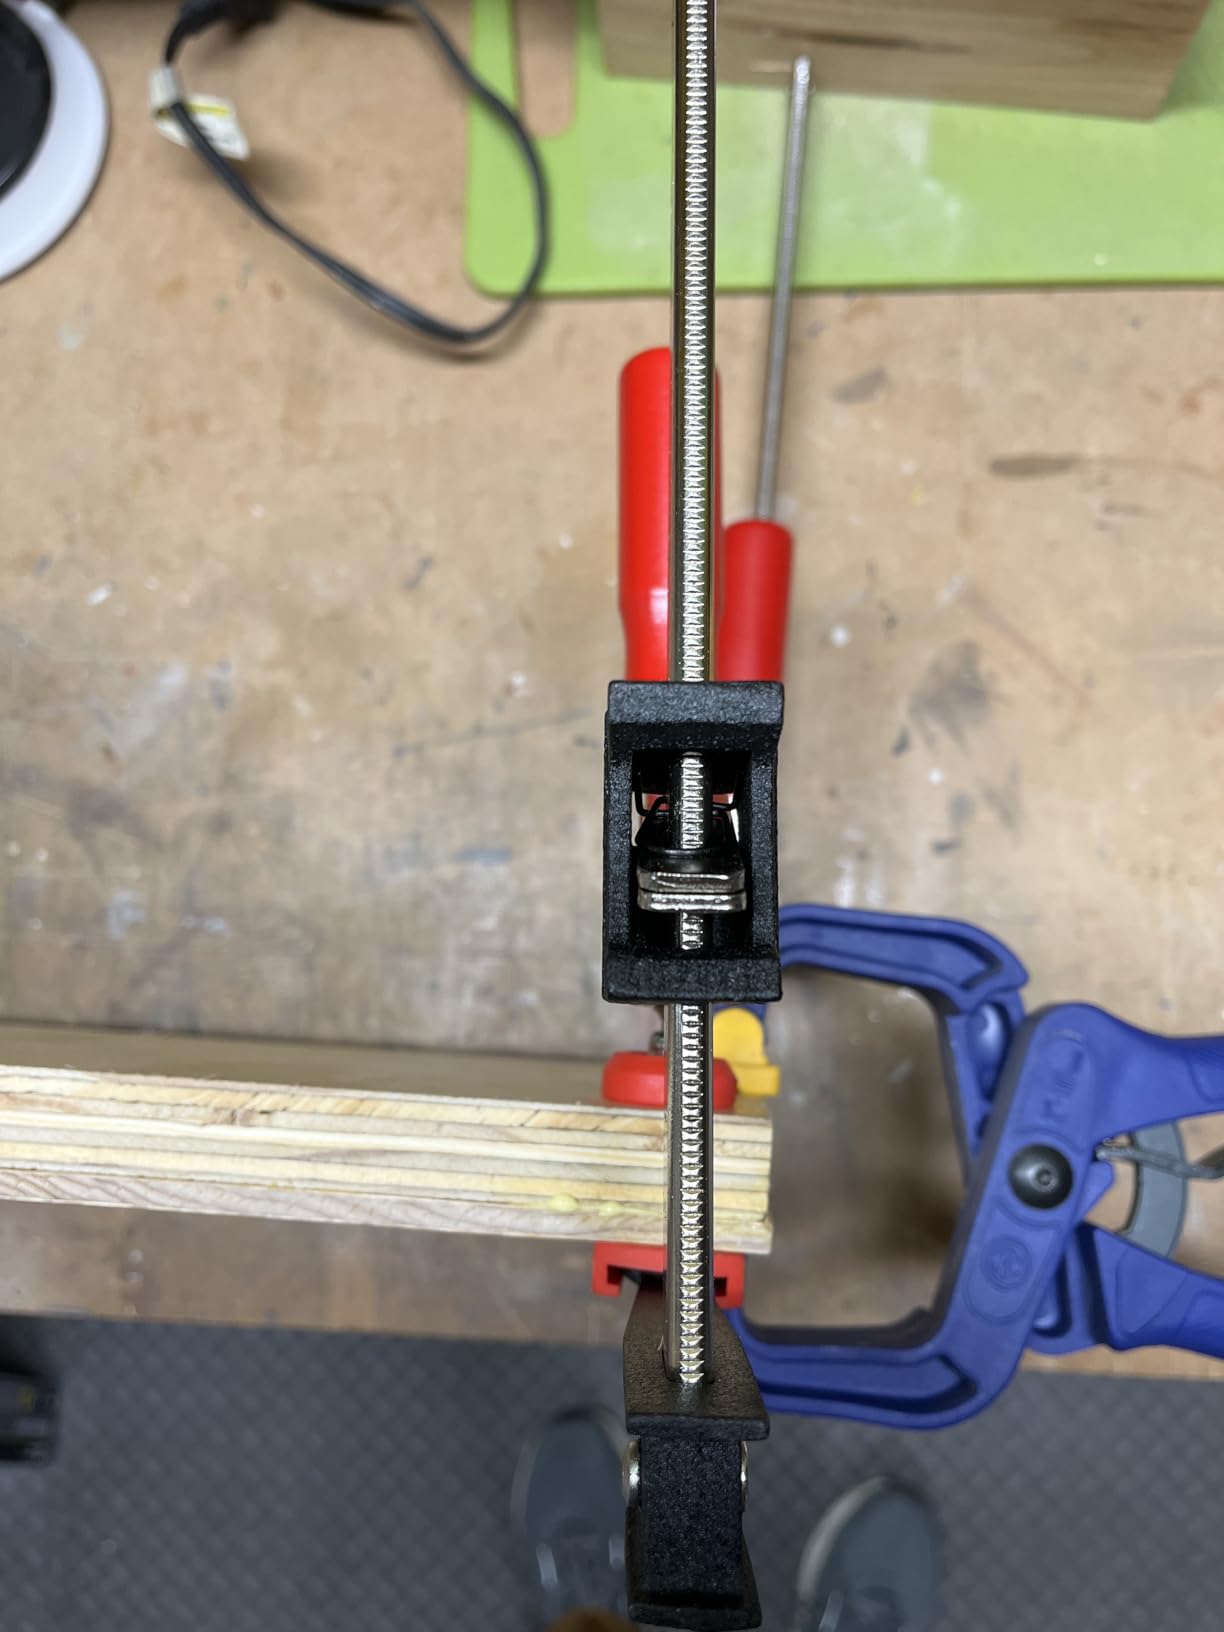
The set is powder coated for durability, and the whole pack weighs 2.64 kg. Bessey builds this family in multiple variants, so you can move up in length later without changing brand or feel.
Ratings sit at 4.5 stars across 238 reviews. That is a smaller review pool than the other bar clamps here, and the honest reading is that this is a well-liked mid-volume product rather than a cult favourite.
Why a 4-pack of mixed lengths beats four of one length
Most glue-ups are not one size. A 6 inch clamp handles a small box, a frame rail or a drawer side, and a 12 inch clamp handles a door panel edge or a worktop glue-up. Buying a mixed pack means neither job forces you to wait for a different clamp.
Four clamps is also the minimum for a stable glue-up on a typical part, so a four pack is the smallest set that can actually finish a job without improvisation.
Where it is not enough
Medium duty is the honest word. For a thick, cupped or wide panel you will want a parallel clamp with more force and a flat jaw, and for a long panel you will want 24 inch or longer reach.
Some owners find the wooden handles narrow or slippery, particularly once they pick up finish. It is a comfort note rather than a defect, and it is the one thing we would check in person if handle feel matters to you.
10. Bessey KREK2440 K Body REVO Clamp Kit – Best for Cabinet Carcasses
BESSEY KREK2440 K Body REVO Clamp Kit, 2 x 24 In., 2 x 40 In. and 1 set of KP Blocks – 1700 lbs Nominal Clamping Force. Spreader, and Woodworking Accessories – Clamps and Tools for Cabinetry
1700 lb nominal force
2 x 24 in plus 2 x 40 in
KP blocks
12.5 lb kit
Lifetime warranty
Pros
- Highest clamping force in the roundup
- parallel jaws hold 90 degrees with no slip
- KP blocks allow separate pressure per corner
- hex key socket adds up to 17 Nm of torque
- lifetime warranty against manufacturing defects
Cons
- Very heavy at 12.5 lb for the kit
- hex key operation has a learning curve
- more than most home shops need
- oversized for small work
This kit is the professional end of the roundup. At 1700 pounds of nominal clamping force it produces the highest clamping force of any pick here, and the reason is not marketing: it is a cold drawn steel rail with a large clamping surface area designed to distribute that force without deflecting.
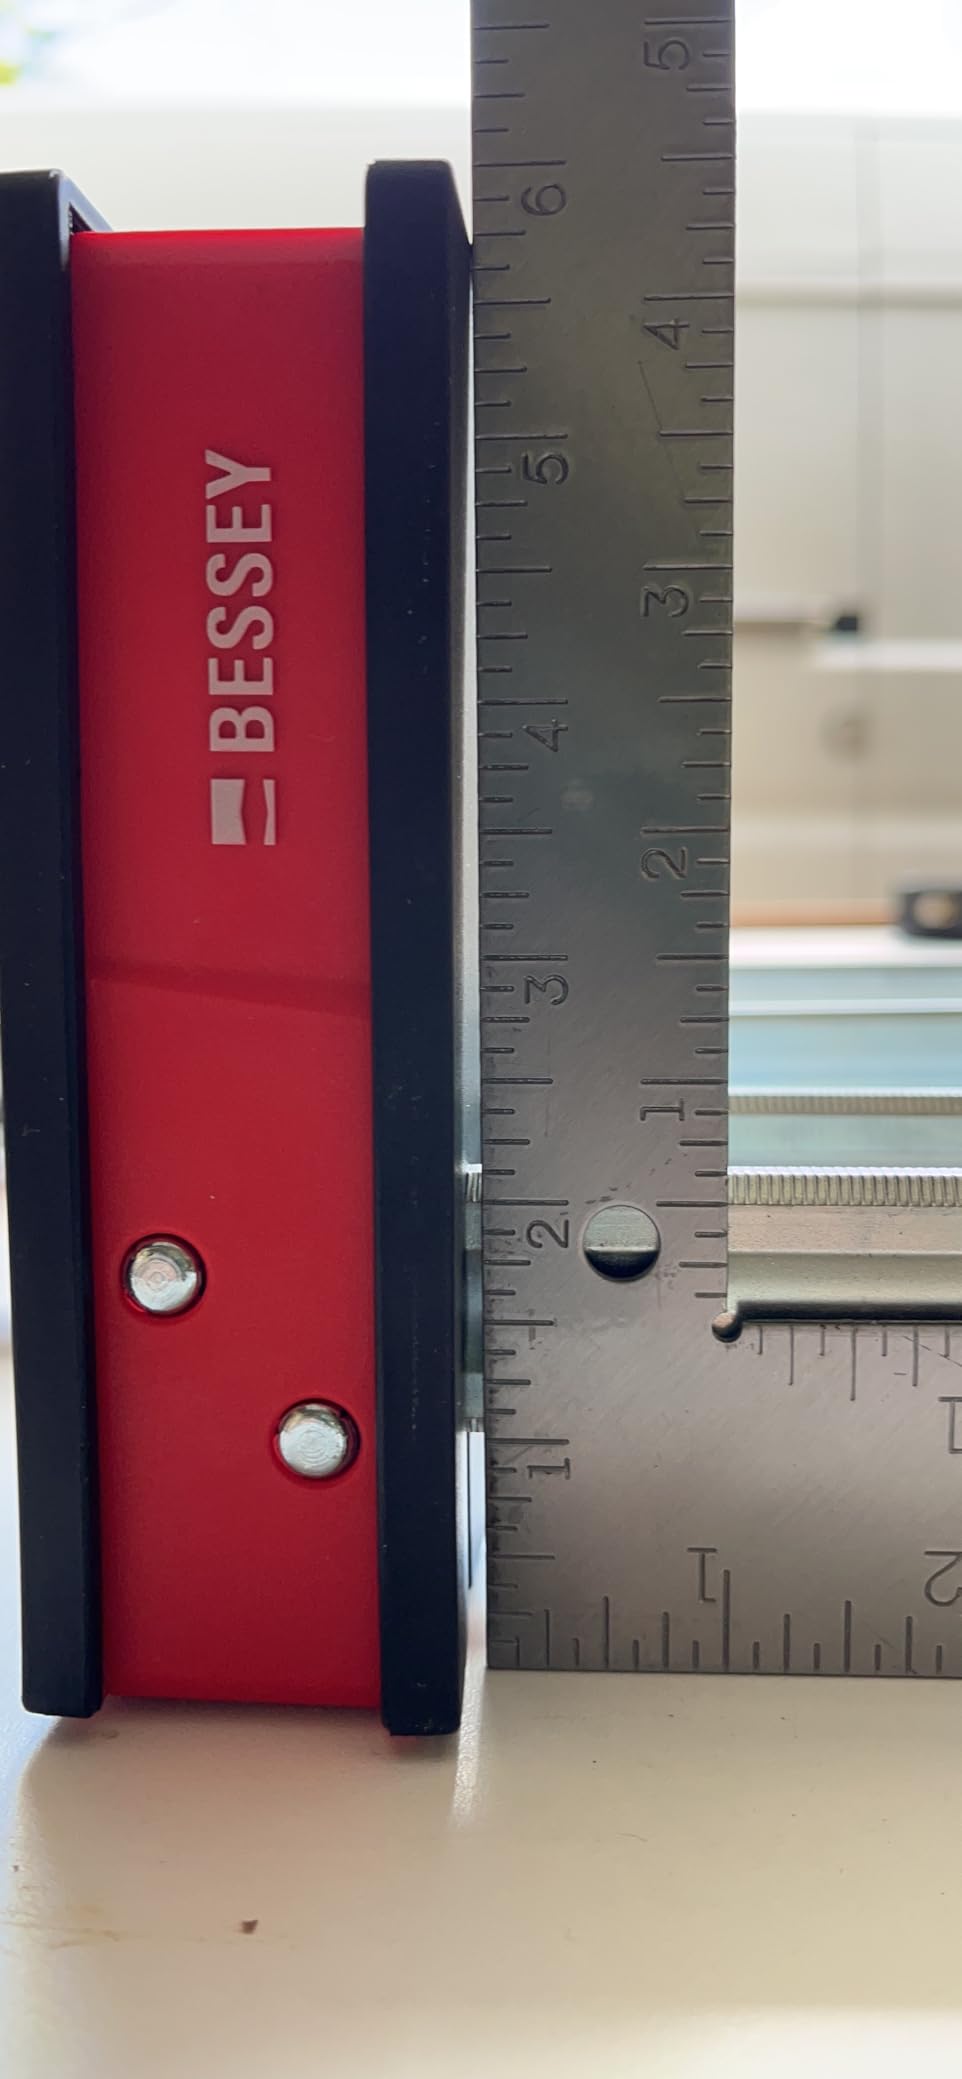
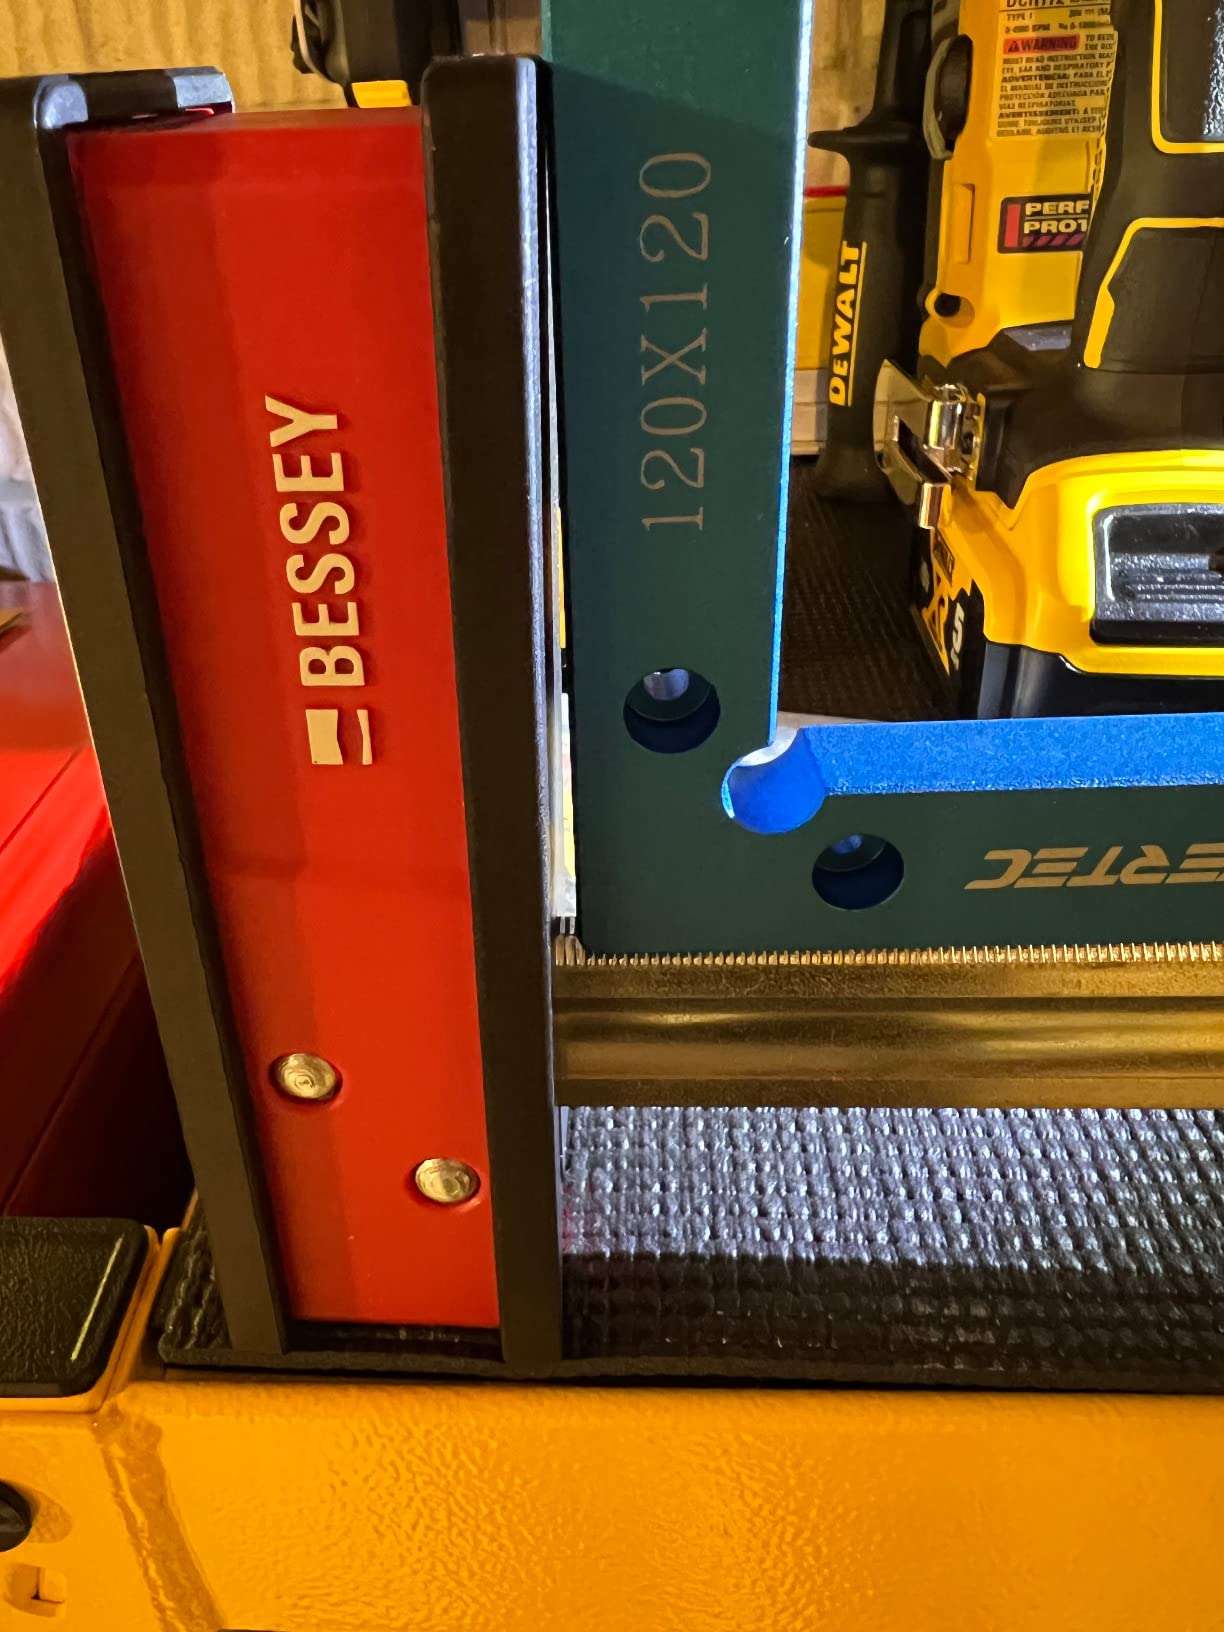
The kit contains two 24 inch and two 40 inch K Body REVO clamps plus one set of KP framing blocks, four blocks to a set. For cabinet carcass work those blocks are the point. A 90 degree clamping block lets you set pressure independently at each corner, so a carcass squares up evenly instead of going out of square on the third corner.
The handle is a two-component ergonomic design with a steel socket, and it accepts a hex key for up to 17 Nm of additional torque when hand strength is not enough. Once a clamp is seated on a heavy joint, the extra torque is the difference between a fully closed seam and a gap.
Three replaceable pressure caps are included to protect both the clamp and the workpiece, and rail protection pieces stop the rail from marking the joint line. The operating jaw stays positioned during setup, which reduces the fiddly work of getting a jaw to sit where you want it on a sticky, glue-covered bar.
Warranty is a lifetime warranty against manufacturing defects, and the clamps are listed as made in Mexico. Weight for the kit is 12.5 pounds, which is a serious amount of steel to hang on a wall and a real consideration in a small shop.
At 4.7 stars across 180 reviews this is the lowest review volume in the roundup, so judge it on the specification and the warranty rather than on crowd sentiment. Buyers who use it describe it as a buy-once investment for serious cabinetmakers.
Why the framing blocks matter
A cabinet carcass has four corners and each one is a separate joint with its own gap. Setting all four by eye is how carcasses end up out of square, and no amount of squeezing afterwards fixes it once the glue is set.
A 90 degree clamping block gives each corner a fixed reference, so you can set each one to the same squeeze and walk away. For repeat production this turns a careful job into a routine one.
Where it is more than you need
Forty inch clamps and 1700 pounds of clamping force are aimed at thick, hard, wide material. On a small shop panel or a picture frame the extra weight and torque make the work slower, not better.
The hex key torque step also has a learning curve, and for a first-time builder it is one more unfamiliar thing to get wrong. Buy this when a kit of 24 inch clamps starts to feel limiting, not before.
How Many Clamps Do You Actually Need for a Glue-Up?
The honest answer is that clamp count is a function of workpiece length, not of clamp brand. The rule most experienced woodworkers use is one clamp per 12 to 18 inches of joint, with a minimum of four for anything that needs to stay flat. The Peachtree instructions in this roundup state the same spacing, which is a good sign that the number is not folklore.
Below that spacing, the middle of the panel has no pressure on it at all, and it is free to bow as the wood dries. Above that spacing you are adding clamps that do nothing except take up wall space.
Use this as your starting point, then adjust for the material. Thin, flat, quartersawn material barely needs help. Thick, flat-sawn, cupped or figured material needs more clamp points, more cauls and slower application.
One more variable ties clamp count to the glue itself. The clamps have to be on the joint before the glue skins over, because once it does you can no longer push the parts together. If getting ten clamps onto a panel takes longer than your glue’s open time, you have a clamp count problem whether or not you owned the clamps.
This is the argument for owning a few extra clamps rather than stretching. A staggered line of three clamps on a wide panel applies force at three points, and the two unsupported sections between them are the sections that end up cupped.
Which Clamp Type for Which Glue-Up
Start from the shape of the joint, not the tool. These are the glue-ups most people build, and the clamp family that suits each one.
Panel glue-ups reward flat parallel jaws, because the job is to compress the panel without flexing it. The Jorgensen Cabinet Master 24 in is built for exactly this, and the Peachtree 4 Way goes further by pulling the panel in from all four sides at once.
Edge glue-ups are the most forgiving. You want even pressure along a straight line and enough clamp points to hold the boards in register. Bar clamps, parallel clamps and pipe clamps all work, and this is where a mixed set of lengths pays off.
Face glue-ups of cutting boards and panels need wide, padded jaws so pressure spreads along the seam. The Bora 31 in, with its 3.5 inch padded jaw, is the clearest example, and the Jorgensen 36 in deep-reach pads are a good second choice.
Carcass and frame assembly is where blocking helps. The Bessey K Body REVO kit with its KP framing blocks sets each corner independently, and the WETOLS corner clamps handle the small frame work where a bar clamp cannot reach.
Long stock glue-ups are a reach problem, not a force problem. You need clamps that span the full length of the joint, which is where the Bessey pipe clamp head and the Jorgensen 36 in both earn their place.
Irregular or multi-sided assemblies need a band. The MLCS Merle wraps the entire perimeter and holds a hexagonal or curved frame evenly, which no bar clamp arrangement can do.
Clamping Force, Throat Depth and Jaw Quality
Most clamp specifications are full of numbers that mean very little. Here is what actually determines whether a glue-up goes well.
Clamping capacity is the maximum jaw opening, the width of joint the clamp can span. Miss it, and the clamp cannot be used at all on the work in front of you.
Throat depth is how far the fixed jaw reaches back from the bar. A shallow throat can only reach joints that sit right at the end of the clamp, which is why a shallow-throat clamp forces you into an awkward stance on a door panel.
Clamping capacity versus clamping force is the distinction buyers get wrong. Force tells you how hard the clamp can push. It says nothing about how evenly that push is delivered.
Jaw deflection is how far a jaw bends under load. A jaw that deflects presses a line instead of an area, which starves the glue at the edges of the joint and produces a weak, uneven bond.
Jaw pad material decides whether you need cauls. Soft non-marring pads let you clamp a finished face directly. Hard or narrow metal pads print into soft wood, and then a caul is mandatory rather than optional.
On force specifically, the useful range for wood glue is far lower than most listings suggest. The claims in this roundup run from 150 pounds on the light duty WORKPRO pair to 1700 pounds nominal on the Bessey REVO kit. Wood glue needs enough pressure to close the joint, not enough to crush the cell walls, and the practical working range sits in the middle of that list.
Bar finish is worth a note too. A glossy bar gathers hardened glue and eventually stops moving smoothly. Regular wipe-down, and for a long glue-up, a film of paste wax on the bar, keeps the handle travelling freely. Canadian Woodworking regulars specifically recommend the wax, and it is cheap insurance on a big job.
How to Run a Glue-Up That Stays Flat
Good clamping is half about which clamp you bought and half about the sequence. Six steps keep a panel flat.
1. Dry clamp first. Set every clamp in position, snug them lightly, and check the joint before any glue goes on. Correct a shifting assembly while it is still dry.
2. Plan the cauls. If the material is anything other than dead flat, lay out cauls across the panel at the points where your clamps are not. Cauls spread a narrow jaw into a wide, even face.
3. Watch the open time. Glue has a working window and it is shorter than most beginners think. Know roughly how long it takes you to clamp the whole assembly, and if it is longer than the open time, clamp from one end in a single pass rather than working back and forth.
4. Glue and clamp from one end. Start at the far end and work toward yourself so you can see the joint close as it goes. Alternate clamps left and right so pressure builds evenly instead of driving the assembly sideways.
5. Check for registration. Run a finger along the joint line, sight down the edge, and confirm the assembly has not walked before the glue skins. This is the last moment you can fix alignment.
6. Remove in reverse. Loosen the clamps in the same order you tightened them, from the first to the last, and lift rather than drag the assembly off them.
On how long to leave clamps on, the practical answer is that PVA glue is firm to handle well before it is fully cured. Wait until squeezing the joint no longer moves it at all, then release the outer clamps first and leave the centre ones on a little longer. There is no benefit to leaving clamps on for hours once the glue has gone solid, and there is a real risk of printing the joint.
Clamp Failure Modes and a Five-Point Pre-Glue-Up Check
A clamp failure during a glue-up is not a near miss. One woodworking forum account describes a clamp shattering at the bottom jaw and throwing fragments that reflected into the user’s eye, with safety glasses the only reason it was not worse. Treat every clamp under load as a potential projectile and wear eye protection on long glue-ups.
Other reported failure modes are less dramatic and more common.
A screw that backs off under load leaves a clamp that loosens while you are not looking. One long-term owner reported finding his heavy duty Jorgensens dangling after a routing operation, having repeatedly backed off on their own. The same owner found a competing brand never slipped at all over the same period.
Lost parallelism is the quiet one. On a parallel clamp, the jaw faces can travel past parallel under pressure, which bows a panel slowly rather than obviously. Test it: close the clamp on a known flat board and measure with a straightedge.
A jaw head that dislodges under impact is a structural failure, and a riveted head separates more cleanly than a pinned one. That is worth knowing when you choose between clamps of similar specification.
Before a big glue-up, run this five-point check on every clamp you plan to use.
1. Turn the handle full travel and listen for skipping or a thread that binds partway through.
2. Look at the jaw pads for cuts, hardened glue or a pad that has started to lift.
3. Check the head where the jaw meets the rail for movement, deformation or a visible gap.
4. Sight down the bar for bends. A bowed bar changes your pressure angle and skews the assembly.
5. Test the quick release, if the clamp has one, and confirm the handle cannot slide out of your hand and land on the joint.
Starter Sets by Glue-Up Size
How you phase your purchases depends on the largest thing you plan to build. Most people do this in three stages.
Your first four clamps. The Bessey GSCC4PK-C 4-pack covers this stage: two 6 inch and two 12 inch F-style clamps at 600 pounds each. Add a set of corner clamps and you can build frames, boxes, small panels and shop assembly.
The 24 inch stage. A pair of parallel clamps at 24 inch is where panel work starts to become practical, because 24 inch capacity covers most cabinet panels and the flat parallel jaw stops the panel bowing.
The long-panel stage. Clamps at 36 inch and longer, or a run of pipe clamp heads on long pipe, are what you add when you build furniture-scale work. This is also the stage where extra clamp count matters most, because a 6 foot panel at one clamp per 18 inches needs more clamps than most people own.
On mixing brands, the long-term owner consensus is consistent: buy one brand across all lengths if you can. Same brand means same handle feel, same jaw pad behaviour and one warranty to remember, and the difference in speed across a large glue-up is measurable.
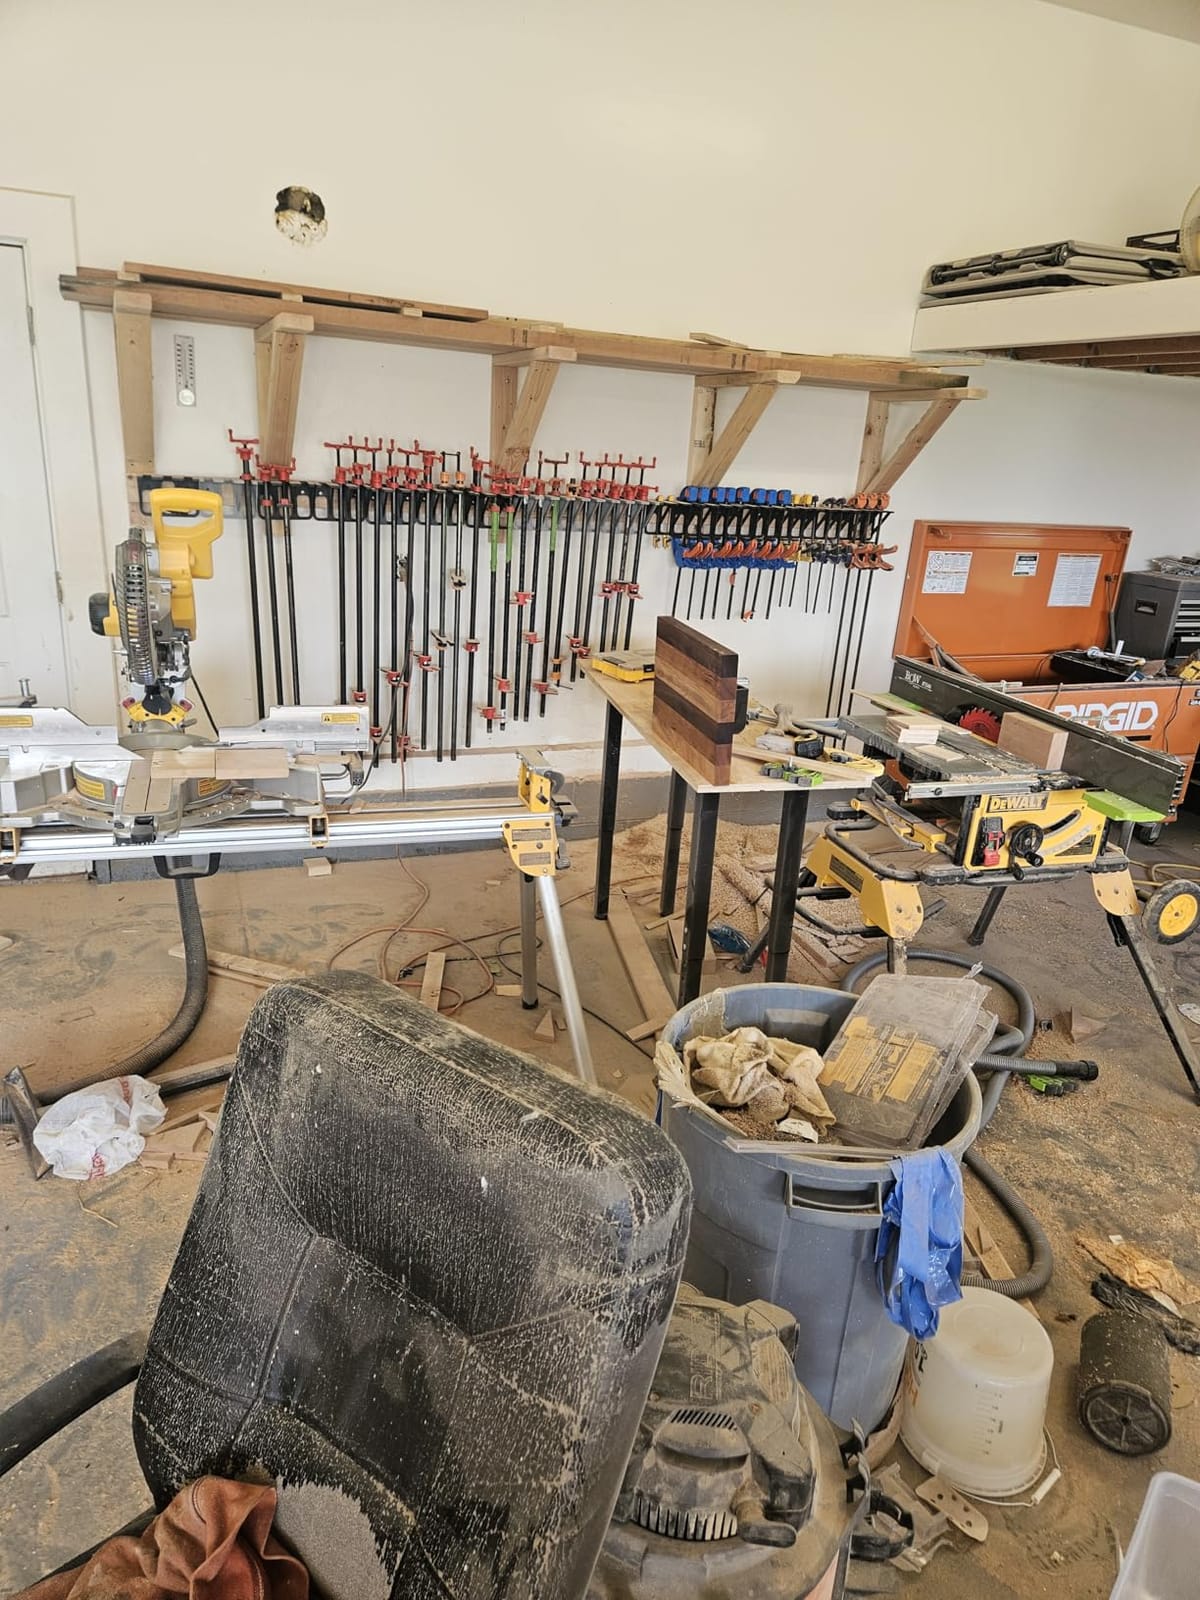
On storage, long bar clamps eat wall space faster than anything else in a shop. Vertical racks on a stud wall, a ceiling-mounted grid for the 36 inch and longer bars, and a drawer for corner clamps solve most of it. Keep the ones you use most at hand height rather than at the top of a ladder.
Frequently Asked Questions
What is the best clamp for glue-ups?
For most glue-ups the best clamp is a parallel bar clamp, because its flat jaw compresses a joint without bowing it. The Bessey BPC-H34 pipe clamp head is the most versatile option, the Jorgensen 36 in bar clamps cover the longest panels, and the Jorgensen Cabinet Master 24 in parallel clamps are built specifically for flat panel work.
How many clamps do I need for a glue-up?
Budget one clamp per 12 to 18 inches of joint, with a minimum of four for anything that needs to stay flat. Below that spacing the unsupported middle of a panel is free to bow as it dries. Long panels and thick, cupped material need more clamp points than thin quartersawn boards.
Are bar clamps or parallel clamps better?
Parallel clamps win on panel glue-ups because the fixed jaw sits square to the rail and stays square under load, which stops the panel bowing. Bar clamps are better for edge glue-ups, general assembly and anything where a deep throat helps you reach past the near edge. Many builders end up owning both.
What are the best pipe clamps for woodworking?
The Bessey BPC-H34 H-Style pipe clamp head is the pick here. It fits any length of 3/4 inch pipe you own, so one head covers clamping reach from a small panel to a long workpiece, and the H-style base resists tipping in two directions. You supply the pipe and cut it to length yourself.
How long should I keep clamps on a wood glue-up?
Leave clamps on until the joint no longer moves when you squeeze it, then release the outer clamps first and the centre ones a little later. There is no benefit to leaving clamps on for hours once the glue has gone solid, and extra clamping time can print the joint in soft material.
What are the common problems with bar clamps?
The most common problems are a jaw that creeps down a smooth bar, jaws that drift past parallel under heavy pressure, clamping screws that back off while you work, and long clamps that crowd out shop storage. Serrated rails, wide padded jaws and a periodic wipe-down of the bar prevent most of them.
Conclusion: The Best Clamps for Woodworking Glue-Ups in 2026
The best clamps for woodworking glue-ups are not one tool, they are a small set matched to the joints you actually build. Start with the Bessey BPC-H34 pipe clamp head if you want one purchase that adapts to any reach, add a Bessey GSCC 4-pack for everyday F-style work, and move to a parallel clamp at 24 inches the first time you glue up a panel.
Add a four-pack of corner clamps for frames and small assemblies, keep cauls on hand for anything that is not dead flat, and buy more clamps than you think you need, because the middle of a panel with no pressure on it is exactly where a glue-up goes wrong.
Run the five-point check before every big glue-up, wear eye protection, and the panel will come off the clamps flat. Last updated for October 2026.