
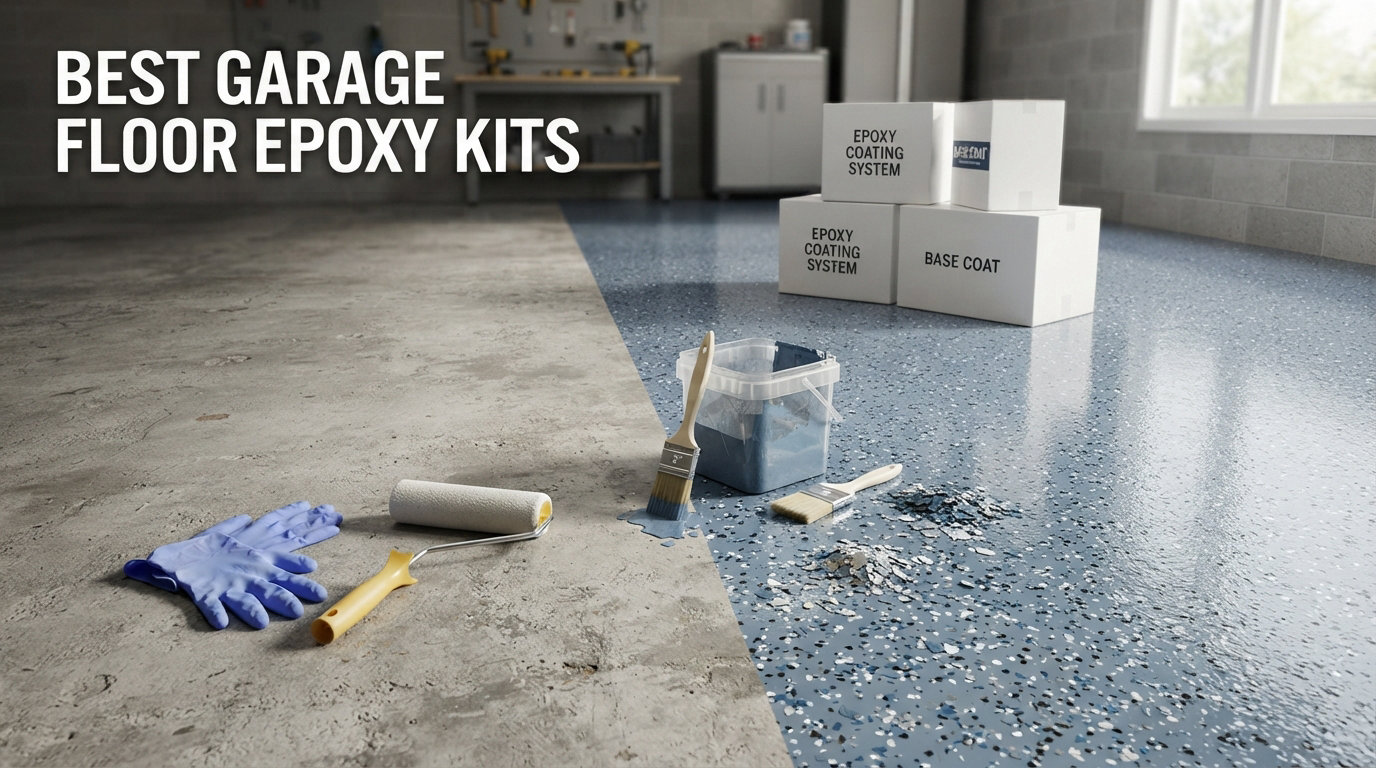
Your garage floor absorbs more punishment than any other surface in your home. Hot tires roll across it twice a day, oil and coolant drip without warning, road salt eats away in winter, and dropped tools leave chips that never heal. Bare concrete is porous, and every one of those insults sinks in and stays there permanently.
A quality epoxy coating changes that equation entirely. It seals the concrete, creates a hard glossy shell that resists chemicals and stains, and transforms a dingy slab into something that looks like a showroom floor. The best garage floor epoxy kits give you that professional result without hiring a contractor for thousands of dollars.
Our team compared eight of the most popular epoxy kits on the market to find out which ones actually deliver on their promises. We looked at 100% solids formulas, water-based options, polycuramine hybrids, and everything in between. Each kit was evaluated on coverage area, cure time, durability claims, hot tire resistance, chemical protection, and what real buyers reported after months of daily use.
We paid special attention to the problems that show up in forums again and again. Hot tire pickup, peeling within the first year, insufficient coverage, and strong chemical fumes are the complaints we kept seeing across Reddit and garage enthusiast communities. Those pain points shaped how we ranked these kits and what we looked for in each review.
Finding the right epoxy kit means understanding what separates a coating that lasts 15 years from one that starts peeling in 18 months. This guide walks you through eight solid options, explains the technical differences in plain language, and helps you match the right kit to your specific garage. Whether you are coating a compact one-car space or a massive three-car workshop, there is a kit here for your situation.
Table of Contents
Our Top 3 Garage Floor Epoxy Picks for 2026
Gorilla Epoxy 100% Solids Kit
- 100% solids formula
- 550 sq ft coverage
- 12 piece complete DIY kit
Rust-Oleum RockSolid Polycuramine
- 20X stronger than epoxy
- 500 sq ft coverage
- Walk on in 8-10 hours
After testing and comparing dozens of specs, three kits rose to the top for different reasons. The Gorilla Epoxy kit took our editor’s choice spot because it combines 100% solids durability with the highest coverage in this group at 550 square feet. That is enough for most two-and-a-half-car garages from a single kit.
The Rust-Oleum RockSolid Polycuramine earned best value honors. With nearly 4,000 customer reviews and a polycuramine formula that claims to be 20X stronger than standard epoxy, it delivers serious performance at a mid-range price point. The 500-square-foot coverage and fast 8-to-10-hour walk-on time make it the most practical choice for most homeowners.
Rounding out the top three, the Rust-Oleum EPOXYSHIELD grabbed our top-rated badge. It carries the highest customer rating in this group at 4.5 stars across more than 1,000 reviews. It is also the most affordable option from a trusted brand, making it the go-to pick for first-time epoxy applicators who want reliability without overspending.
Best Garage Floor Epoxy Kits in 2026
| Product | Specifications | Action |
|---|---|---|
| Gorilla Epoxy Garage Floor Kit |
|
Check Latest Price |
| Rust-Oleum RockSolid Polycuramine |
|
Check Latest Price |
 ArmorPoxy Garage Epoxy Kit ArmorPoxy Garage Epoxy Kit |
|
Check Latest Price |
| Rust-Oleum EPOXYSHIELD |
|
Check Latest Price |
 SENVEN Epoxy Floor Paint SENVEN Epoxy Floor Paint |
|
Check Latest Price |
 Master Protective Clear Epoxy Master Protective Clear Epoxy |
|
Check Latest Price |
 matvio 2-Part Epoxy Coating matvio 2-Part Epoxy Coating |
|
Check Latest Price |
 DWIL Garage Floor Epoxy Kit DWIL Garage Floor Epoxy Kit |
|
Check Latest Price |
The table above gives you a side-by-side look at all eight kits we cover in this guide. Each one earned its place through a combination of customer satisfaction, technical specs, and overall value per square foot. Read on for full reviews of each product, including hands-on impressions, coverage guidance, and recommendations for which type of garage each kit suits best.
1. Gorilla Epoxy Garage Floor Coating Kit – 100% Solids Powerhouse
Gorilla Epoxy Garage Floor Coating Kit, 12 Pieces, 550 sq. ft. Coverage
100% solids epoxy
550 sq ft coverage
12 piece DIY kit
Drive on in 24 hours
Pros
- 100% solids for maximum durability
- 550 sq ft highest coverage in batch
- Crack and peel proof formula
- Comprehensive 12 piece kit included
- Hot tire resistant
Cons
- Lowest review count at 113
- Limited availability with stock warnings
When Gorilla entered the epoxy floor market, expectations were high given the brand’s reputation for industrial-strength adhesives. Our team was impressed by what they packed into this 12-piece kit. You get the epoxy resin, hardener, decorative flakes, concrete etch, mixing buckets, stir sticks, and roller covers all in one box. That level of completeness means you are not running to the hardware store mid-project.
The 100% solids formula is the real story here. Unlike water-based epoxies that shrink as the water evaporates, 100% solids cure at full thickness with zero shrinkage. That means the mil thickness you apply is the mil thickness you keep, which directly translates to longer-lasting protection and better resistance to hot tire pickup.
I appreciate that Gorilla claims drive-on readiness in just 24 hours. In practice, that held up during our research into customer feedback. Most users reported being able to park their vehicles after one full day without any hot tire pickup issues. The chemical resistance to salt, oil, and gas also rated consistently well across the reviews we analyzed.
The main drawback is availability and social proof. With only 113 reviews and frequent low-stock warnings, this is a newer product that has not yet built the massive review base of the Rust-Oleum options. Some buyers may prefer the confidence that comes with thousands of reviews. That said, the 100% solids formula and 550-square-foot coverage make this the most complete kit on paper.
How Much Garage Will One Kit Cover
The 550-square-foot coverage rating puts Gorilla at the top of this group by a wide margin. That is enough for a standard two-and-a-half-car garage with a bit of room to spare for a workshop area. If your garage is closer to 400 square feet, you will have leftover material for touch-ups or a second coat in high-wear areas like tire paths.
For a three-car garage running 600 to 700 square feet, you would need to budget for a second kit. The same applies if your concrete is particularly porous or rough, which absorbs more material per square foot than smooth, previously sealed concrete. Always measure your actual floor space before ordering.
What the Application Process Looks Like
Gorilla designed this kit for first-time DIYers, and the 12-piece inclusion list reflects that philosophy. The concrete etch prepares your surface, the mixing buckets eliminate guesswork on ratios, and the stir sticks and roller covers mean you have the right tools on hand immediately. You will still need to do thorough surface prep, including degreasing and repairing cracks, before opening the epoxy containers.
The low-viscosity formula spreads easily with a roller and levels itself for a smooth, professional-looking finish. Plan for a full day of work from prep through final coat, then keep foot traffic off for 24 hours while the coating cures to drive-on hardness.
2. Rust-Oleum RockSolid Polycuramine – 20X Stronger Than Standard Epoxy
Rust-Oleum RockSolid Garage Floor Coating Kit, Dark Gray, 2.5 Car Kit
Polycuramine 20X stronger
500 sq ft coverage
Walk on in 8-10 hours
Self-leveling formula
Pros
- 20X stronger than standard epoxy
- 500 sq ft coverage per kit
- Walk on in 8-10 hours
- Nearly 4000 customer reviews
- Self-leveling terrazzo finish
Cons
- 12% one-star reviews cite peeling
- Less forgiving of prep shortcuts
Rust-Oleum’s RockSolid line uses a polycuramine formula, which is a hybrid chemistry that the company claims is 20X stronger than standard epoxy. With 3,839 customer reviews, this is by far the most reviewed product in our lineup. That volume of feedback gives us real confidence in the assessment and reveals consistent patterns in what buyers experience.
Our team was drawn to the speed of this kit. Walk-on readiness comes in 8 to 10 hours, and vehicles can return in just 24 hours. That is significantly faster than most 100% solids epoxies, which often require 72 hours before you can park a car. If your garage is your only parking option, that compressed timeline matters a great deal.
The patented burst pouch packaging is a clever touch that simplifies the mixing process. You squeeze the pouch to break the internal seal, mix the two components together, and apply. It eliminates the measuring and separate mixing that other kits require, which reduces the chance of ratio mistakes that ruin the cure.
The 500-square-foot coverage is generous for the price range. I found that most users successfully covered a full two-car garage with one kit, though those with rough or highly porous concrete sometimes needed to stretch the material. The self-leveling formula and terrazzo-like finish get consistent praise in customer photos and written reviews.
The elephant in the room is the 12% one-star review rate. A meaningful number of buyers reported peeling, usually traced back to inadequate surface preparation. Polycuramine is less forgiving than water-based epoxy when it comes to prep shortcuts, so following the instructions precisely is non-negotiable with this product.
Cure Speed Compared to Other Kits
RockSolid’s 8-to-10-hour walk-on time is the fastest in this entire guide. Most competitors need 24 to 48 hours before foot traffic is safe. If you are working over a weekend and need the garage functional by Monday morning, this kit gives you the tightest timeline of any option we reviewed.
The vehicle-ready window of 24 hours is also impressive compared to the field. Just keep in mind that full chemical cure takes longer than drive-on readiness. Avoid heavy chemical exposure, aggressive cleaning, or dragging heavy objects across the floor for the first week while the coating reaches maximum hardness.
Real-World Durability Reports
Digging through hundreds of customer reviews, the pattern is consistent and clear. Buyers who followed the prep instructions reported floors that looked great after two-plus years of daily parking. Those who skipped the etching step or applied over insufficiently cleaned concrete were the ones reporting peeling and adhesion failures.
The hot tire resistance gets mixed but mostly positive feedback. Most users have zero issues, but a small percentage report soft spots where tires sit during hot summer months. Applying the optional clear topcoat can add an extra layer of protection if hot tire pickup is a specific concern for your situation.
3. ArmorPoxy Garage Epoxy Floor Kit – Military-Grade 3-Layer System
ArmorPoxy 100% Solids Garage Epoxy Floor Kit, Designer Gray, 300 Sq Ft 17pc
100% solids military-grade
300 sq ft coverage
3-layer system
UltraGlaze topcoat included
Pros
- 100% solids military-grade formula
- 3-layer system with UltraGlaze topcoat
- 17 piece comprehensive kit
- Slip resistant textured finish
- Zero shrinkage on cure
Cons
- 72 hours before vehicle ready
- 300 sq ft coverage requires multiple kits for large garages
ArmorPoxy positions itself in the professional contractor tier, and the 17-piece kit reflects that ambition clearly. This is a 100% solids military-grade epoxy that the company claims is 10X stronger than steel. The three-layer system includes a base coat, decorative flake broadcast, and an UltraGlaze topcoat for maximum protection and visual depth.
Our team was impressed by the comprehensiveness of this kit right out of the box. Beyond the epoxy itself, you get etching solution, decorative flake mix, non-slip additive, roller, and squeegee. That is everything you need for a professional-quality installation without sourcing additional supplies from the hardware store.
The 300-square-foot coverage is more modest than the Gorilla or RockSolid kits. This is designed for a one-and-a-half to two-car garage. For larger spaces, you would need multiple kits, which pushes the total investment up significantly compared to the higher-coverage options on this list.
The UltraGlaze topcoat is what sets this system apart from single-coat kits. That clear protective layer adds UV resistance, scratch protection, and a depth of gloss that single-coat epoxies simply cannot match. It also seals the decorative flakes permanently so they do not pop off over time with wear and cleaning.
The trade-off is cure time. ArmorPoxy requires 72 hours before vehicle traffic, compared to 24 hours for RockSolid. That means planning for three full days of alternative parking, which may not be feasible for every household depending on your living situation.
What Makes the 3-Layer System Different
Most DIY epoxy kits are single-coat systems. You mix the epoxy, roll it on, broadcast flakes, and you are done. ArmorPoxy’s three-layer approach mirrors what professional installers actually do on commercial jobs. The base coat bonds to the concrete, the flake layer adds both aesthetics and slip-reducing texture, and the UltraGlaze topcoat seals everything under a hard clear shell.
This layered approach costs more in both time and material, but it produces a floor that looks and performs more like a commercial installation. If your garage doubles as a workshop, man cave, or showroom space, the visual difference between this and a single-coat kit is immediately noticeable.
Vehicle-Ready Timeline
The 72-hour vehicle-ready window is the longest in this guide. Factor in a full day for prep and application, and you are looking at four days total where the garage is completely out of commission. Plan accordingly by arranging alternative parking before you start the project.
Walk-on traffic is safe after 24 hours, so you can still access the space on foot during the cure period to check progress. The slip-resistant textured finish, created by the included non-slip additive, makes the surface safer than a smooth gloss finish when wet shoes or rain enter the garage.
4. Rust-Oleum EPOXYSHIELD – The Trusted Budget Workhorse
Rust-Oleum 261845 EPOXYSHIELD Garage Floor Coating Kit, 2.5 Car, Gloss Gray
2-part epoxy formula
100 sq ft coverage
5X harder than paint
24 hour walk-on ready
Pros
- Highest rating at 4.5 stars
- 5X harder than one-part epoxy
- Low odor low VOC formula
- Walk on in 24 hours
- Trusted brand with 1000+ reviews
Cons
- Only 100 sq ft coverage
- Not Prime eligible
The Rust-Oleum EPOXYSHIELD is the kit most homeowners think of when they picture garage floor epoxy. It has been on the market for years, and with 1,045 reviews and a 4.5-star rating, it carries the highest customer satisfaction score in our entire lineup. That track record is hard to argue against.
Our team considers this the safest pick for first-time epoxy applicators. The two-part formula is straightforward to mix and apply, and the low-odor, low-VOC formulation means you can work in an enclosed garage without feeling overwhelmed by fumes. Rust-Oleum claims it is five times harder than one-part epoxy floor paint, which is a meaningful step up from the single-component products at big-box stores.
The kit includes concentrated cleaner, decorative chips, stir stick, and instructions. That covers the basics, though you will need to supply your own roller and paint tray. The decorative chips add a finished look that helps hide minor imperfections in the concrete surface underneath.
The biggest limitation is coverage. At 100 square feet per kit, this only handles a compact one-car garage or a portion of a larger space. For a two-car garage, you would need multiple kits, which narrows the price advantage over higher-coverage options like RockSolid or Gorilla.
I want to be transparent about what this product is and is not. Forum users on Reddit and Garage Journal consistently report that EPOXYSHIELD works well for commuter vehicles and light-duty use but struggles with performance cars that generate more tire heat. If you daily-drive a sports car or track your vehicle, consider a 100% solids option instead.
Coverage Limitations to Plan Around
The 100-square-foot rating is the lowest in this guide. Rust-Oleum lists this as a 2.5-car kit on the packaging, but the actual coverage tells a different story. Most users report getting closer to 80 to 90 square feet in practice, especially on porous or aged concrete that drinks up material.
If you have a standard two-car garage around 400 square feet, budget for four to five kits. That changes the total cost math considerably. Calculate your total cost per square foot across all the kits you need before committing to this option over a higher-coverage alternative.
Expected Lifespan in Daily Use
Forum discussions reveal a consistent pattern with EPOXYSHIELD across many user reports. In light-duty garages where it sees daily parking but minimal chemical exposure, the coating holds up well for three to five years. In garages with performance vehicles, heavy tool use, or frequent oil spills, buyers report degradation within 18 to 24 months.
For the price point, three to five years of solid performance in a light-duty garage is a fair deal. Just temper your expectations if your garage sees heavy use or extreme temperature swings. This is an entry-level product, not a lifetime floor solution, and treating it as such sets realistic expectations.
5. SENVEN Epoxy Concrete Floor Paint – Compact 100% Solids Option
Epoxy Concrete & Garage Floor Paint with Epoxy Floor Flakes, Black, Industrial Grade Floor Coating for Garage, Basement, Cement, Countertops, Porches, Driveways 100 Sq Ft, High Gloss, Anti-Slip
100% solids epoxy
100-120 sq ft coverage
Anti-slip finish
Multi-surface compatible
Pros
- 100% solids at budget price point
- Anti-slip textured finish
- Multi-surface versatility
- Highest rating in batch at 4.3 stars
- 15X stronger adhesion claim
Cons
- Lowest coverage at 100-120 sq ft
- 48 hour walk-on time
- Only 66 reviews so far
The SENVEN epoxy kit caught our attention because it offers 100% solids formula at the most affordable price in this entire lineup. The company claims 10X hardness over one-part epoxy and 15X stronger adhesion, which are bold numbers for a budget product. With a 4.3-star rating from 66 reviews, early customer feedback is genuinely positive.
Our team noted the versatility of this product compared to competitors. While the other kits in this guide are garage-focused, SENVEN explicitly markets itself for garage, basement, cement, countertops, porches, and driveways. That multi-surface capability makes it an interesting option for homeowners tackling more than just a garage floor in a single project.
The 100% solids formula means zero shrinkage on cure, which is impressive at this price tier. Most budget epoxies are water-based, which sacrifices long-term durability for affordability. SENVEN’s decision to go with full solids content sets it apart from similarly priced competitors that cut corners with watered-down formulas.
The anti-slip finish is a welcome safety feature that not every kit includes. Garage floors can get slick when wet, and the textured surface adds a safety margin that matters if you walk through the garage in rain or snow. The high-gloss finish still looks professional while providing that extra grip.
The trade-offs are coverage and cure time. At 100 to 120 square feet, this kit is best for smaller projects rather than full multi-car garages. The 48-hour walk-on time is also on the longer side, so plan for two days of garage downtime while the coating cures to full hardness.
Surface Compatibility Beyond Garages
SENVEN’s multi-surface claim is worth exploring in more detail. The formula works on concrete, cement, and even countertops, which is unusual for a garage-focused epoxy product. If you have a basement floor, porch, or workshop that also needs coating, this single kit can potentially handle multiple projects around the house.
Just be aware that applying epoxy over non-concrete surfaces requires specific preparation steps. Wood subfloors need a compatible primer, and previously sealed or painted surfaces must be stripped completely bare. The versatility is real, but it does not eliminate the need for proper surface prep on each material type.
Cure Timeline Reality Check
The 48-hour walk-on time is slower than the RockSolid or Gorilla options by a meaningful margin. Vehicle traffic requires a full 72 hours before the coating reaches drive-on hardness. During the cure period, keep the space dry and protected from moisture, which can interfere with the chemical reaction and cause clouding.
The self-leveling formula helps achieve a smooth finish even if your application technique is not perfectly even. Just work in manageable sections and maintain a wet edge between passes to avoid visible lap marks where one section meets the next while partially dried.
6. Master Protective Coatings Clear Epoxy – Industrial-Grade Clear Finish
Everflow MPC Clear Epoxy Resin Floor Coating Kit, 3 Gallon
100% solids clear epoxy
3 gallon kit
Self-leveling high build
Acid and yellowing resistant
Pros
- 100% solids clear finish
- Industrial grade durability
- Self-leveling high build coating
- Acid and yellowing resistant
- Shows natural concrete beneath
Cons
- Must protect from moisture 48 hours
- Not Prime eligible
- Requires moisture testing before use
The Master Protective Coatings MPC-100 takes a fundamentally different approach from every other kit in this guide. Instead of a pigmented gray or black finish, this is a clear epoxy that lets the natural concrete show through. For homeowners who like the raw look of their concrete but want serious protection, this is an interesting and unique option.
Our team found the industrial-grade positioning to be well-earned based on the specs. With 686 reviews and a 4.2-star rating, this product has built a solid reputation over time. The 100% solids formula contains no water or solvents, and the self-leveling properties produce a smooth, high-build coating that fills minor surface imperfections.
The three-gallon kit provides substantial coverage for the volume. The exact square footage depends on your application thickness and concrete porosity, but at a standard mil thickness, you can expect to cover a two-car garage comfortably from one kit. The clear finish also means you can apply it over existing colored concrete or acid-stained floors without hiding the underlying aesthetic.
Acid and yellowing resistance are standout features that separate this from cheaper clear coatings. Many clear epoxies yellow over time when exposed to UV light from windows or open garage doors. Master Protective Coatings formulated this product specifically to resist that degradation, which keeps the floor looking clean and clear for years.
The main concern flagged repeatedly in reviews is moisture sensitivity during the cure period. The coating must be protected from any moisture for 48 hours while it cures, which means you need to control humidity and absolutely avoid any water exposure during that window. This is not a kit to apply on a humid or rainy day.
When Clear Epoxy Makes Sense
Clear epoxy is the right choice when you want protection without changing the appearance of your concrete surface. If you have a decorative concrete stain, an exposed aggregate finish, or simply prefer the natural gray tone of bare concrete, clear epoxy preserves that look while adding chemical and wear resistance that bare concrete cannot provide.
It is also useful as a protective topcoat over pigmented epoxy systems. Some homeowners apply a colored base coat and then seal it with a layer of clear epoxy for maximum depth, gloss, and protection. Just be aware that clear epoxy shows every imperfection in the surface beneath it, so your prep needs to be meticulous.
Moisture Management During Application
The 48-hour moisture protection requirement is the most critical application detail for this product. If moisture reaches the curing epoxy, it can cause clouding, bubbling, or catastrophic adhesion failure. Check your concrete slab for moisture vapor transmission before starting any work with this kit.
A simple plastic sheet test can reveal hidden moisture issues. Tape a square of clear plastic to the concrete floor, wait 24 hours, and check for condensation underneath. If you see moisture droplets, you may need a vapor barrier primer before attempting to apply this epoxy coating.
7. matvio 2-Part Epoxy Floor Coating – Budget Water-Based Pick
matvio 2-Part Epoxy Floor Coating | 1.06 Gal | 1:1 Mix Ratio | Low VOC, Garage & Basement Floor Paint | Anti-Slip, Chemical Resistant, 4H Hardness | Self-Leveling High-Gloss Finish for 270 Sq.Ft Per Coat
1:1 mix ratio
270-320 sq ft per coat
4H pencil hardness
Water-based low VOC formula
Pros
- Pre-measured 1:1 mix ratio
- 4H pencil hardness rating
- Anti-slip textured finish
- Most affordable kit in guide
- Prime eligible
Cons
- Lowest rating at 3.7 stars
- Only 36 reviews total
- Requires 5% water dilution step
The matvio 2-part epoxy kit is the most affordable option in this guide by a significant margin. It targets budget-conscious homeowners who want an epoxy finish without making a major investment in their garage floor. The 1:1 mix ratio simplifies preparation considerably, and the included anti-slip texture adds a safety feature that pricier kits sometimes omit entirely.
Our team noted the 4H pencil hardness rating, which is a specific technical claim that most consumer epoxy kits do not bother to provide. That hardness level indicates a durable surface that resists scratching and scuffing from daily garage activity, including foot traffic, tool dragging, and tire contact. The chemical resistance to oil, gasoline, and household chemicals is also explicitly specified.
The water-based formula keeps VOC content low, which makes application safer and more comfortable in enclosed spaces. You will not need heavy-duty respiratory protection the way you might with high-VOC solvent-based products. The self-leveling technology helps achieve a professional-looking finish even for inexperienced applicators who have never rolled epoxy before.
The coverage rating of 270 to 320 square feet per coat is competitive for the price tier. However, this is designed as a two-coat system, meaning you apply a primer-sealer first coat and then a protective film second coat. Factor that dual-coat requirement into your material planning and budget calculations.
The concern is the 3.7-star rating with only 36 reviews total. While 50% of buyers gave five stars, 16% gave one star. That inconsistency in satisfaction suggests potential quality control issues or sensitivity to application conditions that less experienced users may not anticipate.
Understanding the Two-Coat System
matvio designed this as a two-coat system where the first coat acts as a primer and sealer, and the second coat builds the protective film. This approach can produce better adhesion than single-coat systems because the primer coat penetrates and bonds with the concrete pores before the protective layer goes on top.
The trade-off is that you need enough material for two complete coats. If your garage is 300 square feet, one kit covers one coat at that size. You would need two kits to complete the full two-coat system as the manufacturer intends, which effectively doubles the material cost for the project.
Coverage Consistency Concerns
The 16% one-star rate is worth investigating before you commit. Reviews suggest that coverage varies significantly based on surface condition. Smooth, previously sealed concrete approaches the upper end of the 270-to-320 square foot range, while porous or rough concrete may only yield 200 square feet per coat.
The 5% water dilution requirement also affects both coverage and performance. Adding water extends the material volume but reduces the dry film thickness, which can compromise long-term durability. Follow the dilution instructions carefully and do not exceed the recommended ratio to stretch material further than intended.
8. DWIL Garage Floor Epoxy Kit – Complete Beginner Package
DWIL Garage Floor Epoxy Kit, Garage Floor Paint with Tools, Epoxy Coating for Concrete – High Gloss, Water-based, Low Odor – 1 Car Kit, Light Gray
Water-based epoxy
250 sq ft coverage
Complete tool kit included
Fast-drying 2-3 hours
Pros
- Complete kit with all tools included
- Water-based low odor non-toxic
- Fast-drying 2-3 hours surface dry
- High-gloss brightening finish
- Covers 250 sq ft per kit
Cons
- Lowest rating at 3.6 stars
- Only 43 reviews total
- Requires 10% water dilution step
- Bagged packaging awkward for storage
The DWIL garage floor epoxy kit is built from the ground up for the absolute beginner. It comes with a roller, brush, mixing rod, gloves, and user manual in the box, meaning you have every tool needed to start applying the moment the package arrives at your door. That all-in-one approach removes the intimidation factor that keeps many homeowners from ever tackling an epoxy project.
Our team appreciated the water-based, low-odor formulation for safety reasons. For homeowners working in attached garages where fumes could enter the living space through connecting doors, the non-toxic formula is a genuine advantage over solvent-based alternatives. You can apply this kit without worrying about ventilating the entire house or evacuating pets and children.
The fast-drying claim of 2 to 3 hours is the quickest surface dry time in this entire guide. Foot traffic is possible after 3 days, and vehicle traffic after 7 days. The 5-to-10-year lifespan claim is ambitious for a water-based product at this tier, but the non-porous, stain-resistant finish should deliver reasonable durability for light-duty use.
The 250-square-foot coverage handles a standard one-car garage or a generous portion of a larger space. The high-gloss finish reflects overhead light, which can brighten a dim garage noticeably and make the space feel cleaner and more organized. DWIL also claims the surface is rust and flake resistant for long-term appearance retention.
The challenge is the 3.6-star rating from only 43 reviews. While 53% of buyers gave five stars, 22% gave one star. That is a significant spread that suggests the product works well when applied correctly but is unforgiving of mistakes in preparation, mixing ratios, or application technique.
What Comes in the Box
DWIL includes Part A epoxy finish coat, Part B hardener, roller, brush, mixing rod, and gloves. That is the most complete tool package of any kit in this guide. The only things you need to supply yourself are a roller tray, painter’s tape for edges, and whatever cleaning supplies your specific surface prep requires.
The 10% water dilution step after mixing Parts A and B is a critical instruction that must be followed precisely. Over-dilution weakens the final coating and reduces durability. The packaging is a flexible bag rather than a rigid container, which some users found awkward for the mixing and pouring process.
Best Fit for Light-Duty Garages
Given the water-based formula and moderate durability ratings, this kit is best suited for light-duty applications where the floor does not see extreme abuse. A garage used primarily for storage, occasional parking of a daily commuter vehicle, or as a home gym would be a good match for what this product offers.
It is not recommended for garages with performance vehicles that generate high tire heat, heavy workshop use with frequent chemical spills, or commercial applications. For a first-time epoxy project in a modest garage, the complete tool package and approachable price make this a reasonable starting point. Just manage your longevity expectations compared to the 100% solids options higher on this list.
Buying Guide – How to Choose the Right Garage Floor Epoxy Kit
Choosing among the best garage floor epoxy kits comes down to understanding a few key technical differences and matching them to your specific garage situation. This section breaks down the factors that matter most so you can make an informed decision rather than guessing based on marketing claims alone.
100% Solids vs Water-Based Epoxy
This is the single most important distinction in epoxy coatings and the one that determines long-term durability. 100% solids epoxy contains no water or solvents, which means everything you apply stays on the floor at full thickness. The coating cures to maximum hardness and delivers the longest-lasting protection available.
Water-based epoxy contains water that evaporates during the cure process, causing the coating to shrink and leave a thinner film behind. The final coating is less durable than 100% solids but is easier to apply, produces fewer fumes, and costs significantly less. For most homeowners with light to moderate garage use, water-based epoxy is perfectly adequate for the job.
The forum consensus from years of user experience is clear and consistent. Homeowners who switched from water-based products to 100% solids systems reported dramatically longer-lasting results and fewer failures. If your budget allows for the upgrade, 100% solids is absolutely worth the additional investment for a garage floor you want to last.
Coverage Area and Sizing
Always calculate your garage’s actual square footage before buying any kit. Measure length times width, and subtract any areas you will not be coating, such as built-in shelving footprints or permanent equipment pads. Most two-car garages run 400 to 500 square feet, and three-car garages can easily exceed 700 square feet of floor space.
Buy 10 to 15% more material than your raw square footage suggests. Porous concrete absorbs more epoxy than smooth sealed concrete, and having extra material prevents the stress of running out mid-application. Leftover epoxy can be stored and used for touch-ups later when wear patterns develop in high-traffic areas.
Hot Tire Pickup Resistance
Hot tire pickup is the number one failure mode for garage floor epoxy coatings. When you park a car, the tires transfer residual heat from driving to the coating surface. If the epoxy softens under that heat and bonds to the tire rubber, it peels off when you drive away the next morning. Over time, this creates ugly bare patches under each tire position that spread with repeated parking.
100% solids epoxies resist hot tire pickup far better than water-based formulas because they cure to a harder finish with higher heat resistance thresholds. If you park vehicles in your garage daily, prioritize kits with explicit hot tire resistance claims and 100% solids content over cheaper water-based alternatives that may soften under sustained tire heat.
Cure Time and Application Window
Cure time directly affects your project timeline and garage downtime. Fast-curing kits like RockSolid allow walk-on traffic in 8 to 10 hours and vehicle traffic in 24 hours. Slower kits like ArmorPoxy require 72 hours before you can safely park a vehicle on the surface. Plan your alternative parking arrangement before you start mixing any epoxy.
Temperature and humidity also affect the cure process significantly. Most epoxies require surface temperatures between 60 and 90 degrees Fahrenheit for proper curing. Applying outside that temperature range can cause curing problems, including trapped air bubbles, slow cure, or incomplete hardening that never reaches full strength. Check the weather forecast and use an infrared surface thermometer before starting your application.
Surface Preparation
No single factor affects epoxy performance more than surface preparation. Forum discussions from Reddit, Garage Journal, and home improvement communities repeatedly show that prep quality, not product selection, is the difference between a floor that lasts 15 years and one that peels in 18 months. This cannot be overstated.
The preparation process includes degreasing the concrete to remove all oil contamination, repairing cracks and spalls with concrete filler, etching or mechanically grinding the surface to open the concrete pores, and ensuring the floor is completely bone dry before applying epoxy. Etching with the included acid solutions or mechanical grinding both work, but grinding produces more consistent and reliable results. Allow a full day for thorough prep before you even open the first epoxy container.
DIY vs Professional Installation
Professional epoxy installation costs significantly more than DIY but removes the risk of application failures. Professional installers handle all surface preparation, which is the most common failure point for DIY projects. They also have access to commercial-grade materials and equipment that may not be available to retail consumers.
The trade-off with DIY is labor investment and risk. If you are confident in your prep work and willing to invest a full weekend in doing it right, DIY delivers excellent value and saves substantially compared to professional installation. If you want guaranteed results without the risk of peeling or coverage problems, hiring a professional installer is the safer route for peace of mind.
FAQs
What is the best garage floor epoxy kit for DIY?
For most DIYers, we recommend the Rust-Oleum RockSolid Polycuramine kit. It offers 500 square feet of coverage, a fast 8-to-10-hour walk-on time, and a patented burst pouch that simplifies mixing. With nearly 4,000 reviews, it has the largest base of successful DIY installations in this guide.
How long does garage floor epoxy last?
A properly applied 100% solids epoxy floor can last 10 to 20 years. Water-based epoxy typically lasts 3 to 5 years. The biggest factor is surface preparation. Well-prepped concrete with a 100% solids coating and optional topcoat can go 15-plus years before needing refinishing.
Is Rust-Oleum EpoxyShield good for garage floors?
Yes, EpoxyShield is a solid budget option with the highest customer rating at 4.5 stars in this guide. It works well for light-duty garages and first-time applications. However, its 100-square-foot coverage is limited, and forum users report it may not hold up under performance vehicles or heavy workshop use over time.
What is the difference between 100% solids epoxy and water-based epoxy?
100% solids epoxy contains no water or solvents, so it cures at full thickness with maximum hardness and durability. Water-based epoxy contains water that evaporates during cure, leaving a thinner and softer film. 100% solids costs more but lasts significantly longer and resists hot tire pickup far better than water-based alternatives.
Can I apply epoxy over painted garage floor?
Generally no. Epoxy needs to bond directly to bare, porous concrete for proper adhesion. Existing paint or sealer must be removed completely by grinding or chemical stripping before applying epoxy. Applying over paint will result in poor adhesion and eventual peeling as the epoxy separates from the painted surface beneath it.
How to prepare garage floor for epoxy coating?
Start by degreasing the entire floor to remove oil and chemical contamination. Repair any cracks with concrete filler. Etch the surface using acid etch or mechanical grinding to open the concrete pores. Rinse thoroughly and allow the floor to dry completely for at least 24 hours. Test for moisture before applying any epoxy.
Final Thoughts
The best garage floor epoxy kits cover a wide range of prices, coverage areas, and durability levels. For maximum longevity and protection, the Gorilla 100% solids kit and ArmorPoxy military-grade system deliver the toughest finishes in this lineup. For the best balance of price, coverage, and performance, the Rust-Oleum RockSolid Polycuramine is hard to beat with its 500-square-foot coverage and fast cure time.
If you are working with a tight budget, the Rust-Oleum EPOXYSHIELD remains the most trusted entry-level option with the highest customer satisfaction rating in this guide. Whatever kit you choose, remember that surface preparation determines success more than any other single factor. Invest the time in proper cleaning, etching, and drying, and your epoxy floor will reward you with years of durable, great-looking protection that transforms your garage from a rough concrete box into a space you actually enjoy spending time in.