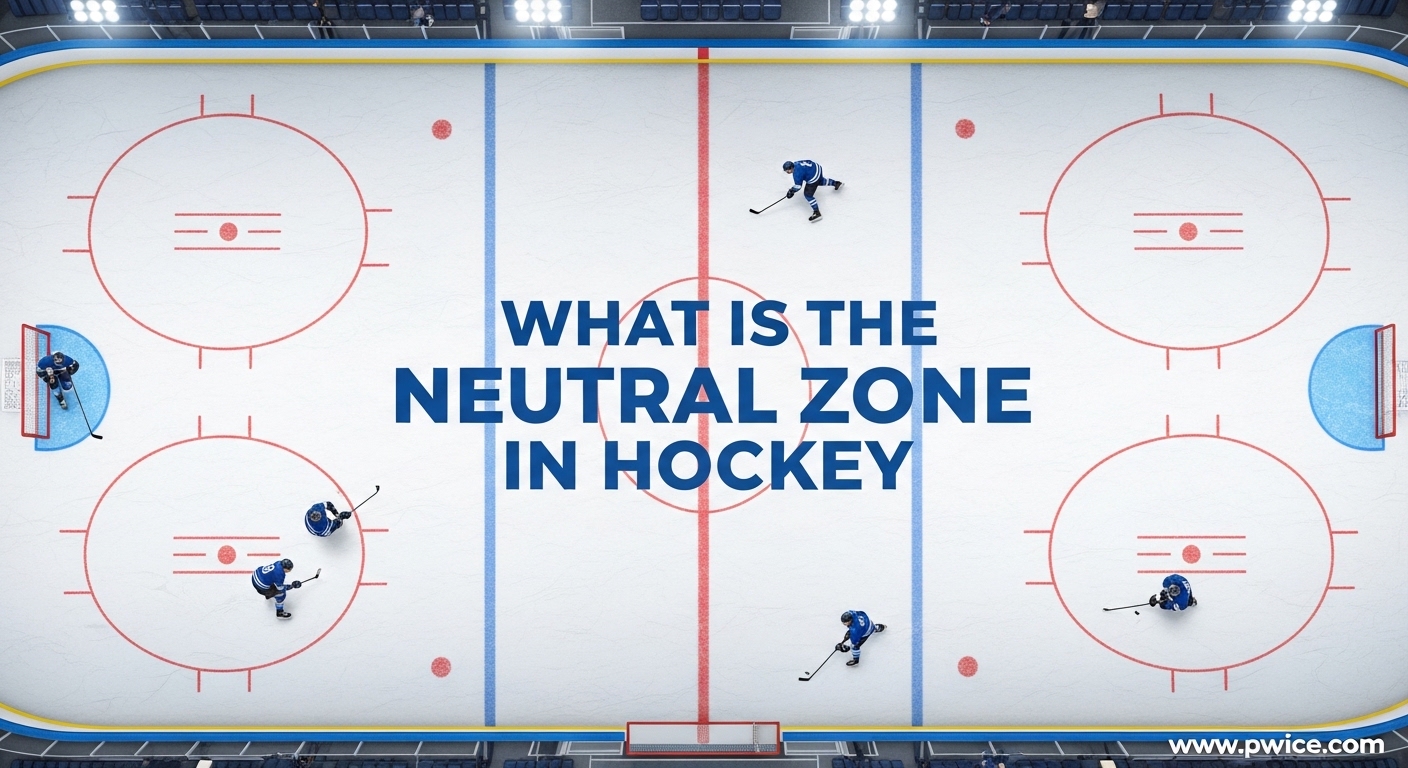
The neutral zone is the 50-foot area between the two blue lines on an ice hockey rink. It serves as the middle zone where teams transition between offense and defense. Understanding this space is essential for anyone who wants to truly appreciate the strategy and flow of a hockey game.
I remember the first time I watched a hockey game with a coach friend. He kept pointing out how the action in the middle of the rink determined everything else. I did not understand it at the time, but that middle area – the neutral zone – is where games are won and lost. Whether you are a new fan trying to follow the action or a player looking to improve your game, this guide breaks down exactly what happens between those blue lines.
By the end of this article, you will understand the rules that govern this space, the strategies teams use to attack and defend it, and why controlling those 50 feet matters more than most casual observers realize.
Table of Contents
What Is the Neutral Zone in Hockey?
The neutral zone in hockey is the middle section of the ice surface, bounded by the two blue lines that divide the rink into three distinct zones. It measures exactly 50 feet in length on a standard NHL rink and sits between the defensive zone (where your goalie defends) and the offensive zone (where you try to score).
Think of a hockey rink like three connected rooms. The room on your left is the defensive zone. The room on your right is the offensive zone. The room in the middle – that is the neutral zone. This is where teams switch from trying to stop the other team to trying to score themselves.
The Three Zones of a Hockey Rink
Every hockey rink is divided into three zones by two blue lines. These lines run across the width of the ice and are 50 feet apart.
- Defensive Zone: The area from your goal line to the nearest blue line. You defend your net here.
- Neutral Zone: The 50-foot stretch between the two blue lines. This is the transition area.
- Offensive Zone: The area from the far blue line to the opponent’s goal. You try to score here.
The center red line cuts through the middle of the neutral zone. This line matters for certain rules like icing. When you see play moving back and forth across the blue lines, you are watching teams battle for control of this critical middle ground.
Visualizing the Neutral Zone
If you are watching on television, the neutral zone often gets less attention than the areas around the goals. But look for those two blue lines. Everything between them is where the real chess match happens. The benches are typically located in or near the neutral zone, which is why you will see players hopping on and off the ice as the puck moves through this area.
Players who master neutral zone play often become the most valuable members of their teams. They know when to attack, when to retreat, and how to read the developing play before it fully materializes. This anticipation separates good players from great ones.
Key Rules That Affect the Neutral Zone
Several important hockey rules directly involve the neutral zone or the blue lines that define it. Understanding these rules helps explain why teams handle the puck differently in this area compared to the offensive or defensive zones.
The Offside Rule
Offside is the most important rule connected to the neutral zone boundaries. An attacking player is offside when both of their skates completely cross the blue line into the offensive zone before the puck crosses that same line.
This rule makes the blue line a critical checkpoint. Teams must time their entries carefully. Players often skate parallel to the blue line, dragging one skate behind to stay onside while waiting for the puck to catch up. The neutral zone becomes a staging area where forwards try to build speed while staying behind the puck.
If an offside occurs, play stops and a faceoff happens outside the offensive zone. This gives the defending team a chance to reset, making clean zone entries essential for maintaining offensive pressure.
Icing and the Red Line
Icing occurs when a player shoots or passes the puck from behind their own side of the center red line and the puck travels untouched across the opponent’s goal line. The center red line sits right in the middle of the neutral zone.
This rule prevents teams from simply firing the puck down the ice to relieve pressure. When you are stuck in your defensive zone, you cannot just throw the puck to the other end without consequences. You must either carry it through the neutral zone or make a pass to a teammate who can gain control before the puck crosses the far goal line.
The red line also used to matter for two-line passes. Before the 2004-05 lockout, passes that crossed two lines (including the red line) were illegal. That rule change opened up the neutral zone and made long stretch passes a viable offensive weapon.
Line Changes in the Neutral Zone
The neutral zone is where most line changes happen. Players can only substitute on the fly when their team has possession or during stoppages. As play moves through the neutral zone, you will see entire units swapping places at the benches.
Smart teams manage their changes carefully. A bad change in the neutral zone can leave you with too many men on the ice or create an odd-man rush against your team. Coaches drill their players on proper change timing, especially during transition play when both teams are swapping personnel.
Offensive Strategies: Zone Entries
Moving the puck from the neutral zone into the offensive zone is one of the hardest and most important skills in hockey. Teams that enter the zone with control create significantly more scoring chances than those who dump the puck in and chase.
Analytics from the past decade have confirmed what coaches always suspected. Controlled zone entries lead to better offensive outcomes. A player carrying the puck across the blue line creates twice as many scoring chances as a dump-and-chase entry. This data has changed how teams approach neutral zone offense.
Carry-In Entries
A carry-in happens when a player skates the puck across the blue line while maintaining possession. This is the gold standard of zone entries because it keeps the puck on your stick and forces defenders to react to you.
Elite players like Connor McDavid and Mathew Barzal excel at carry-ins because of their speed and stickhandling ability. They attack the blue line with speed, forcing defenders to back up and give them space. Once inside the zone, they can either shoot, pass, or circle behind the net to start a cycle.
Teams often set up passing options to support the carry-in. One forward might drive wide while another cuts to the middle, creating a passing lane across the blue line. Defensemen sometimes jump into the play, becoming a fourth attacker who receives a drop pass at the line.
Dump-and-Chase
When carrying the puck is not possible, teams resort to dumping it into the offensive zone and chasing after it. This strategy sacrifices possession for position. It works best when the forechecking team has fresh legs on the ice and the defending team has tired players.
The key to effective dump-ins is placement. Dumping the puck around the boards toward the opposite corner forces the goalie to stop the puck and set it up for his defensemen. Dumping it toward the near corner allows your forecheckers to race in and battle for possession.
Some teams use the dump-and-chase as a weapon. They have fast, physical forwards who enjoy board battles. Others avoid it entirely, preferring to back out of the neutral zone and try again rather than give up possession.
Passing Through the Neutral Zone
Stretch passes that cover the entire neutral zone can catch defenders out of position. A defenseman who collects the puck in his own zone might spot a forward breaking behind the defense. A well-placed pass can bypass the neutral zone entirely and create a breakaway.
Cross-ice passes through the neutral zone are riskier but can switch the point of attack quickly. When one side of the ice gets clogged with defenders, a pass to the weak side can open up space. These plays require precise timing and awareness of offside positioning.
Modern hockey has made long passing a bigger part of neutral zone strategy. The removal of the two-line pass rule in 2005 opened up the ice for these plays. Teams with mobile defensemen and fast forwards can turn a defensive zone faceoff win into an odd-man rush in seconds.
Defensive Strategies: The Neutral Zone Trap
If you have been around hockey fans for any length of time, you have probably heard complaints about the trap. This defensive system dominated the NHL for years and created one of the most successful dynasties in league history. Love it or hate it, understanding the trap is essential to understanding hockey strategy.
How the Neutral Zone Trap Works
The neutral zone trap is a defensive strategy designed to stop the opposing team from carrying the puck through the middle of the ice with speed. It relies on positioning rather than physical play to force turnovers.
In a classic 1-2-2 trap formation, one forward pressures the puck carrier while two forwards position themselves in passing lanes through the neutral zone. Two defensemen hold the blue line, ready to intercept dump-ins or step up on slow-moving attackers. The goal is to force the puck carrier toward the boards where they have fewer options.
Once the puck carrier is funneled to the side, the trap springs. The strong-side forward angles the puck carrier toward the boards while cutting off the easy pass back to the middle. The weak-side forward slides across to take away the cross-ice option. The defensemen step up to hold the line. The result is often a turnover or a dump-in that gives the defending team possession.
The New Jersey Devils and the Art of the Trap
No team is more associated with the neutral zone trap than the New Jersey Devils of the mid-1990s to early 2000s. Under head coach Jacques Lemaire, the Devils perfected this system and rode it to three Stanley Cup championships in 1995, 2000, and 2003.
The Devils had the perfect personnel for the trap. Martin Brodeur was a goaltender who could handle the puck like a third defenseman, reducing the risk of dump-ins. Their defensemen were mobile and intelligent. Their forwards bought into a system that prioritized team success over individual statistics.
Other teams tried to copy New Jersey’s success. The trap spread throughout the league in the late 1990s. Scoring dropped to historic lows. Fans complained about boring, low-event hockey. The 2004-05 NHL lockout was partly driven by a desire to open up the game and reduce the effectiveness of trapping systems.
Modern Forechecking Systems
While the pure neutral zone trap has faded from prominence, its influence remains in modern forechecking systems. Coaches still use elements of the trap within more aggressive approaches.
- 1-2-2 Forecheck: One forward deep, two at the tops of the circles, two defensemen at the blue line. A balanced approach used by many teams.
- 1-3-1 System: One forward pressures the puck while three players form a line across the neutral zone. More aggressive than the classic trap.
- 1-4 Defense: Sometimes called the “left wing lock,” this sends one forechecker while four players stack the blue line. Very defensive.
- 2-1-2 Aggressive: Two forwards pressure deep, one stays high, two defensemen hold the line. Used by teams that want to force turnovers in the offensive zone.
Each system has trade-offs. Aggressive forechecks create more turnovers but leave you vulnerable if the other team breaks out. Passive systems protect your defensive zone but give the opponent time and space to organize their attack. Smart coaches adjust their neutral zone strategy based on the score, the time remaining, and the personnel on the ice.
Why the Neutral Zone Matters
The neutral zone is often called the engine room of hockey. What happens there determines everything that follows. A clean zone entry leads to offensive zone time and scoring chances. A turnover in the neutral zone creates a dangerous rush going the other way.
The 200-Foot Game
Hockey analysts often talk about the 200-foot game. This refers to the full length of the ice surface that players must master. The neutral zone is the middle 50 feet of that journey. Players who excel at the 200-foot game understand that their responsibilities do not end when the puck leaves their zone or enter the offensive zone.
Two-way forwards who dominate the neutral zone are among the most valuable players in the sport. They backcheck hard to break up opposing rushes, then turn around and create zone entries for their own team. This transition play requires exceptional skating, awareness, and conditioning.
Controlling Tempo
Teams that control the neutral zone control the tempo of the game. If you want to slow things down, you clog the neutral zone and force the opponent to dump the puck. If you want to play fast, you attack the neutral zone with speed and quick passes.
Coaches often talk about managing the game through the middle of the ice. A lead in the third period might lead to a more defensive neutral zone approach. A deficit might trigger more aggressive forechecking to force turnovers.
Analytics and the Neutral Zone
Modern hockey analytics have confirmed the importance of neutral zone play. Statisticians track controlled zone entries, noting which players successfully carry the puck across the blue line. They measure zone exits, showing which defensemen can break the puck out cleanly under pressure.
These numbers have changed how teams evaluate players. A defenseman who consistently makes good first passes out of the defensive zone and through the neutral zone might be more valuable than one who blocks more shots. A forward who enters the zone with possession creates more offense than one who dumps and chases effectively.
Beginner Tips for Playing in the Neutral Zone
If you are just starting to play hockey or trying to improve your understanding of the game, here are some practical tips for handling the neutral zone better.
For Forwards
- Build speed through the neutral zone before you hit the blue line. Attack with momentum.
- Time your crossing so you do not go offside. Keep your head on a swivel.
- Look for late support from your defensemen. A drop pass at the blue line can be effective.
- If you cannot carry it in, place your dump-in where your teammates can win the race.
- On defense, backcheck through the middle of the ice to take away passing lanes.
For Defensemen
- Maintain good gap control. Stay close enough to the puck carrier to angle them effectively.
- Angle attackers toward the boards rather than letting them drive to the net.
- Communicate with your partner. Know who is taking the puck carrier and who is covering.
- When breaking out, make that first pass quickly. Do not let forecheckers establish position.
- Read the forecheck. Identify which system the other team is using and adjust accordingly.
For All Players
Communication is essential in the neutral zone. Call for passes. Warn teammates about pressure. Let your defensemen know which side you are attacking. The middle of the ice happens fast, and clear communication prevents turnovers.
Skating is the foundation of good neutral zone play. Work on your transitions – moving from forward to backward skating smoothly. Practice your pivots. The players who control their edges and change directions quickly have a huge advantage in this area.
Frequently Asked Questions
What is the point of the neutral zone in hockey?
The neutral zone serves as the transition area between offense and defense. Controlling this 50-foot space allows teams to dictate game flow, create scoring chances through controlled entries, and prevent opponents from building speed attacks. It is where the 200-foot game lives, separating good teams from great ones.
How big is the neutral zone in hockey?
The neutral zone is 50 feet long on a standard NHL rink. It spans the distance between the two blue lines. The center red line divides it in half at the 25-foot mark. Standard NHL rinks are 200 feet long overall, making the neutral zone exactly one-quarter of the total ice surface.
What is a zone entry in hockey?
A zone entry occurs when a team moves the puck from the neutral zone into the offensive zone. This can happen through three main methods: carrying the puck in while maintaining possession, dumping the puck in and chasing, or passing to a teammate already positioned in the offensive zone. Controlled entries with possession create significantly more scoring chances than dump-ins.
What is offside in the neutral zone?
Offside actually happens at the boundary of the neutral zone, not within it. An attacking player is offside when both skates completely cross the attacking blue line before the puck crosses that same line. The neutral zone becomes critical because players must time their crossing carefully, building speed while staying onside. If a player enters the offensive zone too early, play stops immediately.
Why is the neutral zone trap considered boring?
The neutral zone trap reduces scoring chances by clogging the middle of the ice and forcing turnovers before teams can enter the offensive zone. It prioritizes defense and counter-attacking over creative offensive play. During the 1990s and early 2000s, widespread use of the trap led to low-scoring games with fewer highlight-reel moments. The NHL made rule changes after the 2004-05 lockout specifically to reduce the trap’s effectiveness and open up the game.
Conclusion
The neutral zone in hockey is far more than just the space between the blue lines. It is where games are decided, where strategy meets execution, and where the best players separate themselves from the pack. Those 50 feet of ice demand speed, awareness, and tactical understanding from every player on the rink.
Whether you are watching from the stands, analyzing from your couch, or lacing up your own skates, paying attention to the neutral zone will transform how you see the sport. Watch how teams enter the zone. Notice which players excel at transitioning from defense to offense. Appreciate the chess match happening in that middle third of the ice.
The next time you watch a hockey game, resist the urge to only follow the puck around the nets. Keep your eyes on the neutral zone. That is where the real action happens.