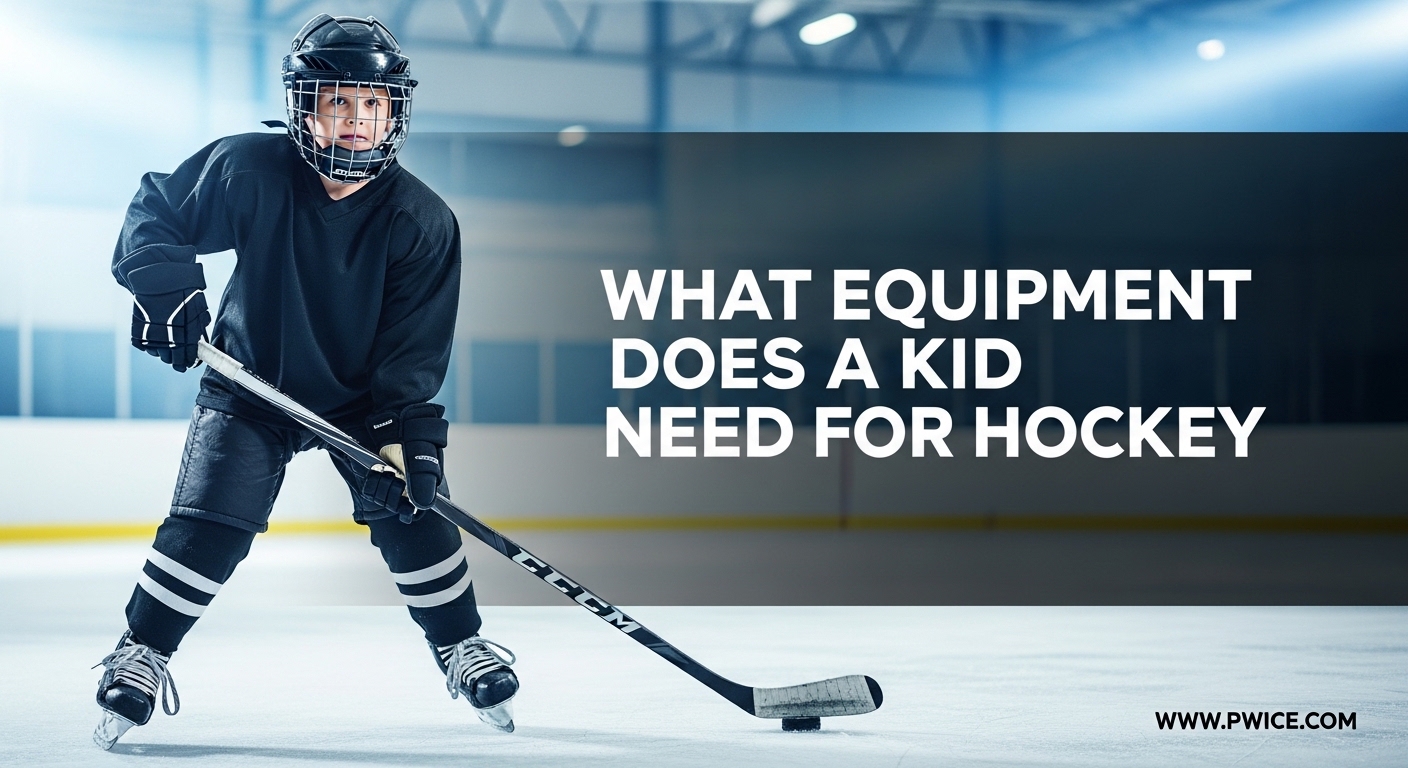
Walking into a hockey shop for the first time can feel overwhelming. I remember standing there surrounded by walls of pads, helmets, and sticks, wondering what equipment does a kid need for hockey and where to even start. If you are a parent facing the same confusion, you are not alone.
According to USA Hockey rules, youth players need 11 essential pieces of protective gear before stepping onto the ice. This guide breaks down every item your child needs, explains what each piece protects, and shares real cost expectations from my experience outfitting young players. By the end, you will have a complete hockey equipment checklist and know exactly how to get your kid ready for their first practice.
Whether your child is joining a Learn to Play program, signing up for their first house league season, or just curious about what hockey gear for kids looks like, this guide covers everything from helmets to hockey bags. Let us get started.
Table of Contents
What Equipment Does a Kid Need for Hockey: Quick Reference Checklist
Here is the complete list of required youth hockey equipment in the order your child will put it on:
- Helmet with full cage or mask – HECC certified for head and face protection
- Mouthguard – Protects teeth and reduces concussion risk
- Neck guard – Required by most leagues for throat protection
- Shoulder pads – Protects chest, shoulders, and upper back
- Elbow pads – Shields elbows and forearms from impacts
- Gloves – Protects hands while allowing stick control
- Hockey pants (breezers) – Padded protection for hips and thighs
- Athletic supporter (jock for boys, jill for girls) – Groin protection with cup
- Shin guards – Protects knees and shins from pucks and sticks
- Hockey skates – Properly fitted for ice mobility
- Hockey stick – Correct length and flex for your child’s size
Your child will also need a team jersey and hockey socks for practices and games, plus an equipment bag to carry everything. Let us break down each item in detail.
Required Youth Hockey Equipment: Head-to-Toe Breakdown
Understanding what each piece of hockey protective equipment does helps you make informed decisions when buying. Here is what every item protects and what to look for when shopping.
Helmet and Face Protection
The helmet is the most critical piece of youth hockey gear your child will wear. Look for a HECC certified helmet with an attached full-face cage or mask. HECC certification means the helmet meets safety standards set by the Hockey Equipment Certification Council.
Youth helmets come with adjustable sizing features to accommodate growth. The helmet should fit snugly without wobbling, sitting about one finger-width above the eyebrows. Never buy a helmet too large hoping your child will grow into it – a loose helmet does not protect properly.
For face protection, youth leagues require full cages, not visors. Cages protect the entire face from pucks, sticks, and collisions. Check that the cage attaches securely to the helmet and does not obstruct vision.
Neck Guard
Neck guards have become required equipment in most youth hockey leagues over the past decade. This padded collar protects the throat and neck from skate blades, puck impacts, and stick contact.
Modern neck guards are lightweight and comfortable, made from cut-resistant materials like Kevlar. Some integrate into shoulder pads, while others are separate pieces. Make sure the neck guard covers the entire throat area without restricting head movement.
Mouthguard
A mouthguard protects your child’s teeth and helps reduce concussion risk by absorbing impact forces. Most youth leagues require mouthguards for all players.
Boil-and-bite mouthguards from sporting goods stores cost $10-20 and work well for most kids. These soften in hot water, then mold to your child’s teeth when they bite down. Custom mouthguards from dentists cost $100-300 but offer the best fit and protection.
For first-time players, start with a store-bought mouthguard. Replace it when it shows wear or your child complains about fit.
Shoulder Pads
Shoulder pads protect the chest, shoulders, upper back, and sometimes the upper arms. They absorb impacts from body checks, falls, and puck contact.
For youth players, look for lightweight shoulder pads that offer good mobility. The pads should cover the shoulders completely and extend to just above the elbow on the arms. The chest plate should protect the sternum without restricting breathing.
Proper fit means the shoulder caps sit directly on the shoulder joint, not sliding down the arm or riding up toward the neck. Most youth shoulder pads have adjustable straps for a secure fit.
Elbow Pads
Elbow pads protect the elbow joint and the forearm area from impacts and falls on the ice. They are essential because kids fall frequently while learning to skate.
Good elbow pads cover from just below the shoulder pad down to the top of the glove. They should fit snugly without cutting off circulation. Look for pads with adjustable straps that keep them in place during play.
The elbow cup should center directly over the elbow joint when your child’s arm is slightly bent. Pads that slide down expose the elbow to injury.
Gloves
Hockey gloves protect the hands and fingers while allowing the grip and mobility needed to handle a stick. They feature padded backs and reinforced palms.
Youth gloves come in various sizes measured in inches. To check fit, have your child grip a stick while wearing the gloves. The fingertips should reach near the end of the glove fingers without being cramped. The glove cuff should overlap slightly with the elbow pad.
Look for gloves with good ventilation to reduce sweating and odor. Adjustable wrist straps help keep gloves secure during play.
Hockey Pants (Breezers)
Hockey pants, also called breezers, are heavily padded pants that protect the hips, thighs, and tailbone. They are essentially the lower body equivalent of shoulder pads.
The pants should fit snugly around the waist without sagging. Most have internal belts or suspenders to keep them up. The padding should cover the hips completely and extend down to the top of the knee.
Many parents prefer pants with velcro tabs for hockey socks rather than the traditional garter belt system. This keeps everything more secure and easier for kids to manage.
Jock (Boys) or Jill (Girls)
The athletic supporter, commonly called a jock for boys and jill for girls, provides essential groin protection. This piece includes a hard protective cup held in place by shorts or a support system.
Most youth hockey players today use velcro jock shorts or jill shorts. These are compression-style shorts with built-in cup pockets and velcro tabs to hold up hockey socks. They are far easier for kids to put on than traditional garter belts.
Make sure the cup fits properly in the pocket and stays in place during movement. This is one area where you should prioritize proper fit over buying bigger sizes for growth.
Shin Guards
Shin guards protect the knees and shins from puck impacts, stick contact, and falls on the ice. They are essential protective gear for all players regardless of position or skill level.
Shin guards should fit from the center of the kneecap down to the top of the skate tongue. The knee cup should center directly over the kneecap when your child stands. Straps or velcro keep the guards in place during play.
Many shin guards now come with removable liners you can wash. Look for guards with good knee padding since kids often fall on their knees when learning to skate.
Skates
Hockey skates enable movement on ice and require the most precise fit of any equipment. Poorly fitted skates cause blisters, foot pain, and can actually hinder your child’s ability to learn skating.
Skate sizes typically run 1-1.5 sizes smaller than regular shoe sizes. The skate should fit snugly with toes barely touching the front when standing. When your child bends their knees in a skating stance, the heel should lock back and toes should pull slightly from the front.
I strongly recommend having skates professionally fitted at a hockey shop, especially for first-time players. Many shops offer heat molding, which uses heat to soften the boot and shape it to your child’s foot. This dramatically improves comfort and performance.
Hockey Stick
The hockey stick is your child’s primary tool for handling the puck, passing, and shooting. Stick selection involves three main factors: length, flex, and handedness.
For length, the stick should reach between your child’s chin and nose when standing in skates. For flex, youth sticks typically range from 20-40 flex. Lighter, younger players need lower flex numbers. For handedness, have your child hold a stick both ways – whichever feels more natural is correct.
You will also need hockey tape for the stick blade and knob. White or black cloth tape on the blade improves puck control. Tape on the knob at the top improves grip. Plan on taping the stick every few weeks during the season.
What to Wear Under Hockey Equipment In 2026?
One of the most common questions parents ask is what hockey players wear under their gear. The answer depends on personal preference, but here are the standard base layer options.
Start with a moisture-wicking base layer shirt and shorts or compression pants. Avoid cotton, which holds sweat and gets cold on the ice. Synthetic materials or merino wool work best for keeping your child warm and dry.
Many kids wear long-sleeve compression shirts and long compression pants under their equipment. These provide warmth, reduce chafing, and make putting on equipment smoother. Some brands even sell hockey-specific base layers with cut-resistant materials.
Over the base layer goes the jock or jill shorts with cup. Then shoulder pads, elbow pads, and pants go on over that. This layering system keeps your child comfortable and protected throughout practice or games.
Hockey Jersey and Socks
Team jerseys and hockey socks complete the uniform. Most associations provide game jerseys, but you may need to purchase practice jerseys separately.
Hockey socks are knee-high knitted socks that cover the shin guards. They attach to the jock or jill shorts using velcro tabs. Some parents use clear hockey tape wrapped around the socks and shin guards for extra security – this is a common trick to keep socks up during play.
Practice jerseys should be a different color from the game jersey so coaches can easily divide players for drills. Many teams use reversible jerseys that are one color on each side.
Equipment Bag and Accessories
With all this gear, you will need a way to transport it. Hockey equipment bags come in two main styles: wheeled bags and carry bags.
Wheeled bags work best for younger players who cannot easily carry heavy loads. The wheels let kids roll their gear to the rink. Carry bags are preferred by older players who have developed the strength to shoulder the weight.
Additional accessories you will need include skate guards (plastic covers that protect skate blades when walking off ice), a water bottle, extra hockey tape, stick wax, and a small towel for drying skates after use.
Some parents also pack a small sewing kit for emergency repairs, spare laces, and equipment deodorizer spray. A hanging equipment dryer that fits in the bag helps keep gear fresh between uses.
Cost Breakdown and Budget Planning
Let us talk about the numbers. Hockey equipment costs vary widely depending on whether you buy new or used gear. Here is what you can expect to spend.
New Equipment Costs
A complete set of new youth hockey equipment typically costs between $300 and $700. Breaking it down by item: expect $80-150 for skates, $60-100 for a helmet with cage, $40-80 for shoulder pads, $25-50 for elbow pads, $30-60 for gloves, $40-70 for hockey pants, $30-50 for shin guards, $20-40 for a jock or jill, $30-60 for a stick, and $15-30 for a neck guard and mouthguard combined.
Add another $40-80 for an equipment bag and accessories. The total puts you in that $300-700 range depending on brands and quality levels.
Used Equipment Options
Buying used equipment can cut your costs to $50-200 for a full set. Play It Again Sports stores, Facebook Marketplace, and SidelineSwap are popular sources for used hockey gear. Many hockey associations also hold equipment swaps at the start of each season.
The only items I recommend buying new are skates and helmets. Skates mold to a child’s foot over time, and used pairs may have formed to someone else’s foot shape. Helmets should be new because you cannot verify their impact history – a helmet that took a big hit may look fine but offer reduced protection.
Money-Saving Tips
Starter kits bundle all essential equipment at a discount compared to buying individually. These kits typically include everything except skates, sticks, and bags. Brands like Winnwell and CCM offer complete youth starter packages.
End-of-season sales in March and April offer 30-50% off as retailers clear inventory. Buy gear a size up during these sales for the following season. Hand-me-downs from older siblings or team families also work great for most equipment.
Equipment Maintenance and Care
Proper equipment maintenance extends the life of your investment and keeps your child healthy. Wet hockey gear breeds bacteria and smells terrible if not cared for properly.
After every practice or game, remove all gear from the bag and hang it to dry. Use a dedicated equipment drying rack or hang items over chairs and shower rods. Never leave gear zipped in a bag overnight – this is how odors start and bacteria grows.
Once a month, wipe down hard surfaces like helmets and shin guards with disinfectant wipes. Machine wash fabric items like jerseys, socks, and base layers after every use. Some shin guards and gloves have removable liners you can wash separately.
Skates need special attention. Always dry the blades thoroughly after skating to prevent rust. Use skate guards when walking off ice, but remove them before storing skates in the bag. Check blade sharpness every few weeks – dull blades make skating harder.
Inspect equipment monthly for damage. Look for cracked helmet shells, torn straps, compressed padding, or loose stitching. Replace damaged items immediately – worn equipment does not protect properly. Most gear lasts 1-2 seasons depending on how fast your child grows.
How to Dress Your Child for Hockey?
Putting on all this equipment in the right order matters. Here is the step-by-step dressing routine used by hockey families everywhere.
- Start with base layers: put on the moisture-wicking shirt and shorts or compression pants
- Put on the jock or jill shorts with protective cup
- Pull on hockey socks and attach them to the velcro on the jock/jill shorts
- Put on shin guards over the socks and secure the straps
- Slide on hockey pants and fasten the belt or suspenders
- Put on shoulder pads over the base layer shirt
- Slide on elbow pads, making sure they overlap with the shoulder pad sleeves
- Put on the practice or game jersey over the shoulder pads
- Lace up skates and add skate guards for walking
- Put on the neck guard
- Insert mouthguard
- Put on the helmet with cage and fasten all straps
- Put on gloves last so your child can handle the stick
At the rink, most kids dress in their base layers and jock/jill at home. They carry the rest in their bag and put it on at the arena. This prevents overheating in warm car rides.
Sizing and Fitting Tips
Getting the right size equipment prevents injuries and keeps your child comfortable. Here are key fitting guidelines.
Measure your child’s height, weight, and any brand-specific measurements before shopping. Most manufacturers provide sizing charts that correlate measurements to equipment sizes. When between sizes, choose the smaller size for better protection.
For first-time buyers, visit a hockey pro shop for professional fitting. Staff can measure your child and suggest appropriate sizes across brands. They can also explain differences between equipment models and price points.
Look for adjustable features like Velcro straps, extension panels, and removable padding. These let equipment accommodate some growth without compromising protection. However, do not buy equipment too large thinking your child will grow into it – oversized gear shifts during play and leaves gaps in protection.
Equipment Rental Programs
Many families start with equipment rental programs to test whether their child enjoys hockey before investing in a full set. This is a smart approach for young first-time players.
USA Hockey’s Try Hockey For Free and NHL Learn to Play programs provide free or low-cost equipment rental for participants. Local hockey associations often rent equipment to new players for their first season at rates around $50-100.
Rental equipment typically includes everything except skates and mouthguards. Some programs include skates too. After the season or program ends, you return the gear. If your child wants to continue, you then purchase their own equipment with full knowledge of what they need.
Rental makes particular sense for very young players who will outgrow gear quickly. It also lets your child try the sport before you commit hundreds of dollars to equipment.
Frequently Asked Questions
What equipment do kids need for hockey?
According to USA Hockey rules, youth players need 11 essential pieces: helmet with cage, neck guard, mouthguard, shoulder pads, elbow pads, gloves, hockey pants, athletic supporter with cup, shin guards, skates, and a hockey stick. Players also need a team jersey, hockey socks, and an equipment bag.
What is the 3-2-1 rule in hockey?
The 3-2-1 rule is a coaching guideline for equal ice time in youth hockey. It means players should have the puck on their stick for 3 seconds, pass within 2 seconds, and recover the puck within 1 second of losing it. This rule encourages quick decision-making and puck movement.
What equipment is necessary for hockey?
Necessary hockey equipment includes protective gear for head-to-toe coverage: HECC certified helmet with cage, neck guard, mouthguard, shoulder pads, elbow pads, gloves, hockey pants or breezers, shin guards, athletic supporter, skates, and stick. These items are required by USA Hockey for all youth league play.
How much does hockey equipment cost for a child?
A complete set of new youth hockey equipment costs $300-700. Buying used equipment reduces this to $50-200. Skates and helmets should always be purchased new for proper fit and safety. Starter kits offer bundled discounts compared to buying items individually.
Should I buy new or used hockey equipment?
Buy skates and helmets new for proper fit and safety verification. Protective pads, pants, gloves, and sticks can be purchased used to save money. Used equipment from Play It Again Sports, Facebook Marketplace, or equipment swaps cuts costs by 50-70%.
What do hockey players wear under their gear?
Hockey players wear moisture-wicking base layers under their equipment – synthetic or merino wool shirts and shorts that keep them dry and warm. Avoid cotton which holds sweat. Over base layers go the jock or jill shorts, then protective equipment layers.
Conclusion: Getting Your Child Ready for Hockey
Understanding what equipment does a kid need for hockey removes the intimidation factor for parents new to the sport. With this complete hockey equipment checklist in hand, you can confidently outfit your child from head to toe.
Remember that you do not need to buy everything at once or buy everything new. Start with rental programs to test the waters, prioritize proper fit over brand names, and focus on safety-certified gear for the helmet and skates. The hockey community welcomes new families, and experienced parents are always happy to share advice.
Your child is about to discover one of the most exciting sports in the world. With the right equipment and your support, they will be gliding across the ice and chasing pucks in no time. I hope this guide helps you feel prepared for the journey ahead. See you at the rink.