I spent my first three seasons in adult league hockey fumbling pucks in the neutral zone while players with silky hands skated circles around me. My breakthrough came when I committed to 15 minutes of daily off-ice stickhandling practice in my garage. Within two months, I went from losing pucks under pressure to confidently carrying through traffic.
Learning how to improve stickhandling at home is the fastest way to transform your game without expensive ice time. NHL stars like Patrick Kane and Connor McDavid built their legendary puck control through countless hours of dryland training away from the rink. You do not need a professional setup or fancy equipment to see real improvement.
This guide gives you everything I have learned from testing dozens of drills and interviewing skills coaches. We will cover equipment that costs next to nothing, drills that work in tiny apartments, and the common mistakes that sabotage most players. Whether you are a beginner parent looking to help your child or an adult rec league player wanting more confidence, you will find a clear path forward.
Table of Contents
How to Get Better at Stick Handling at Home In 2026?
Start improving today with these seven foundational steps. This quick-start roadmap targets the exact PAA question players search most.
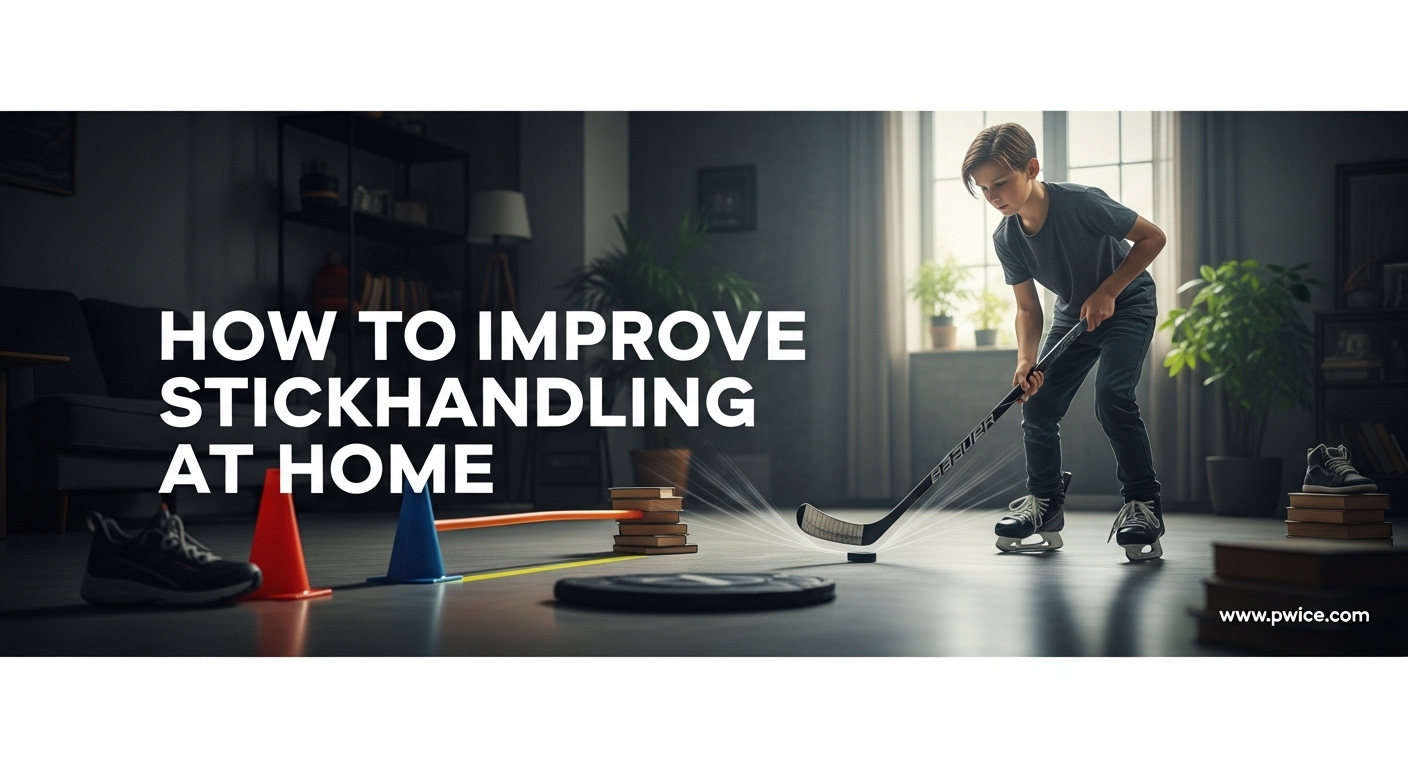
Step 1: Gather minimal equipment. You need only a hockey stick and a ball or puck substitute. A golf ball works perfectly on carpet.
Step 2: Find a flat surface. Basement concrete, garage floors, or even smooth carpet work well for beginner drills.
Step 3: Master hand positioning. Your top hand controls the blade while your bottom hand slides for leverage. Keep your top hand firm but not white-knuckled.
Step 4: Start with stationary dribbles. Focus on cupping the ball with your blade using wrist rolls before adding movement.
Step 5: Practice with your head up. Place your phone or a puck at eye level and focus on it while stickhandling.
Step 6: Progress to lateral movement. Add side-to-side shuffles while maintaining puck control in your shooting box.
Step 7: Build a daily habit. Ten focused minutes every day beats an hour once per week for muscle memory development.
What You Need to Practice Stickhandling at Home
One of the biggest myths about off-ice stickhandling is that you need expensive training aids. The truth is that some of the most effective tools cost under five dollars or are already in your home.
The Essential Basics
Your hockey stick is obviously required. Any stick works for dryland training, though composite sticks transfer better to ice feel. I personally use an old wood stick for garage sessions to save my game stick from wear.
For the puck or ball, you have several budget-friendly options. A standard green biscuit slides beautifully on smooth concrete and simulates ice glide better than alternatives. Golf balls work surprisingly well on carpet and provide excellent feedback because they are unforgiving. Tennis balls offer a softer option for indoor practice when noise matters.
DIY Training Aids That Actually Work
Forum users consistently share brilliant DIY solutions that rival expensive store-bought aids. I have tested these myself and can confirm they work.
Use empty beer cans or plastic bottles as obstacles for weaving drills. Set up six in a line about two feet apart and practice figure-8 patterns through them. This builds the same pattern recognition as expensive cone sets.
Slide a piece of PVC pipe over your shaft to create a visual hand positioning guide. This simple trick from Reddit users helps beginners keep their hands properly spaced without constantly looking down. A twelve-inch section is perfect for most players.
Masking tape or painter’s tape creates instant drill boundaries on any surface. Mark a square shooting box, straight lines for side-to-side work, or circles for around-the-world patterns. Remove it when finished with no residue.
Surface Selection Guide
Your practice surface affects how the puck behaves. Smooth concrete or sealed garage floors offer the best glide for green biscuits and pucks. Rougher concrete works better with golf balls or stickhandling balls that have some weight.
Carpet provides excellent resistance training because it forces you to work harder to move the ball. This builds strength that transfers beautifully to ice. Tile or hardwood works well too, though pucks slide fast so start slow.
Beginner Stickhandling Drills
These five drills form the foundation of every great stickhandler’s skill set. Master them in order before moving to intermediate work.
Around the World
This drill builds comfort with blade positioning on all four sides of the ball. Start with the ball directly in front of you.
Move the ball to your forehand side using a smooth cupping motion. Continue circling around your backhand side, then across your body to the opposite forehand. Complete the circle by returning to center. Focus on smooth transitions without losing contact between blade and ball.
Perform ten clockwise rotations, then ten counter-clockwise. As you improve, shrink the circle diameter while maintaining control.
Quick Dribbles
Rapid small touches build the hand speed that separates good stickhandlers from great ones. Start with the ball slightly in front of your stance.
Use only your wrists to dribble the ball left and right in tiny movements. Your blade should barely leave the ball surface. Aim for three quick touches per second. Keep the ball moving only six inches in either direction.
Practice for thirty-second bursts. You will feel the burn in your forearms, which indicates you are building the specific muscles needed for quick hands.
Side to Side with Dribbles
This drill combines lateral movement with puck control, mimicking game situations where you carry through the neutral zone. Start at one end of your practice space.
Push the ball across your body with a forehand dribble. Let it travel about two feet, then pull it back with a backhand motion. Add a shuffle step in the direction of travel. Continue across your available space.
Focus on keeping the ball within your shoulder width at all times. This teaches puck protection positioning without needing defenders.
Figure 8s
The figure 8 pattern develops blade control through extended ranges of motion and transitions between forehand and backhand. Place two obstacles about two feet apart.
Start with the ball on your forehand side. Dribble through the gap between obstacles, circle around the far one, and return through the middle. Continue circling the opposite obstacle to complete the figure 8 pattern.
Keep your head up and use your peripheral vision to track the ball. This is the first drill where you should consciously practice looking forward rather than down.
Forehand-Backhand Transitions
Game situations constantly require switching from forehand to backhand control while maintaining speed and position. This drill isolates that skill.
Start stationary with the ball in your forehand shooting pocket. Push it across to your backhand side in one smooth motion. Cup it with your backhand, then pull it back to forehand. The motion should resemble a windshield wiper blade.
Start slowly focusing on clean blade contact. Speed up as you improve, but never sacrifice control for velocity.
Intermediate Drills to Level Up
Once the beginner drills feel comfortable, progress to these five intermediate patterns. They introduce deception elements and wider ranges of motion that translate directly to game situations.
Wide Stickhandling
NHL skills coach Max Ivanov emphasizes wide stickhandling as the difference between average and elite puck controllers. This drill dramatically expands your control range.
Set up obstacles or tape marks about four feet apart on each side of your body. Practice pushing the ball from your forehand side all the way across to your backhand extremity. The ball should travel outside your shoulder width.
The key is maintaining blade control at full extension without straightening your arms completely. This creates the wide, deceptive motions that fake out defenders.
5-Point Toe Drag Drill
The toe drag is essential for pulling pucks around defenders’ sticks. This five-point progression builds the skill systematically.
Point 1: Stationary toe drag in place. Pull the ball straight back using only your top hand wrist motion. Point 2: Add lateral movement, dragging while shuffling sideways. Point 3: Practice the drag while moving forward. Point 4: Combine forward motion with a cutback after the drag. Point 5: Add speed and vary the timing.
Each point should feel automatic before progressing. Rushing through this drill creates bad habits that are hard to break.
Backhand Toe Pulls
Backhand skills separate confident stickhandlers from one-sided players who always turn to their forehand under pressure. This drill builds backhand confidence.
Start with the ball on your backhand side. Use your top hand to roll your wrists and cup the puck, pulling it toward your back foot. Push it back out to the starting position. The motion is subtle and relies entirely on wrist action.
Practice this while stationary until you can perform twenty repetitions without looking down. Then add lateral movement.
Backhand Cutbacks
Cutbacks create space in tight situations and are a signature move of players like Patrick Kane. The drill combines backhand control with quick direction changes.
Move forward while stickhandling on your backhand side. Plant your outside foot and cut back sharply toward your backhand, pulling the puck with you. The key is synchronizing your foot plant with the puck pull.
Start at walking pace and gradually increase speed as coordination improves.
Narrow to Wide Stickhandling
This drill teaches you to expand your range of motion mid-sequence, a skill used constantly in games to avoid defenders.
Start with tight, narrow dribbles directly in front of your body. After five quick touches, explode into a wide push to your forehand side. Immediately return to narrow dribbles, then explode wide to your backhand.
The contrast between tight control and extended reach builds the hand speed and range that make elite players so difficult to defend.
5 Drills for Small Spaces (Apartment-Friendly)
Living in an apartment should never stop you from improving. These five drills require minimal space while delivering maximum skill development.
Vertical Figure 8s
Instead of spreading wide, work in a narrow channel moving forward and back. Set two obstacles about eighteen inches apart in a line away from you.
Figure 8 around these obstacles, moving the ball forward on one side and back on the other. This creates the same pattern recognition as standard figure 8s but fits in a hallway or small room.
Stationary Lateral Dribbles
Stand in place and practice rapid side-to-side dribbles without traveling. Focus on hand speed and quick transitions between forehand and backhand.
Use your phone timer for thirty-second intervals. Count how many clean transitions you complete and track improvement over time.
On-the-Spot Toe Drags
Practice toe drag technique without any lateral space requirement. Simply pull the ball back, push it forward, and repeat.
Vary the timing between pulls to simulate game unpredictability. Occasionally hold the ball stationary before exploding into motion.
Circle Patterns
Mark a small circle with tape about three feet in diameter. Practice circling the ball continuously around this boundary.
Change direction every ten rotations. Add a toe drag when transitioning directions to increase difficulty.
One-Handed Top Hand Drills
Remove your bottom hand entirely and practice controlling the ball using only your top hand. This isolates the wrist strength and blade control that powers all stickhandling.
Start with simple forehand-backhand transitions. Progress to dribbles and eventually figure 8s. When you return to two hands, control feels effortless.
Stickhandling with Conditioning Elements
Adding movement and cardio to your stickhandling sessions builds the stamina needed to maintain puck control when you are tired late in games.
McDavid Lateral Crossover Conditioning Drill
This viral drill from Connor McDavid’s off-ice training combines lateral movement with puck control and conditioning. It is challenging but incredibly effective.
Set up two lines about ten feet apart if you have space, or use a smaller distance for apartments. Start at one line in an athletic stance. Perform a lateral crossover step to the opposite line while maintaining stickhandling control. Immediately crossover back to the starting line. Continue for thirty seconds.
The crossover motion builds leg power while the stickhandling maintains puck focus under physical stress. Start slow and prioritize clean crossovers over speed.
Movement-Based Patterns
Incorporate shuffles, pivots, and direction changes into your standard drills. Instead of stationary quick dribbles, shuffle laterally while maintaining the rapid touches.
Add pivots to your figure 8 patterns, opening your hips as you circle obstacles. This teaches puck control through the full range of motion used in games.
Time yourself for five-minute continuous intervals. The goal is maintaining clean stickhandling while your heart rate elevates.
Why Is My Stick Handling So Bad? Common Mistakes to Fix
Most players struggle with stickhandling because of correctable technical errors rather than lack of talent. Here are the six mistakes I see repeatedly and how to fix them.
Mistake 1: Looking Down at the Puck
This is the number one error preventing game-transferable skills. On ice, you must see teammates, defenders, and passing lanes. If you practice looking down, that habit transfers to games.
Fix: Place a focal point at eye level. Use your phone propped up, a poster on the wall, or even a television. Force yourself to watch that point while stickhandling. Start with simple patterns and progress to complex drills only when you can maintain eye contact with your focal point.
Mistake 2: Wrong Hand Positioning
Beginners often choke up too high on the stick or hold it like a baseball bat. Both limit blade control and range of motion.
Fix: Your top hand should be about twelve to fourteen inches from the knob for adult players. Your bottom hand slides based on what you are doing, low for power, high for quick hands. The PVC pipe trick mentioned earlier helps lock in proper spacing.
Mistake 3: Stiff Wrists and Arms
Stickhandling lives in your wrists and forearms, not your shoulders. Stiff arms create choppy, robotic movements that defenders read easily.
Fix: Practice quick dribbles focusing entirely on loose, rolling wrists. Your arms should stay relatively still while your hands work. Film yourself from the side to check for excessive arm movement.
Mistake 4: Puck Too Far from Body
Reaching for pucks exposes them to defenders and limits your power options. Great stickhandlers keep pucks in their shooting box, between their feet and slightly forward.
Fix: Use tape to mark your shooting box on the floor. Practice keeping all stickhandling within those boundaries. When you extend wide, immediately return to the box.
Mistake 5: Rushing the Learning Process
Players try advanced dekes before mastering fundamentals, creating sloppy technique that breaks down under pressure.
Fix: Spend two weeks on nothing but beginner drills until they feel completely automatic. Only then progress to intermediate work. Skills built on solid foundations last; shortcuts create fragile abilities.
Mistake 6: Inconsistent Practice
One long session on weekends does not build muscle memory like short daily sessions. Spaced repetition is how skills become automatic.
Fix: Commit to ten minutes every single day. Set a phone reminder. The cumulative effect of daily practice far exceeds occasional marathon sessions.
Building Your Daily Stickhandling Routine (2026)
Consistency beats intensity for skill development. Here is how to structure a sustainable daily practice habit that delivers results.
How Often Should I Practice Stickhandling?
Ideally, practice stickhandling every single day you are not on the ice. For players with ice time twice weekly, that means five off-ice sessions. For players without regular ice access, daily practice becomes even more critical.
If daily commitment is impossible, aim for at least four sessions per week. The key is never going more than two days without touching a stick and ball. Muscle memory degrades quickly with extended gaps.
How Long Should Stickhandling Practice Be?
Ten to twenty minutes of focused practice delivers optimal results. Beyond twenty minutes, mental fatigue reduces quality and increases error rates. You are better off with two focused ten-minute sessions than one scattered thirty-minute session.
For beginners, start with ten minutes. As drills become more complex and you add conditioning elements, extend toward twenty minutes. Never practice beyond the point where you can maintain proper technique.
Sample Daily Structure
Begin with two minutes of simple warm-up dribbles to get your hands loose. Progress through three to four drills appropriate for your skill level, spending three to four minutes on each. Finish with two minutes of free-form stickhandling where you mix patterns creatively.
Track which drills you complete each day in a simple phone note. This accountability helps maintain consistency and lets you see progress over weeks.
Progressive Difficulty Approach
Week one should be entirely beginner drills. Week two adds one intermediate drill while keeping three beginner patterns. Week three transitions to mostly intermediate work with one advanced element if available.
Only advance difficulty levels when current drills feel completely automatic. Rushing creates sloppy habits. Patience now pays dividends later.
Pro Tips for Faster Improvement
These additional insights from skills coaches and experienced players accelerate your progress beyond standard drill work.
Top Hand Control Secrets
Your top hand does eighty percent of the work in stickhandling. Focus your attention there rather than worrying equally about both hands. The top hand controls blade angle, cupping motion, and directional changes.
Practice drills occasionally with only your top hand to isolate and strengthen this control. When you return to two-handed stickhandling, you will feel the improved precision immediately.
Using Music and Rhythm
Practicing with music makes sessions more enjoyable and adds rhythm to your movements. Try matching your dribble rate to song tempo. This builds the unconscious timing that helps in games.
Create a playlist of songs with beats that match different drill speeds. Fast songs for quick dribbles, slower grooves for wide stickhandling patterns.
Parent-Child Practice Ideas
Parents can practice alongside children, turning stickhandling into quality time. Mirror drills work well, where parent and child face each other and mirror movements. This builds connection while developing skills.
Simple passing games using tennis balls work in living rooms. Toss the ball, your child stickhandles once, then tosses back. Keep the focus fun rather than technical with young players.
Integrating with Shooting Practice
Combine stickhandling with shooting for efficient use of limited time. After every stickhandling drill, fire three quick shots at a target or net. This teaches transferring from control to release under game-like timing.
Set up a shooting pad in your garage or driveway if possible. Even stickhandling balls can be shot at targets to practice accuracy after control sequences.
Video Demonstrations
Visual learners benefit enormously from watching drills performed correctly. These two video resources complement the written instructions above.
The video titled “20 STICKHANDLING DRILLS YOU CAN DO AT HOME” demonstrates every drill mentioned in this guide with clear visual breakdowns. Watch it after reading the instructions to see proper form in action. The demonstrations work without any special equipment, perfect for immediate implementation.
For routine building, the “5 Minute DAILY Stickhandling Routine” video provides a follow-along format. Complete this routine alongside the video to internalize proper pacing and sequencing. The short time commitment makes it approachable even on busy days.
Frequently Asked Questions
How to get better at stick handling at home?
Start with seven steps: gather minimal equipment like a stick and golf ball, find a flat surface, master hand positioning with your top hand controlling the blade, practice stationary dribbles focusing on wrist rolls, train with your head up using a focal point, add lateral shuffles while maintaining control, and build a daily 10-minute practice habit for muscle memory development.
Why is my stick handling so bad?
Common mistakes include looking down at the puck instead of forward, wrong hand positioning choking up too high, stiff wrists and arms instead of loose rolling motions, keeping the puck too far from your body, rushing to advanced drills before mastering basics, and inconsistent practice schedules. Correct these fundamentals for immediate improvement.
How to practice stick handling at home hockey?
You need only a hockey stick and ball substitute like a golf ball or green biscuit. Find any flat surface such as garage concrete, basement floors, or carpet. Start with stationary dribbles in your shooting box between your feet, progress to lateral movements, and incorporate daily 10-20 minute sessions for consistent skill building.
How often should I practice stickhandling?
Practice stickhandling every day you are not on the ice, ideally 5-7 sessions per week. Ten to twenty minutes of focused daily practice builds muscle memory faster than occasional long sessions. Never go more than two days without practice to maintain skill retention and continuous improvement.
Can I practice stickhandling without ice?
Absolutely. Off-ice stickhandling practice is essential for skill development and used by NHL players regularly. Dryland training on concrete, carpet, or any flat surface builds hand speed, puck control, and muscle memory that transfers directly to ice performance. Many players develop elite stickhandling entirely through home practice.
How long should stickhandling practice be?
Ten to twenty minutes of focused practice delivers optimal results. Beyond twenty minutes, mental fatigue reduces technique quality. Beginners should start with ten minutes daily. Quality matters more than duration, so end sessions while you can still maintain proper form rather than practicing sloppy movements when tired.
What equipment do I need for stickhandling at home?
Minimal equipment required: a hockey stick and ball substitute. Golf balls work excellently on carpet, tennis balls for quiet indoor practice, or a green biscuit for smooth surfaces. DIY options include beer cans as obstacles, PVC pipe for hand positioning guides, and masking tape for marking drill boundaries.
Can I practice stickhandling in an apartment?
Yes, many drills work in small spaces. Focus on vertical figure 8s in narrow channels, stationary lateral dribbles, on-the-spot toe drags, small circle patterns, and one-handed top hand drills. These develop excellent skills without requiring large areas. Tennis balls keep noise reasonable for neighbors.
Conclusion
Learning how to improve stickhandling at home is the most accessible path to transforming your hockey performance. You do not need expensive equipment, massive spaces, or professional coaching to develop elite puck control. A stick, a golf ball, and ten minutes of daily commitment will take you further than you imagine.
Start with the beginner drills and resist the urge to rush. Master the fundamentals of hand positioning, wrist rolls, and head-up control. Progress through the intermediate drills only when the basics feel automatic. Use the small-space variations if you are an apartment dweller.
Remember that NHL stars built their legendary skills through exactly this type of dedicated off-ice practice. Patrick Kane did not become a stickhandling wizard overnight. He put in thousands of hours with a ball and stick in his basement. Your journey starts with today’s ten-minute session.
Grab your stick, pick a drill from this guide, and start building the puck control that will change your game.